2024-11-27
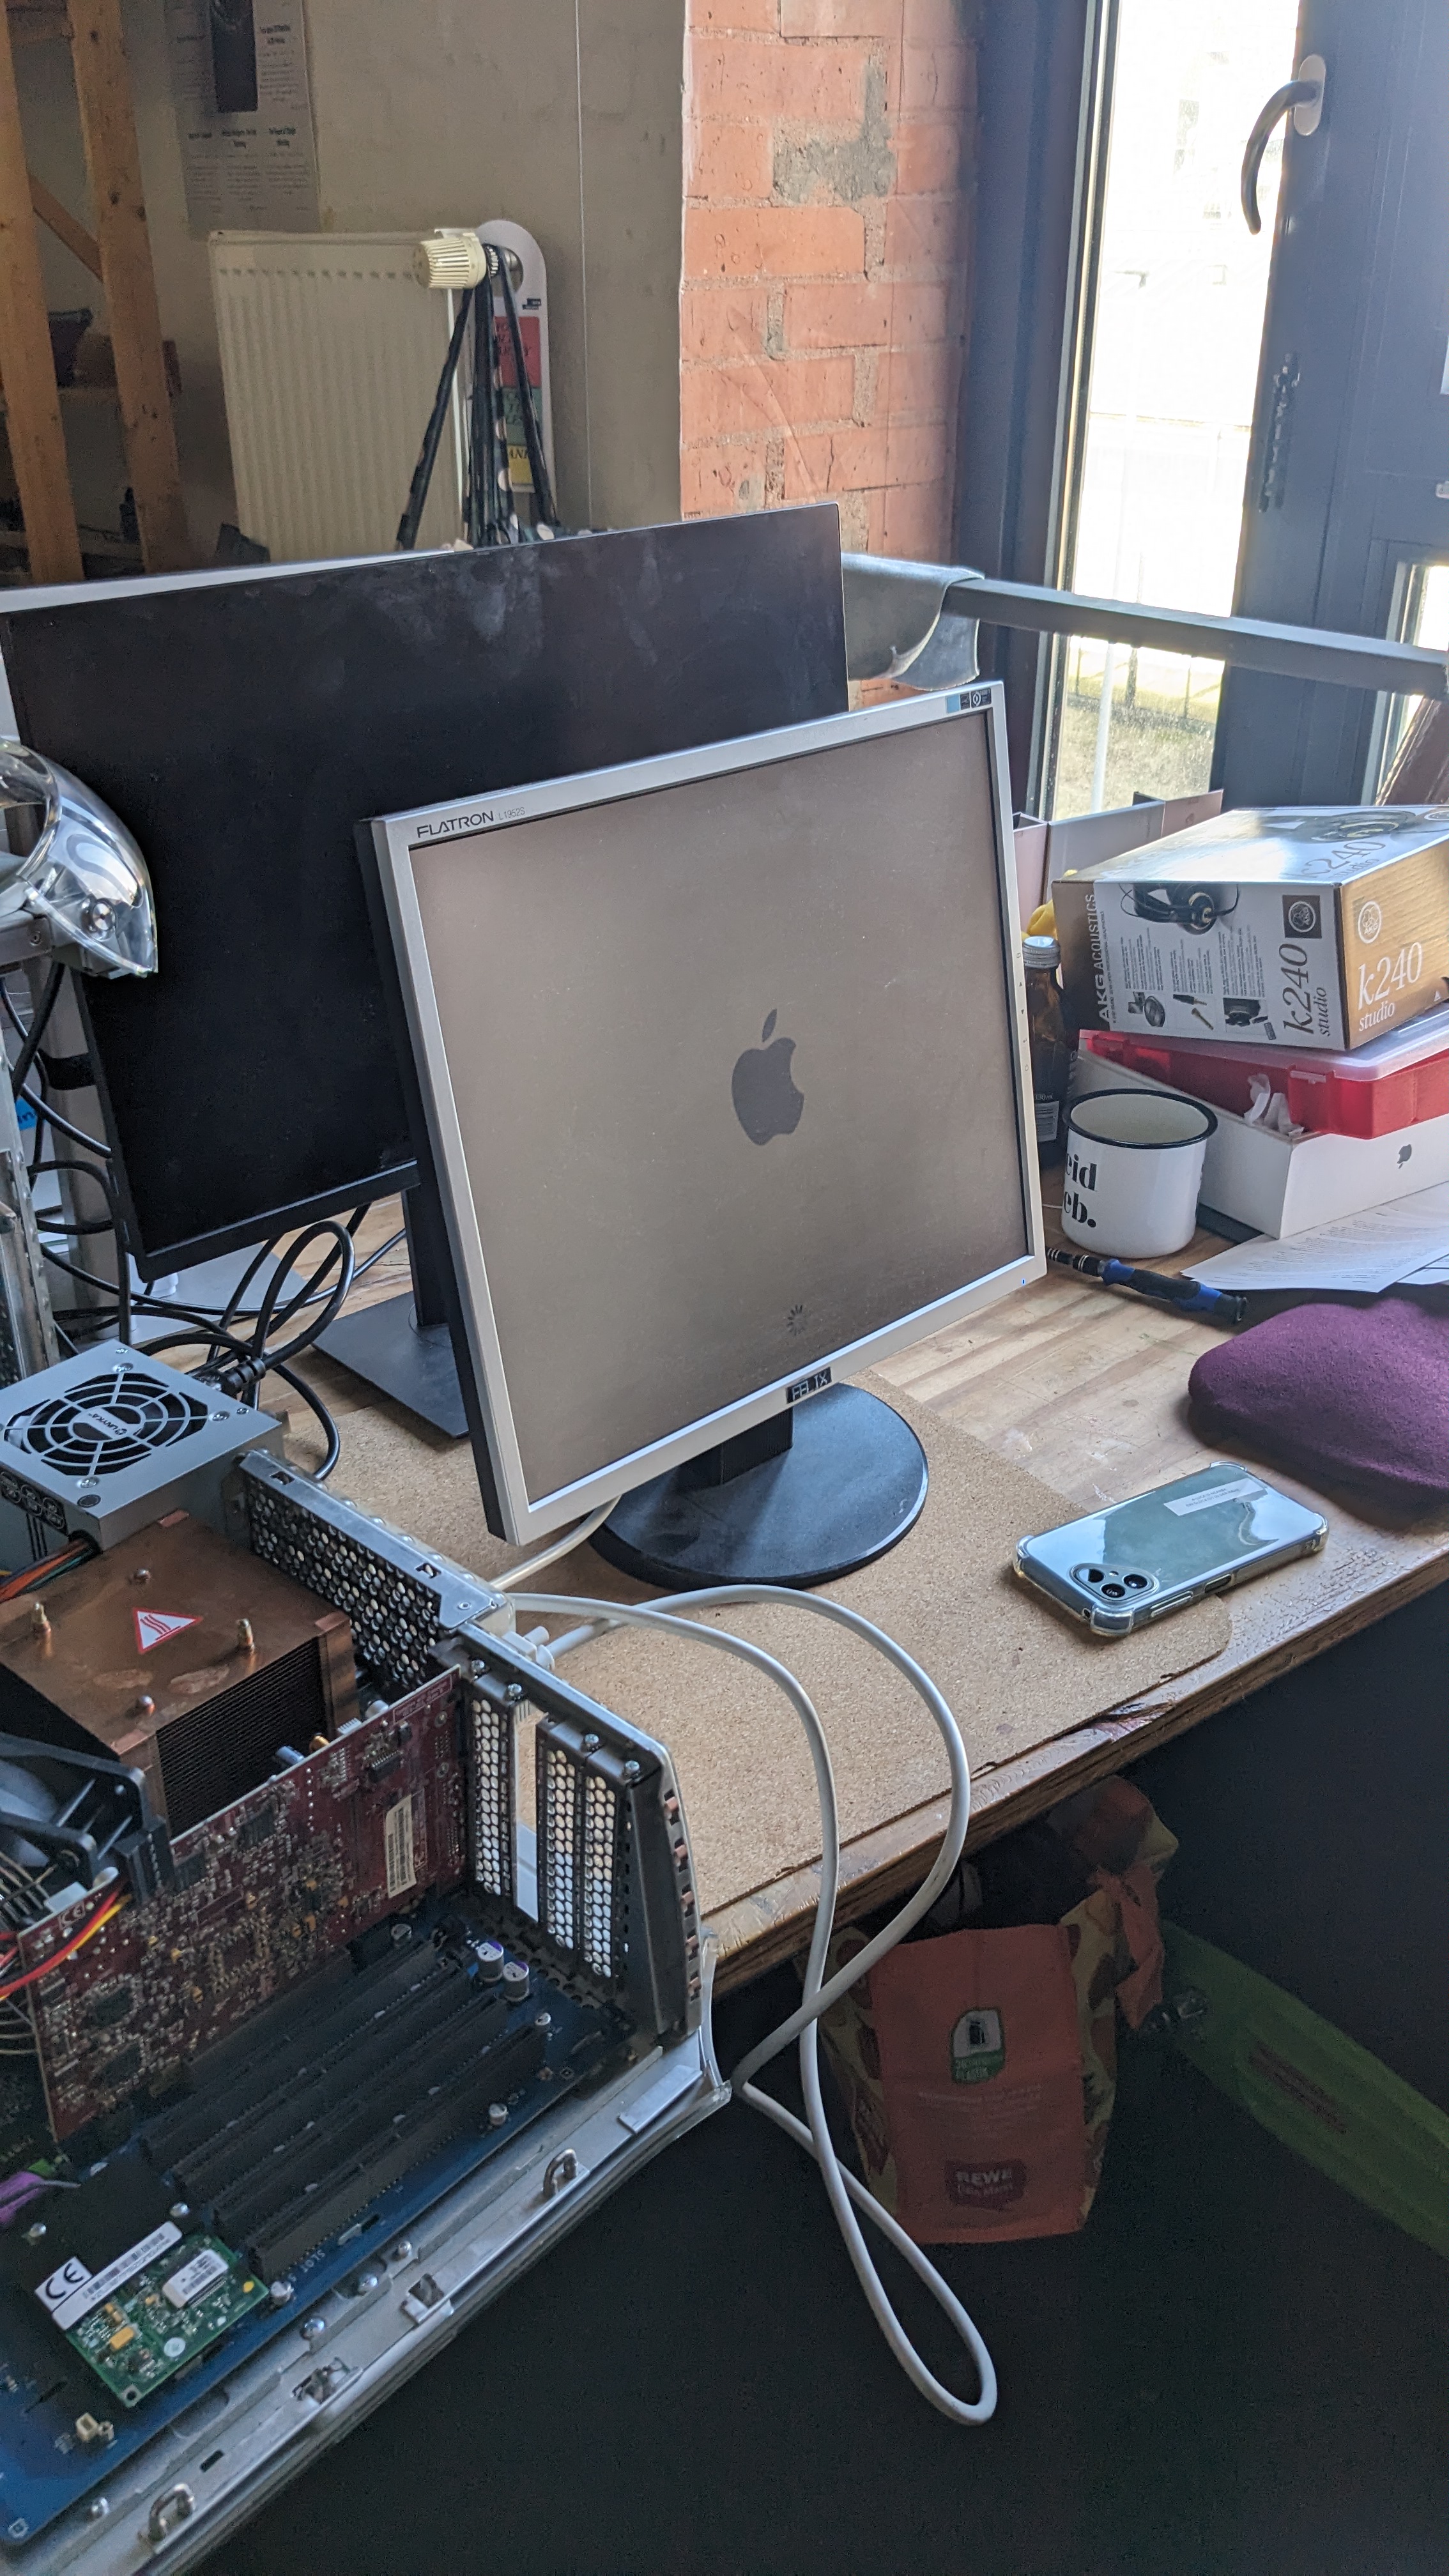
Found three PCs in the Elektromüll (electronical trash) at HfK Bremen. I found a HP Pavilion ze4300, a Dell Optiplex 745 and a Hyrican PC PCK02282. You can read more about them in the [[ssw_device-list|device list]].
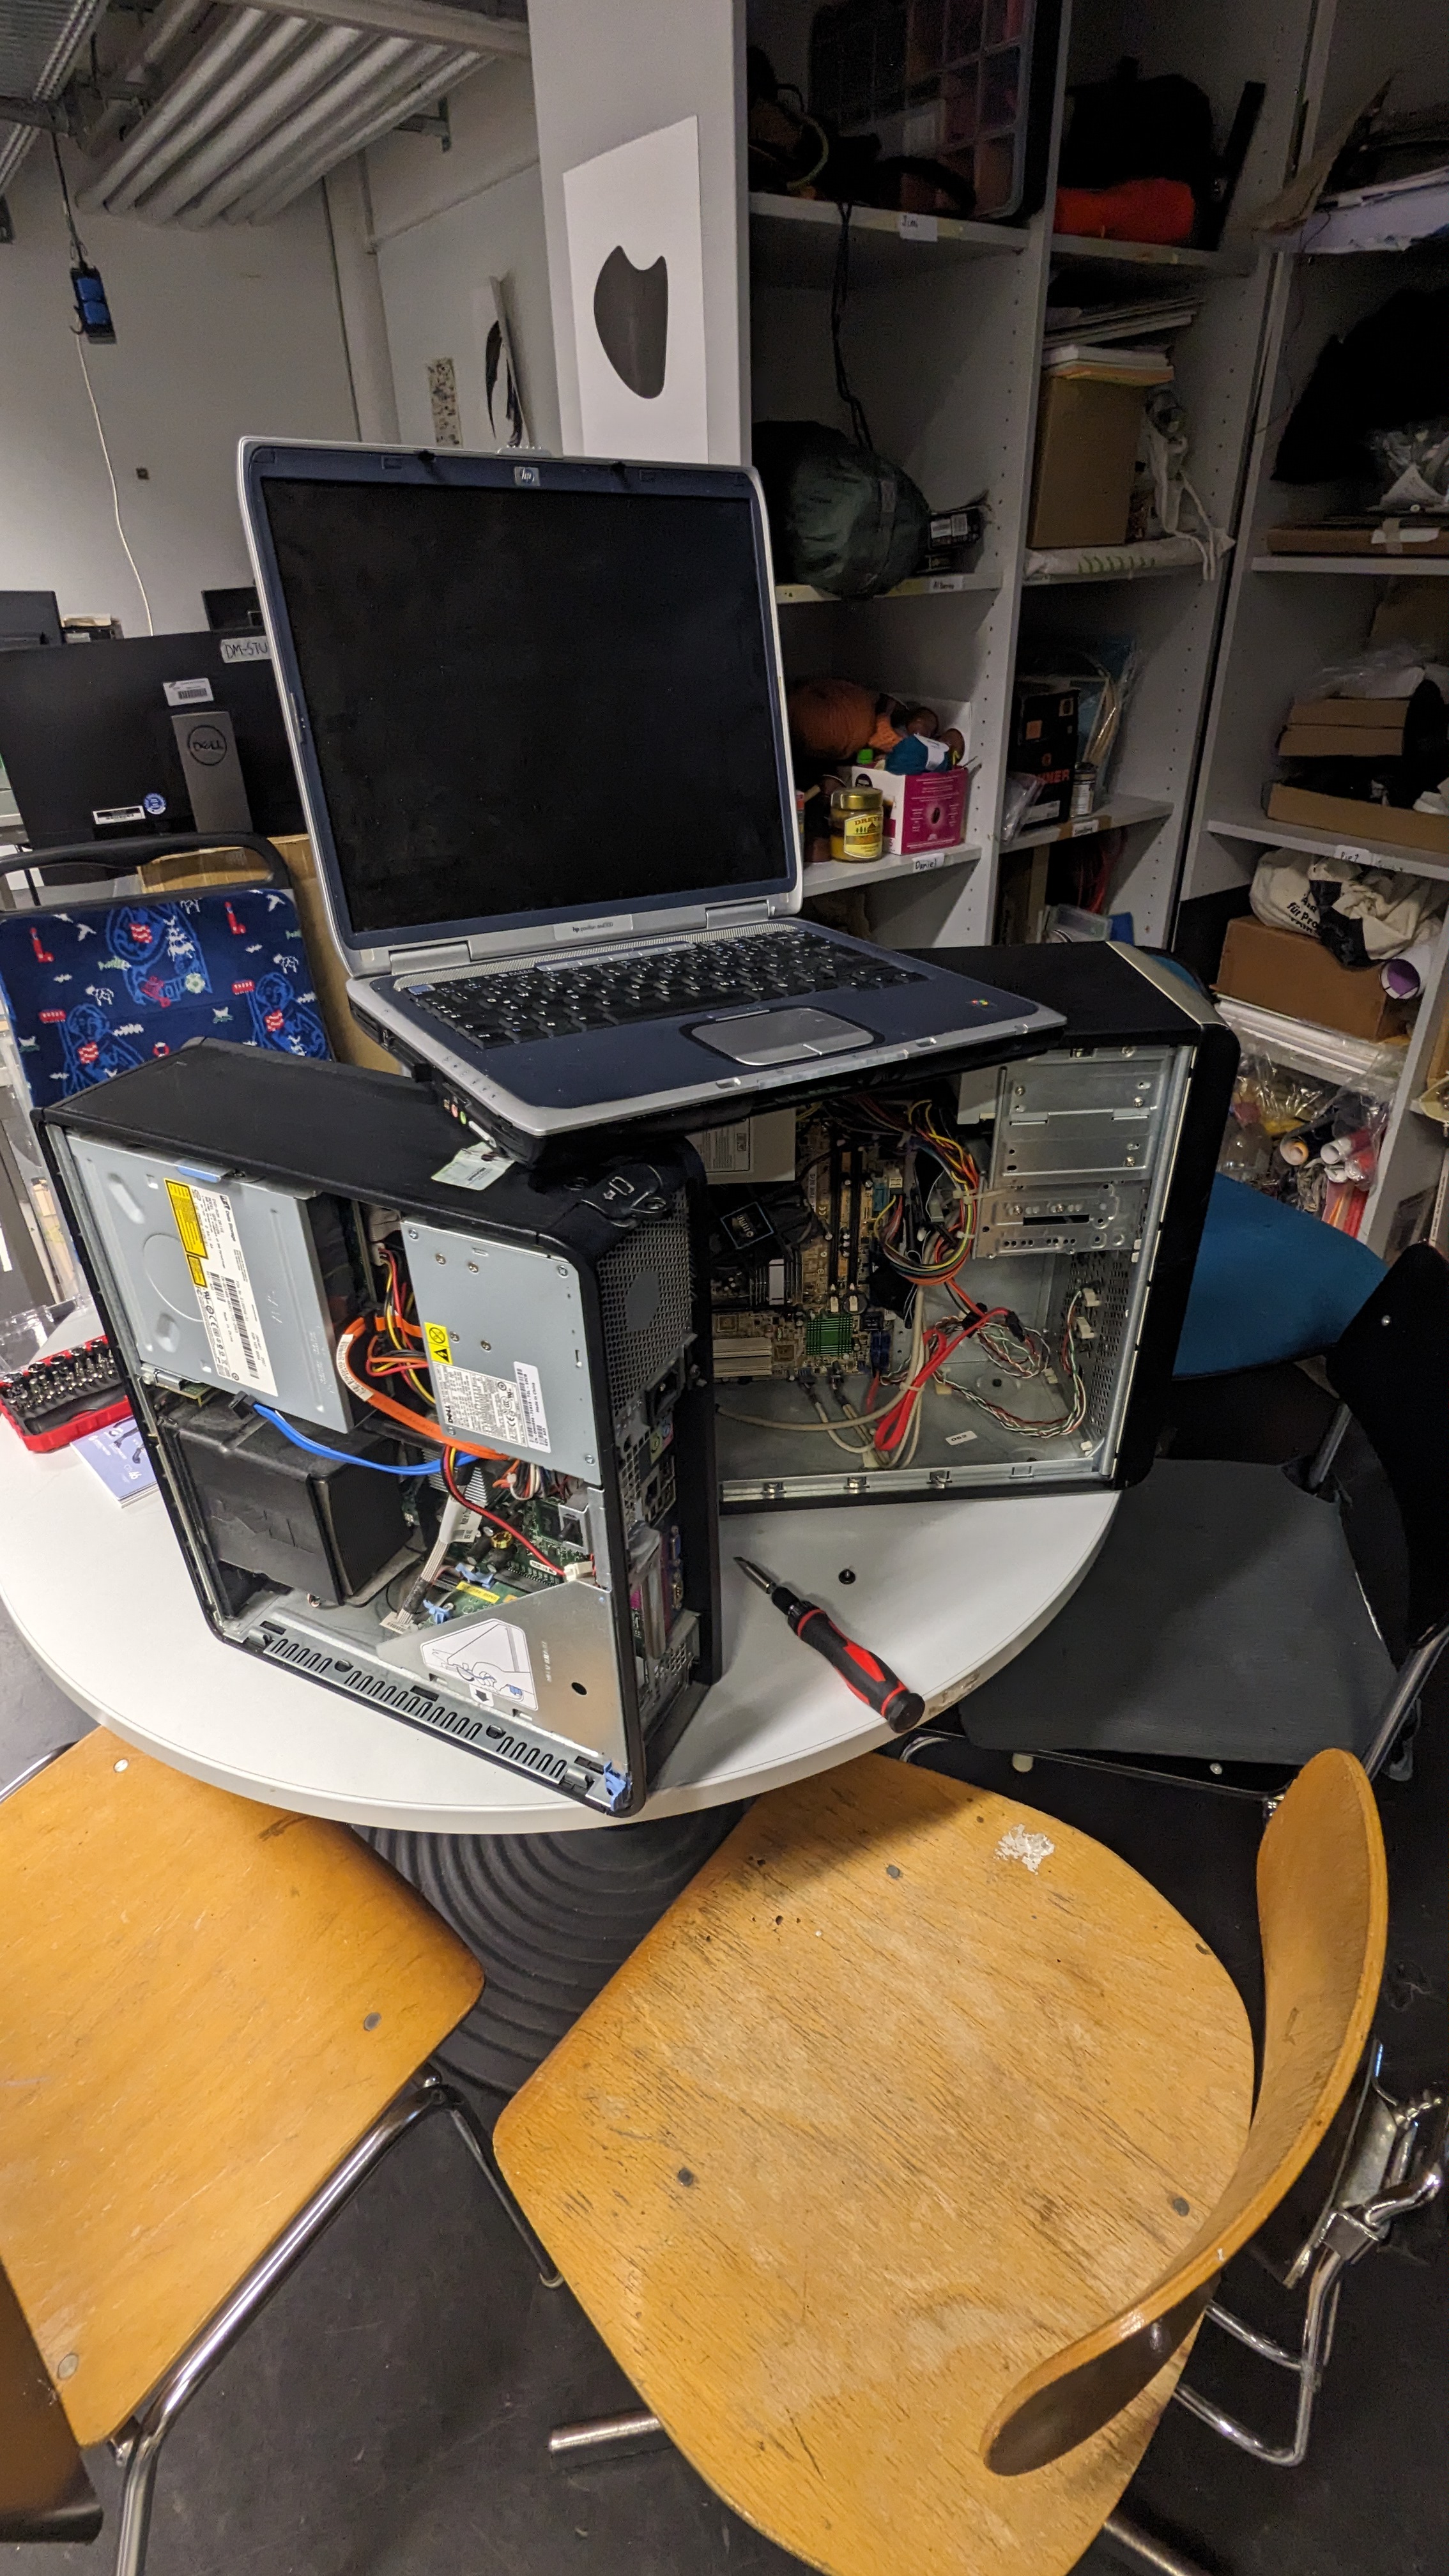
I tried to turn on the HP Pavilion and Dell Optiplex 745 but both of them did not start properly. Both of them are missing crucial components such as RAM, Hard Disks or Graphics Cards. The HP Pavilion is specifically missing RAM and a Hard Disk. The Dell Optiplex is also missing a Hard Disk and a Graphics Cards.
I found four 1GB Ram Sticks in the studio and added two of them to the Optiplex 745. This did not help with the startup process. Tomorrow I will read the manual and try to figure out the status codes.
2024-11-28
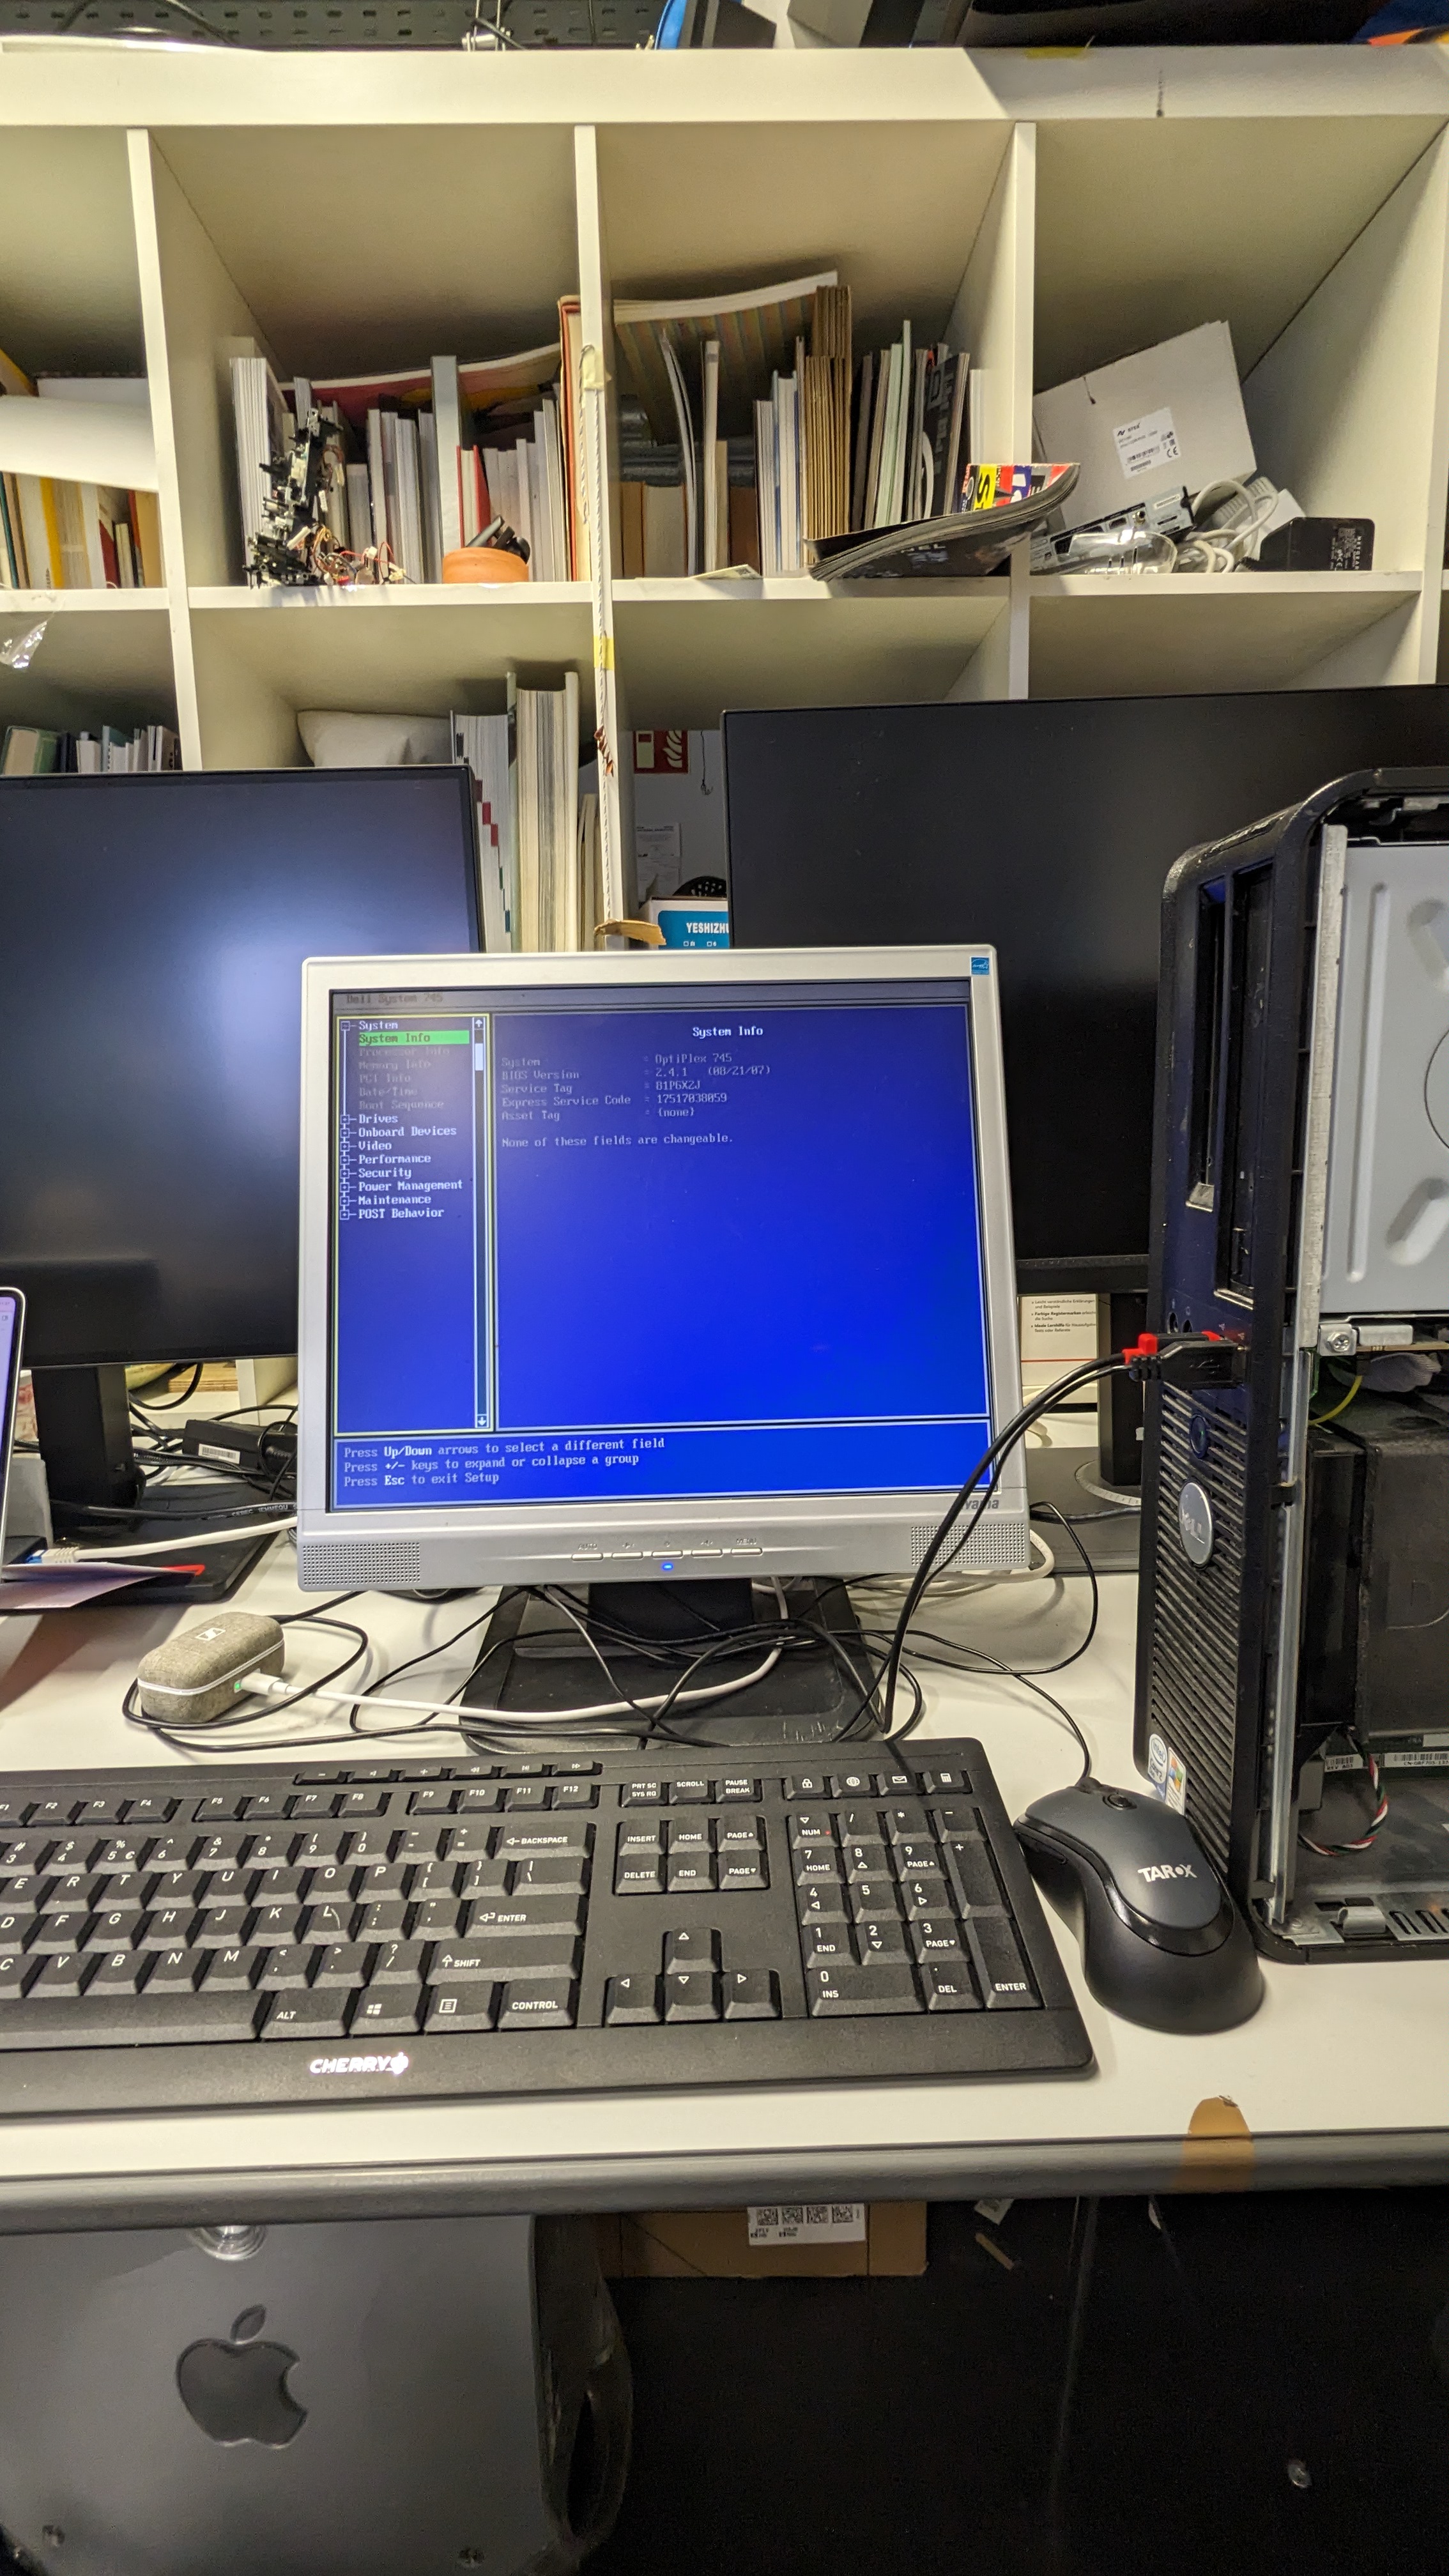
Added the two other 1GB Ram Sticks I found yesterday to the Hyrican PC. Then I tried to boot, startup seemed normal, got a screen signal and was routed into BIOS.

It shows that:
NVRAM check passed
USB controllers initialized
2040MB RAM detected
1 keyboard, 1 mouse, 4 storage devices connected
CD-ROM drive (PHILIPS SPD6005T)
4 USB card readers (SD, CF, SM, MS formats)
CMOS settings are incorrect
Date/Time not set
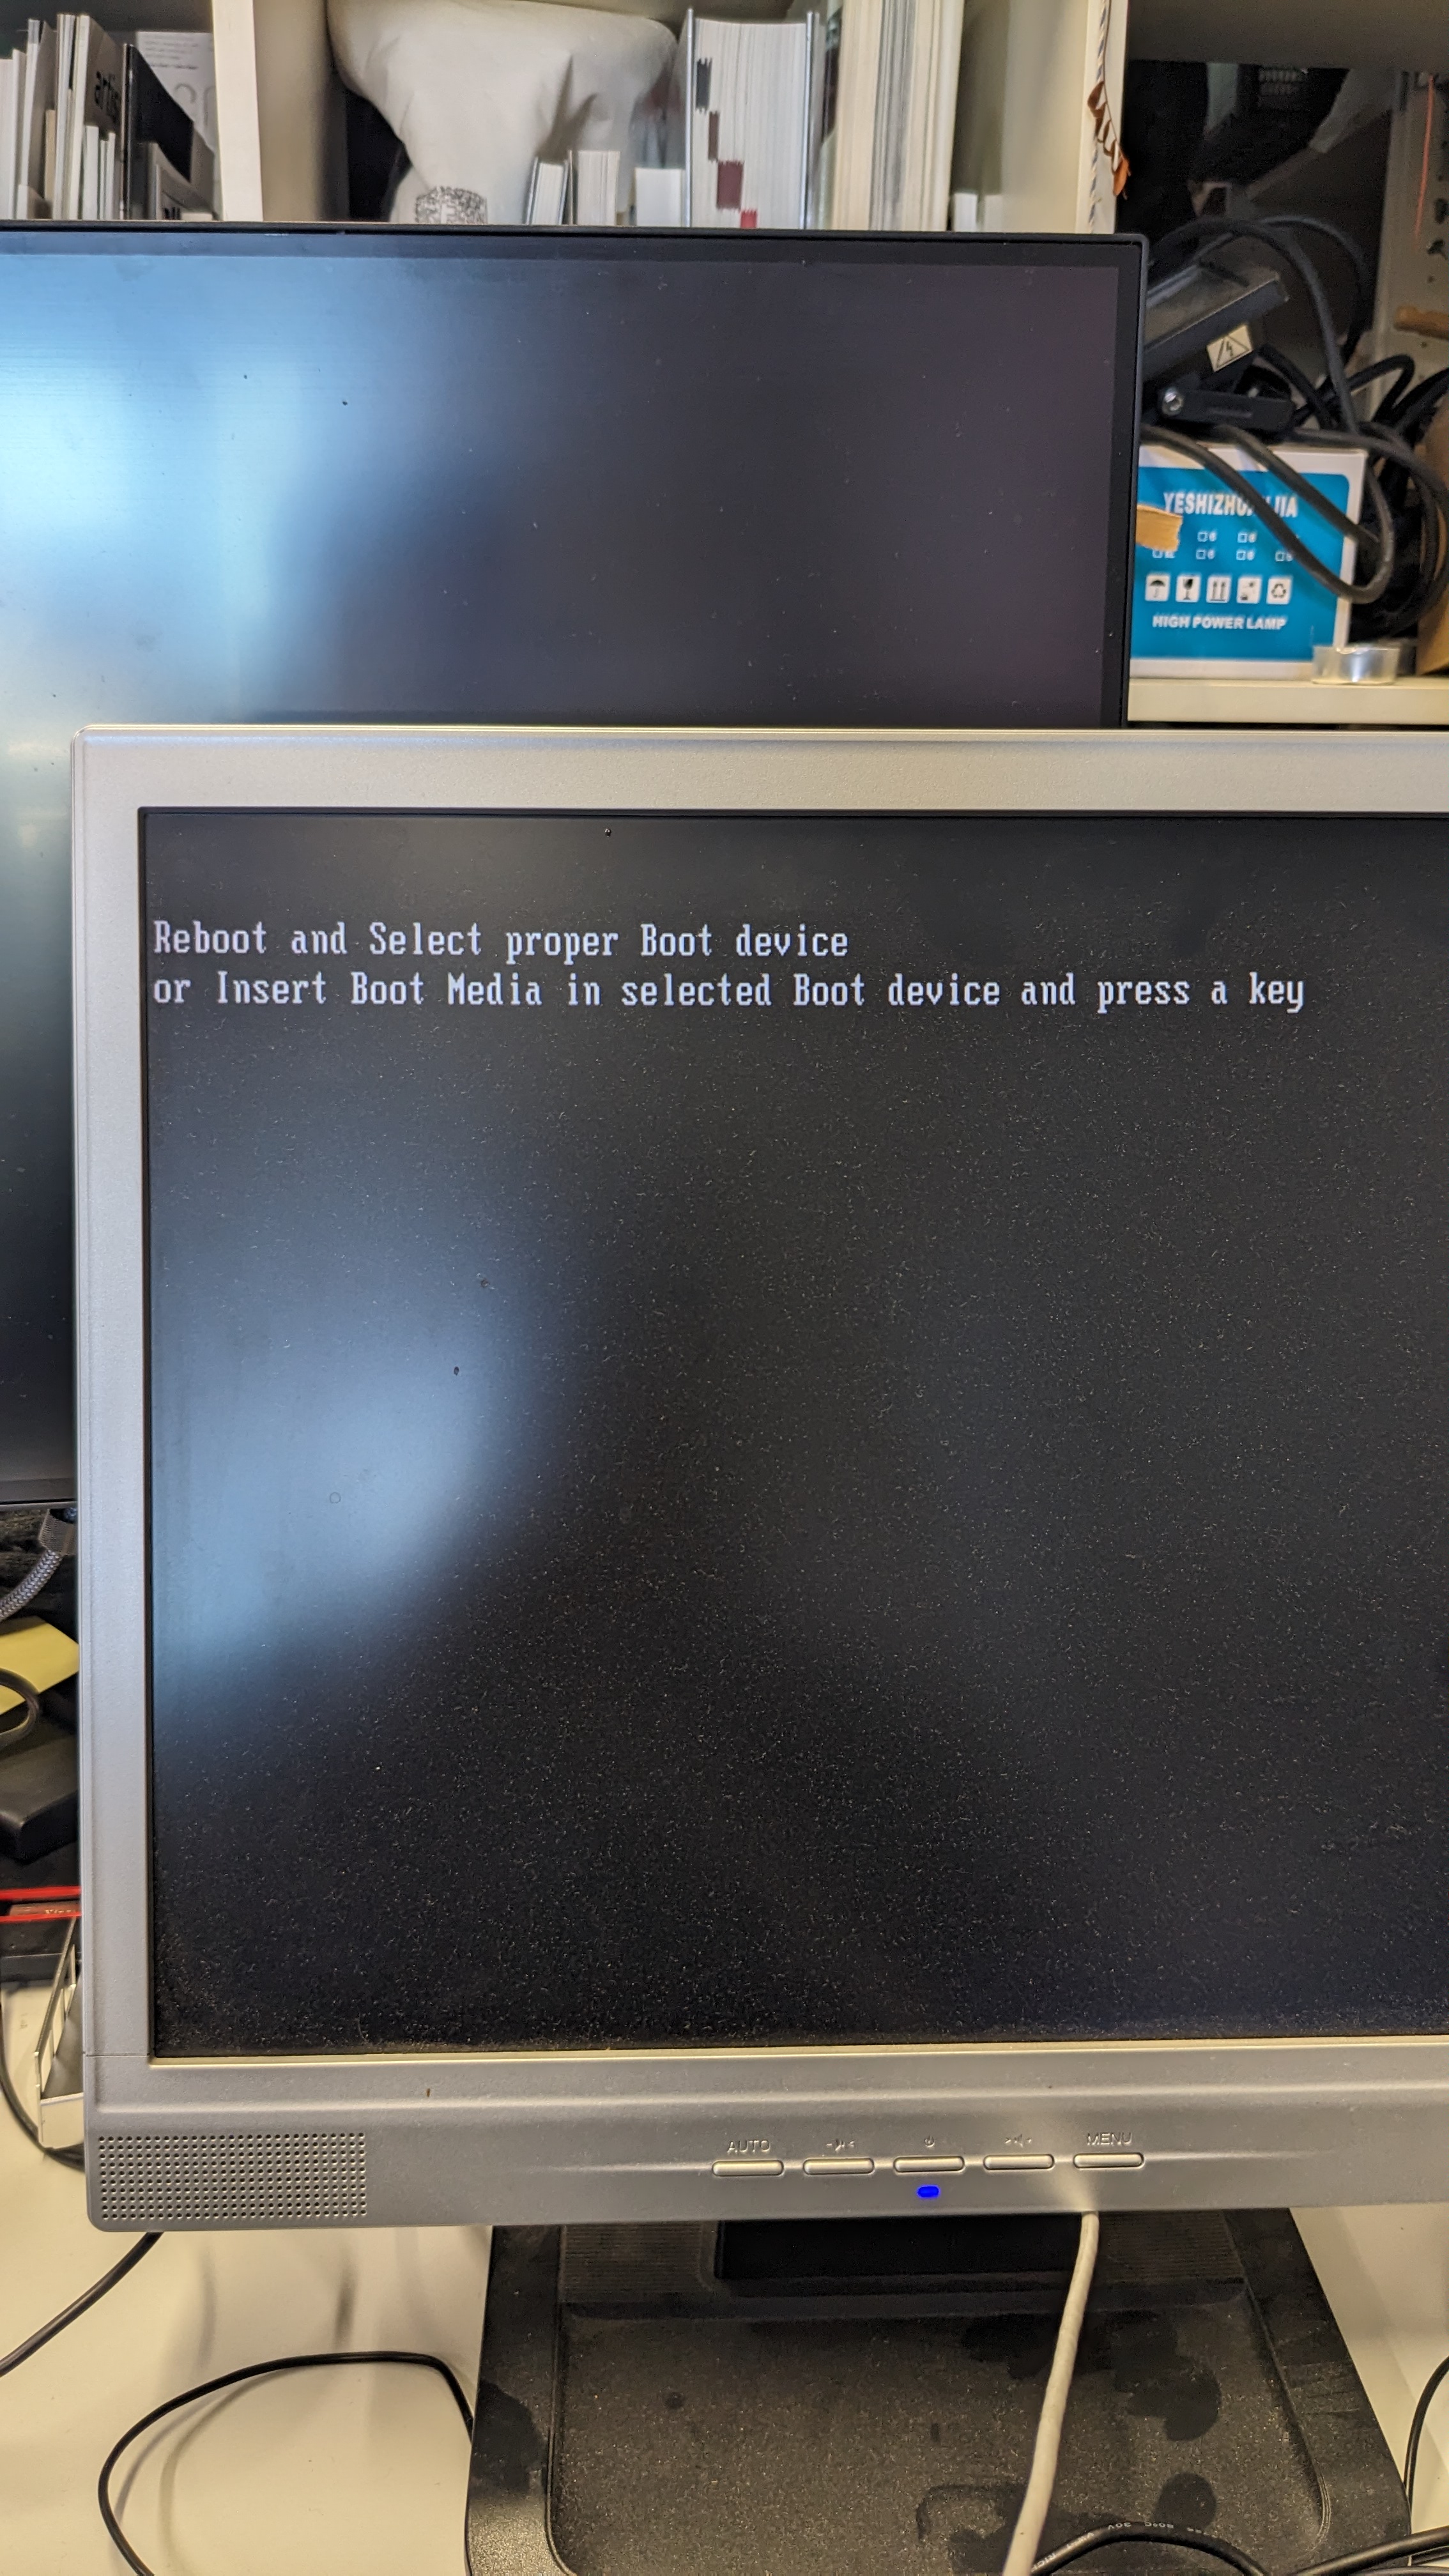
Went into the SETUP and fixed the CMOS Settings, which was basically the time and date setting. After I fixed that I was asked to insert a Boot device.
In the meantime Lars said that he has a spare 4GB RAm Stick for the HP Pavilion laptop I found yesterday. He also said that his flatmate has a 8GB Ram Stick that he wants to gift away. He might send me both of them.
As no storage was found in the Hyrican PC I went to the DM Studio storage to look if I can find one in there. I found a 160GB HDD and connected it to the PC.
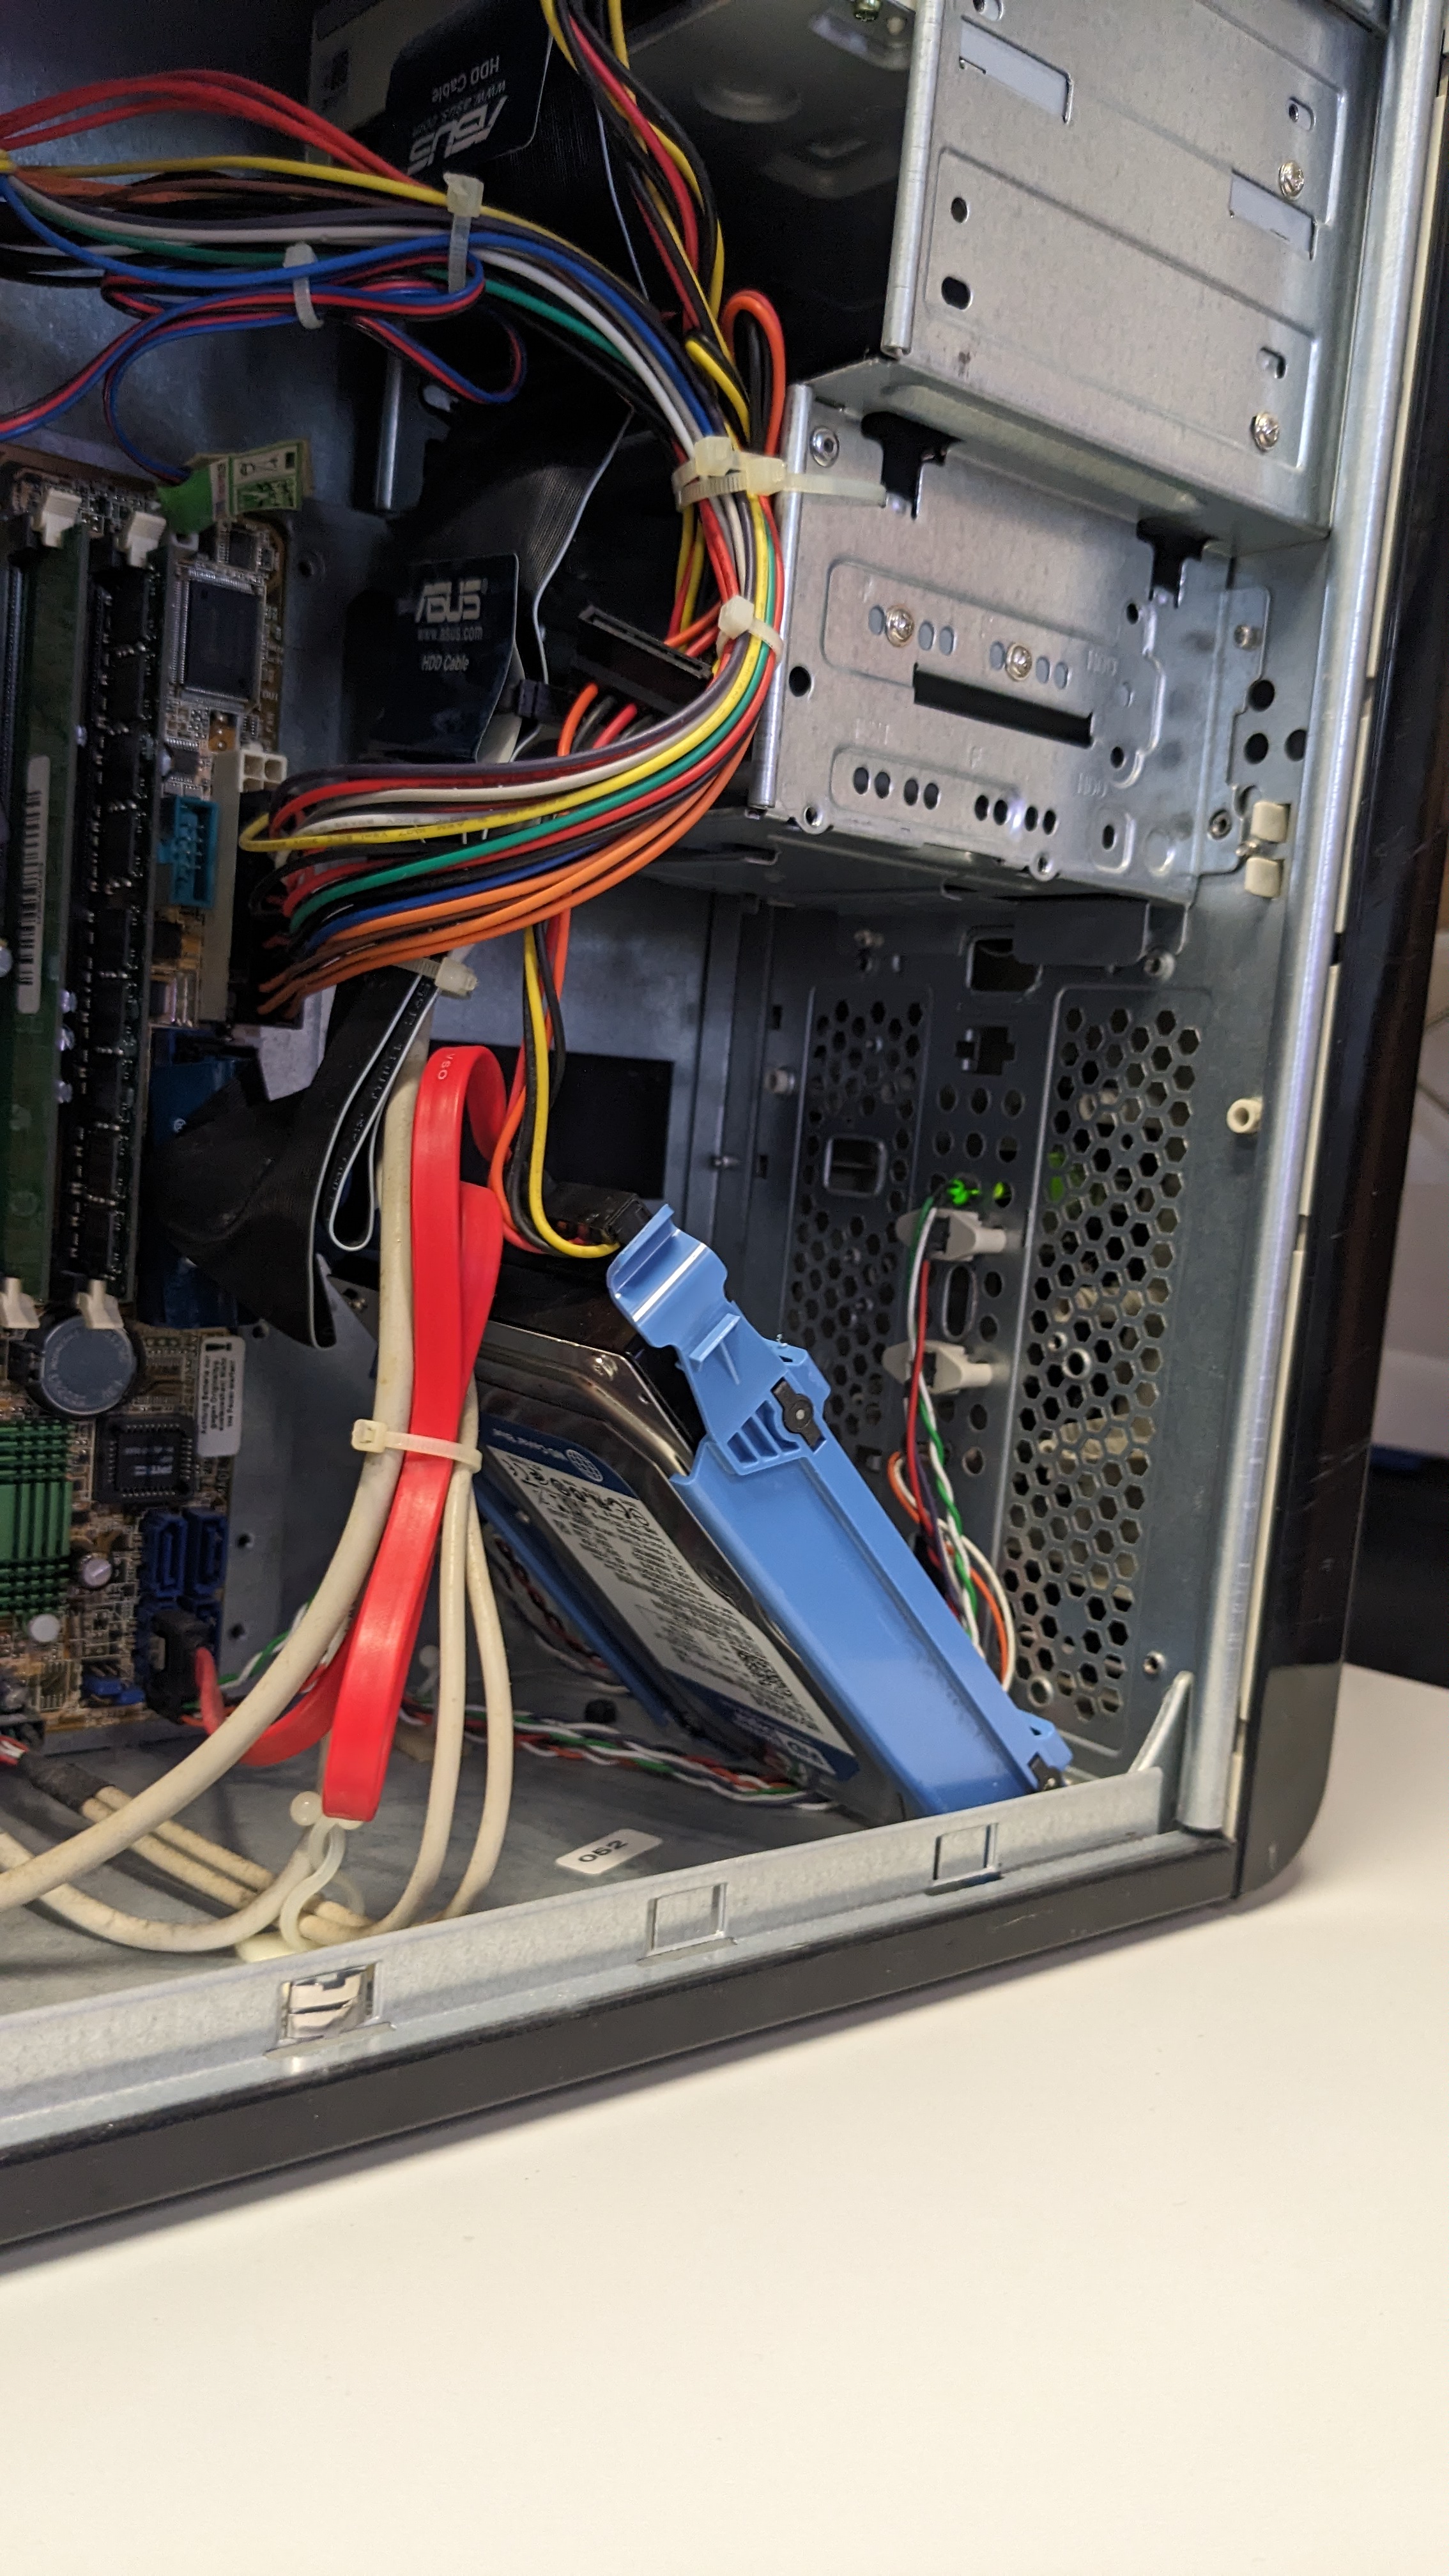
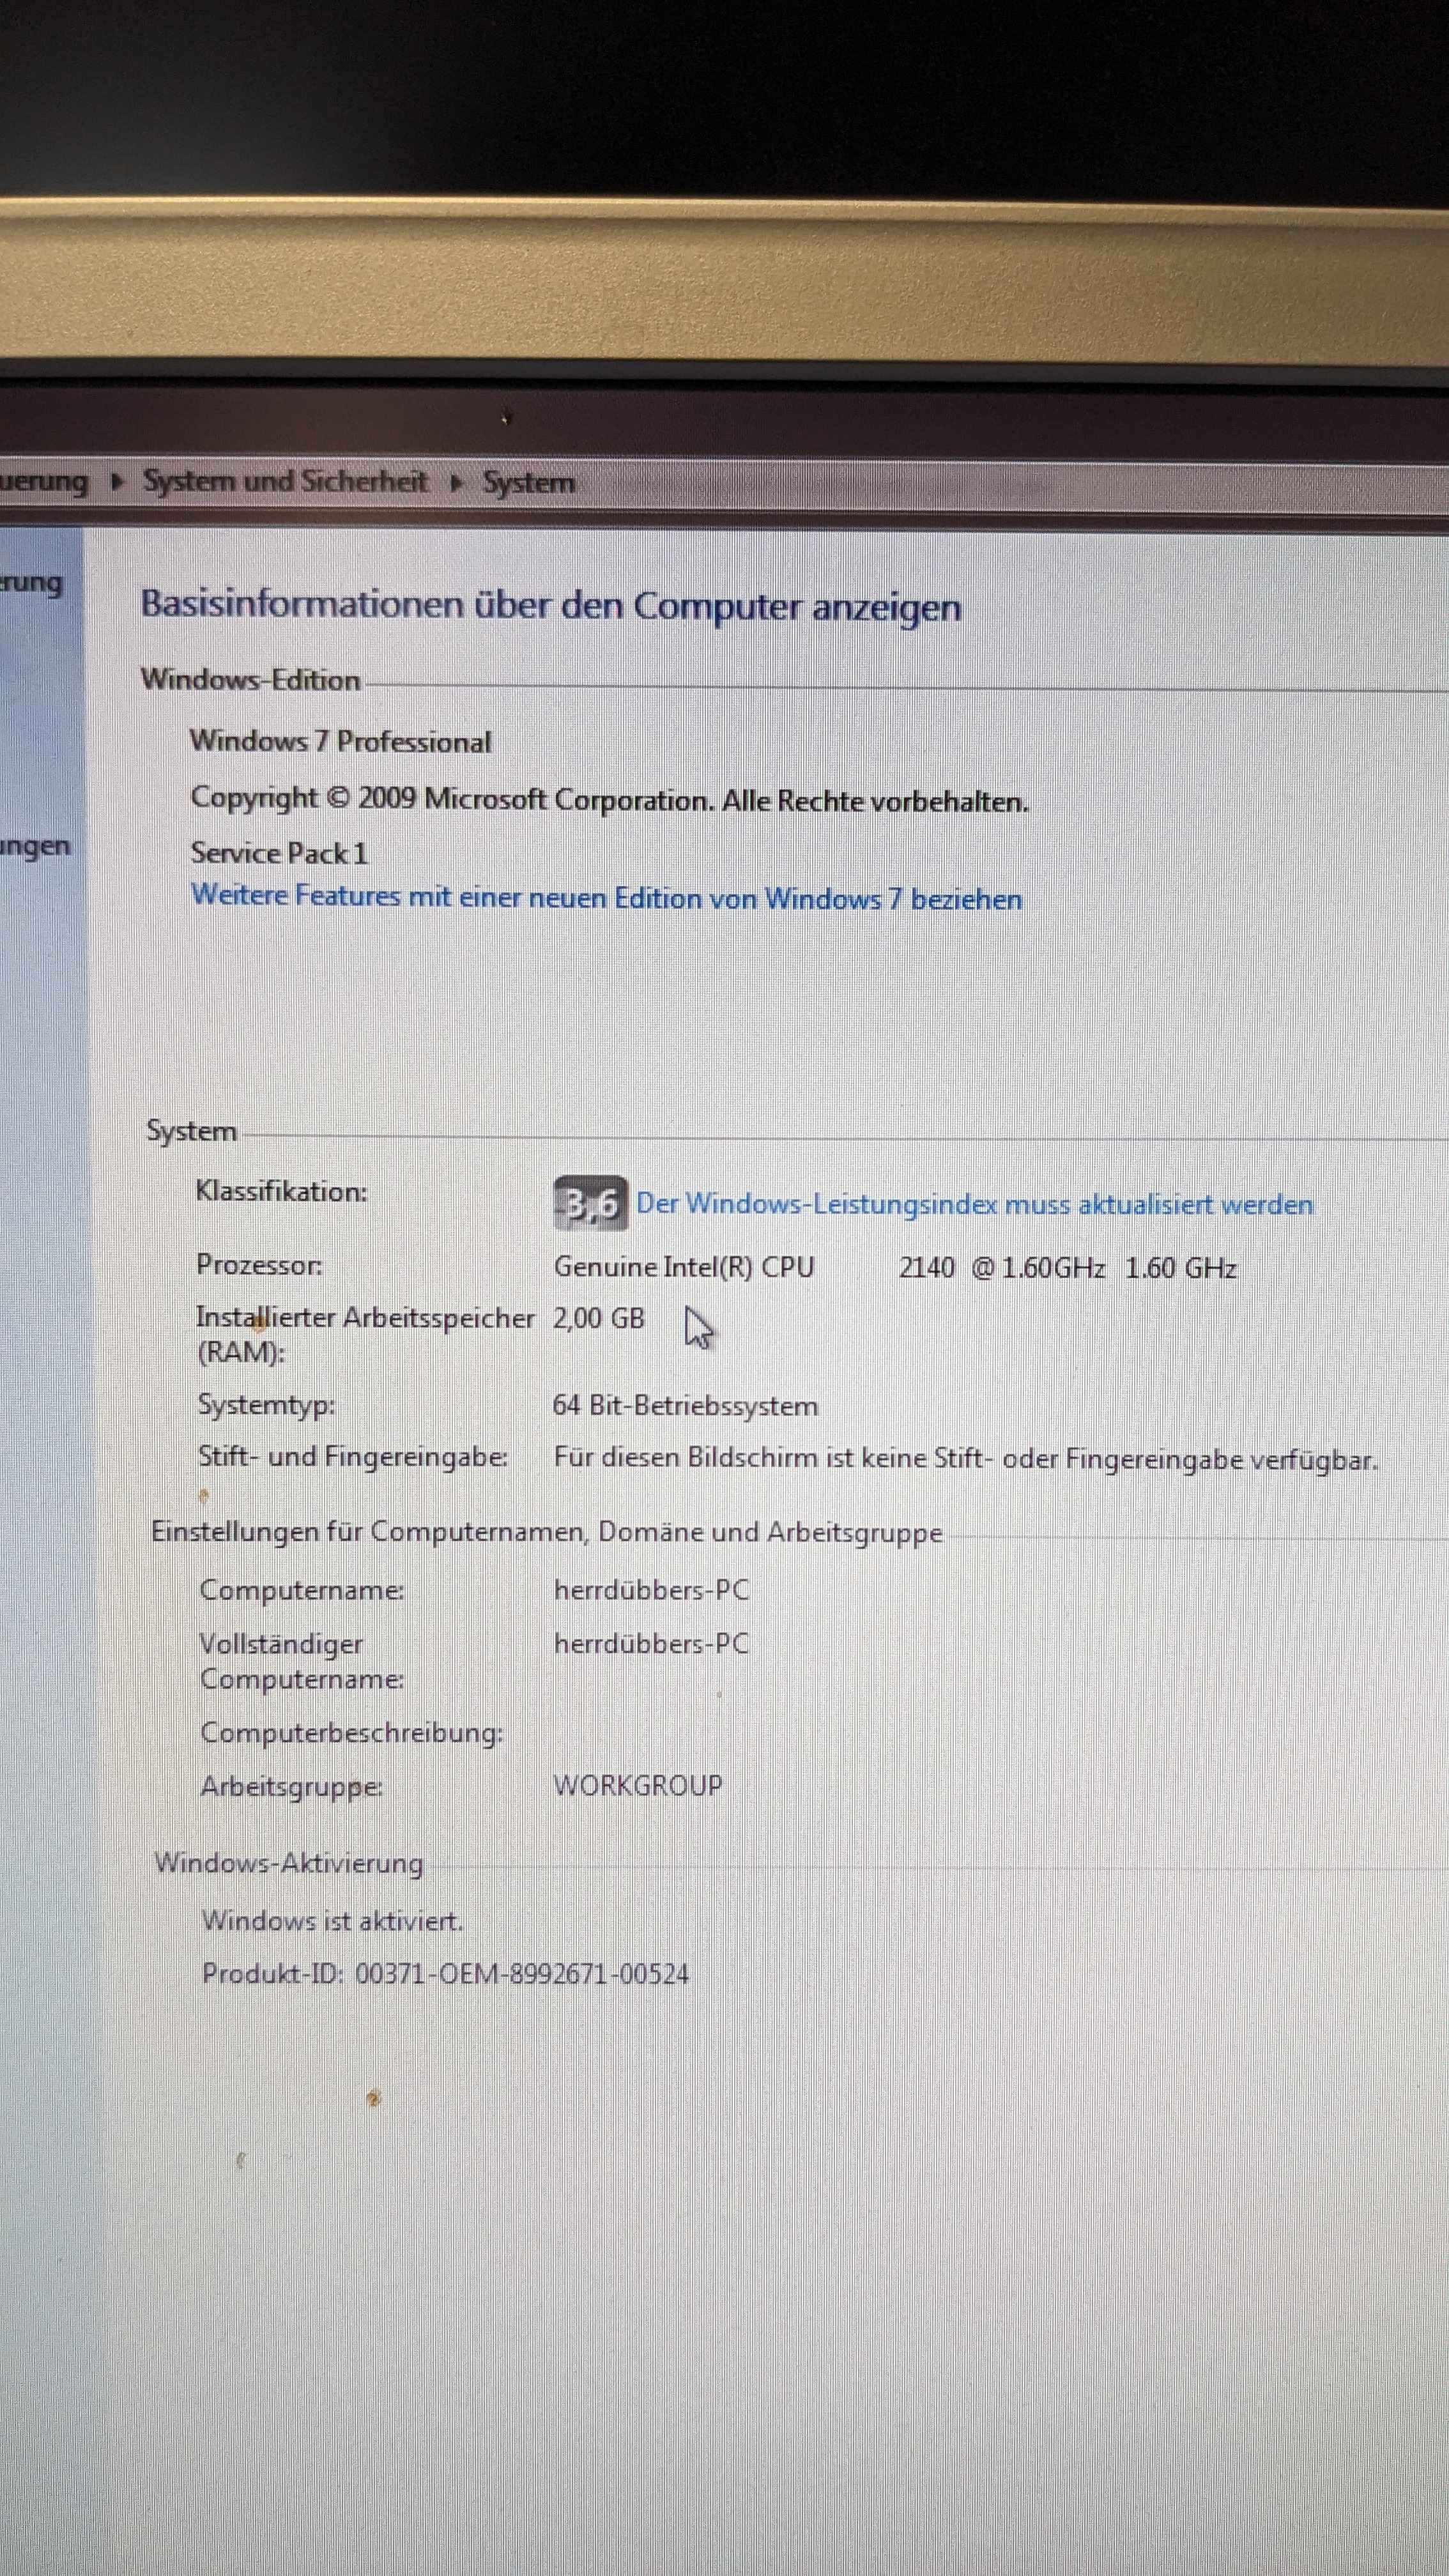
Went into the BIOS and booted from the Western Digital Harddrive. On there was a Windows 7 installation that started without any issues.

This allowed me to check the system settings to see what chip I have in the PC.
After that, I inserted a USB Flash Drive with Fedora 41 into the PC. I changed the Boot order in the BIOS and booted from the flash drive. I selected the option to test the environment and then install fedora. The PC got stuck in this process for a while only displaying a cursor.
After approx. 10min the tests started and almost failed immediately with the following log:
...

Checking: 004.8%

The media check is complete, the result is: FAIL

It is not recommended to use this media.
[FAILED] Failed to start checkisomd5@dev-sdf.service - Media check on /dev/sdf.
[ 155.341909] dracut-initqueue[1445]: Job for checkisomd5@dev-sdf.service failed because the control process exited with error code.
[ 155.342271] dracut-initqueue[1445]: See "systemctl status checkisomd5@dev-sdf.service" and "journalctl -xeu checkisomd5@dev-sdf.service" for details.
[ 155.394629] dracut-initqueue[1282]: Warning: Media check failed! We do not recommend using this medium. System will halt in 12 hours
Apparently this references some sort of error with the boot flash drive. I flashed the drive again.
I research the minimal requirements for Fedora 41 Server to see if the hardware requirements are sufficient. Even though a setup with 1GiB or 2GiB should work a setup with at least 4GiB is recommended.
Currently I have two 1GB Ram sticks inside the Hyrican PC. I will try it with them first and if this does not work I will upgrade to two 2GiB Ram sticks that I found in the DM Studio material storage.
The medium test for the Fedora boot drive took ages, therefore I skipped it. Then I did not have enough time to finish the installation. Will try again tomorrow.
2024-11-29
Read about Alpine Linux yesterday, which seems to be a very lightweight Linux distribution with minimal resource usage. Maybe worth a try.
Also Debian could be an option as it uses less resources then Fedora. For now I will test it with Fedora again.
While installing Fedora I did a bit more research about lightweight Linux distros and stumbled across AntiX Linux and TinyCore Linux, which also promote low resource usage. Especially AntiX Linux looks interesting because it is made to be booted from flash drives. Maybe something I should test after the Fedora install was successful.
The install of Fedora Server Linux was complete after roughly 1.5 hours without testing the flash drive first. Just direct install.
After the install I first upgraded all packages.
sudo dnf upgrade --refresh -y Then I installed NGINX following this guide. The connection to the server failed though.
SELinux is enabled which I could check with:
getenforceThen I needed to run the following to allow http and https requests.
sudo setsebool -P httpd_can_network_connect 1After that requesting the website inside the local network worked.
With Fedora Server an nginx running we have these stats:
top - 13:50:48 up 2:22, 3 users, load average: 0,07, 0,04, 0,01
Tasks: 167 total, 1 running, 166 sleeping, 0 stopped, 0 zombie
%Cpu(s): 0,2 us, 0,2 sy, 0,0 ni, 99,3 id, 0,3 wa, 0,0 hi, 0,0 si, 0,0 st
MiB Mem : 1950,6 total, 610,5 free, 466,6 used, 1048,5 buff/cache
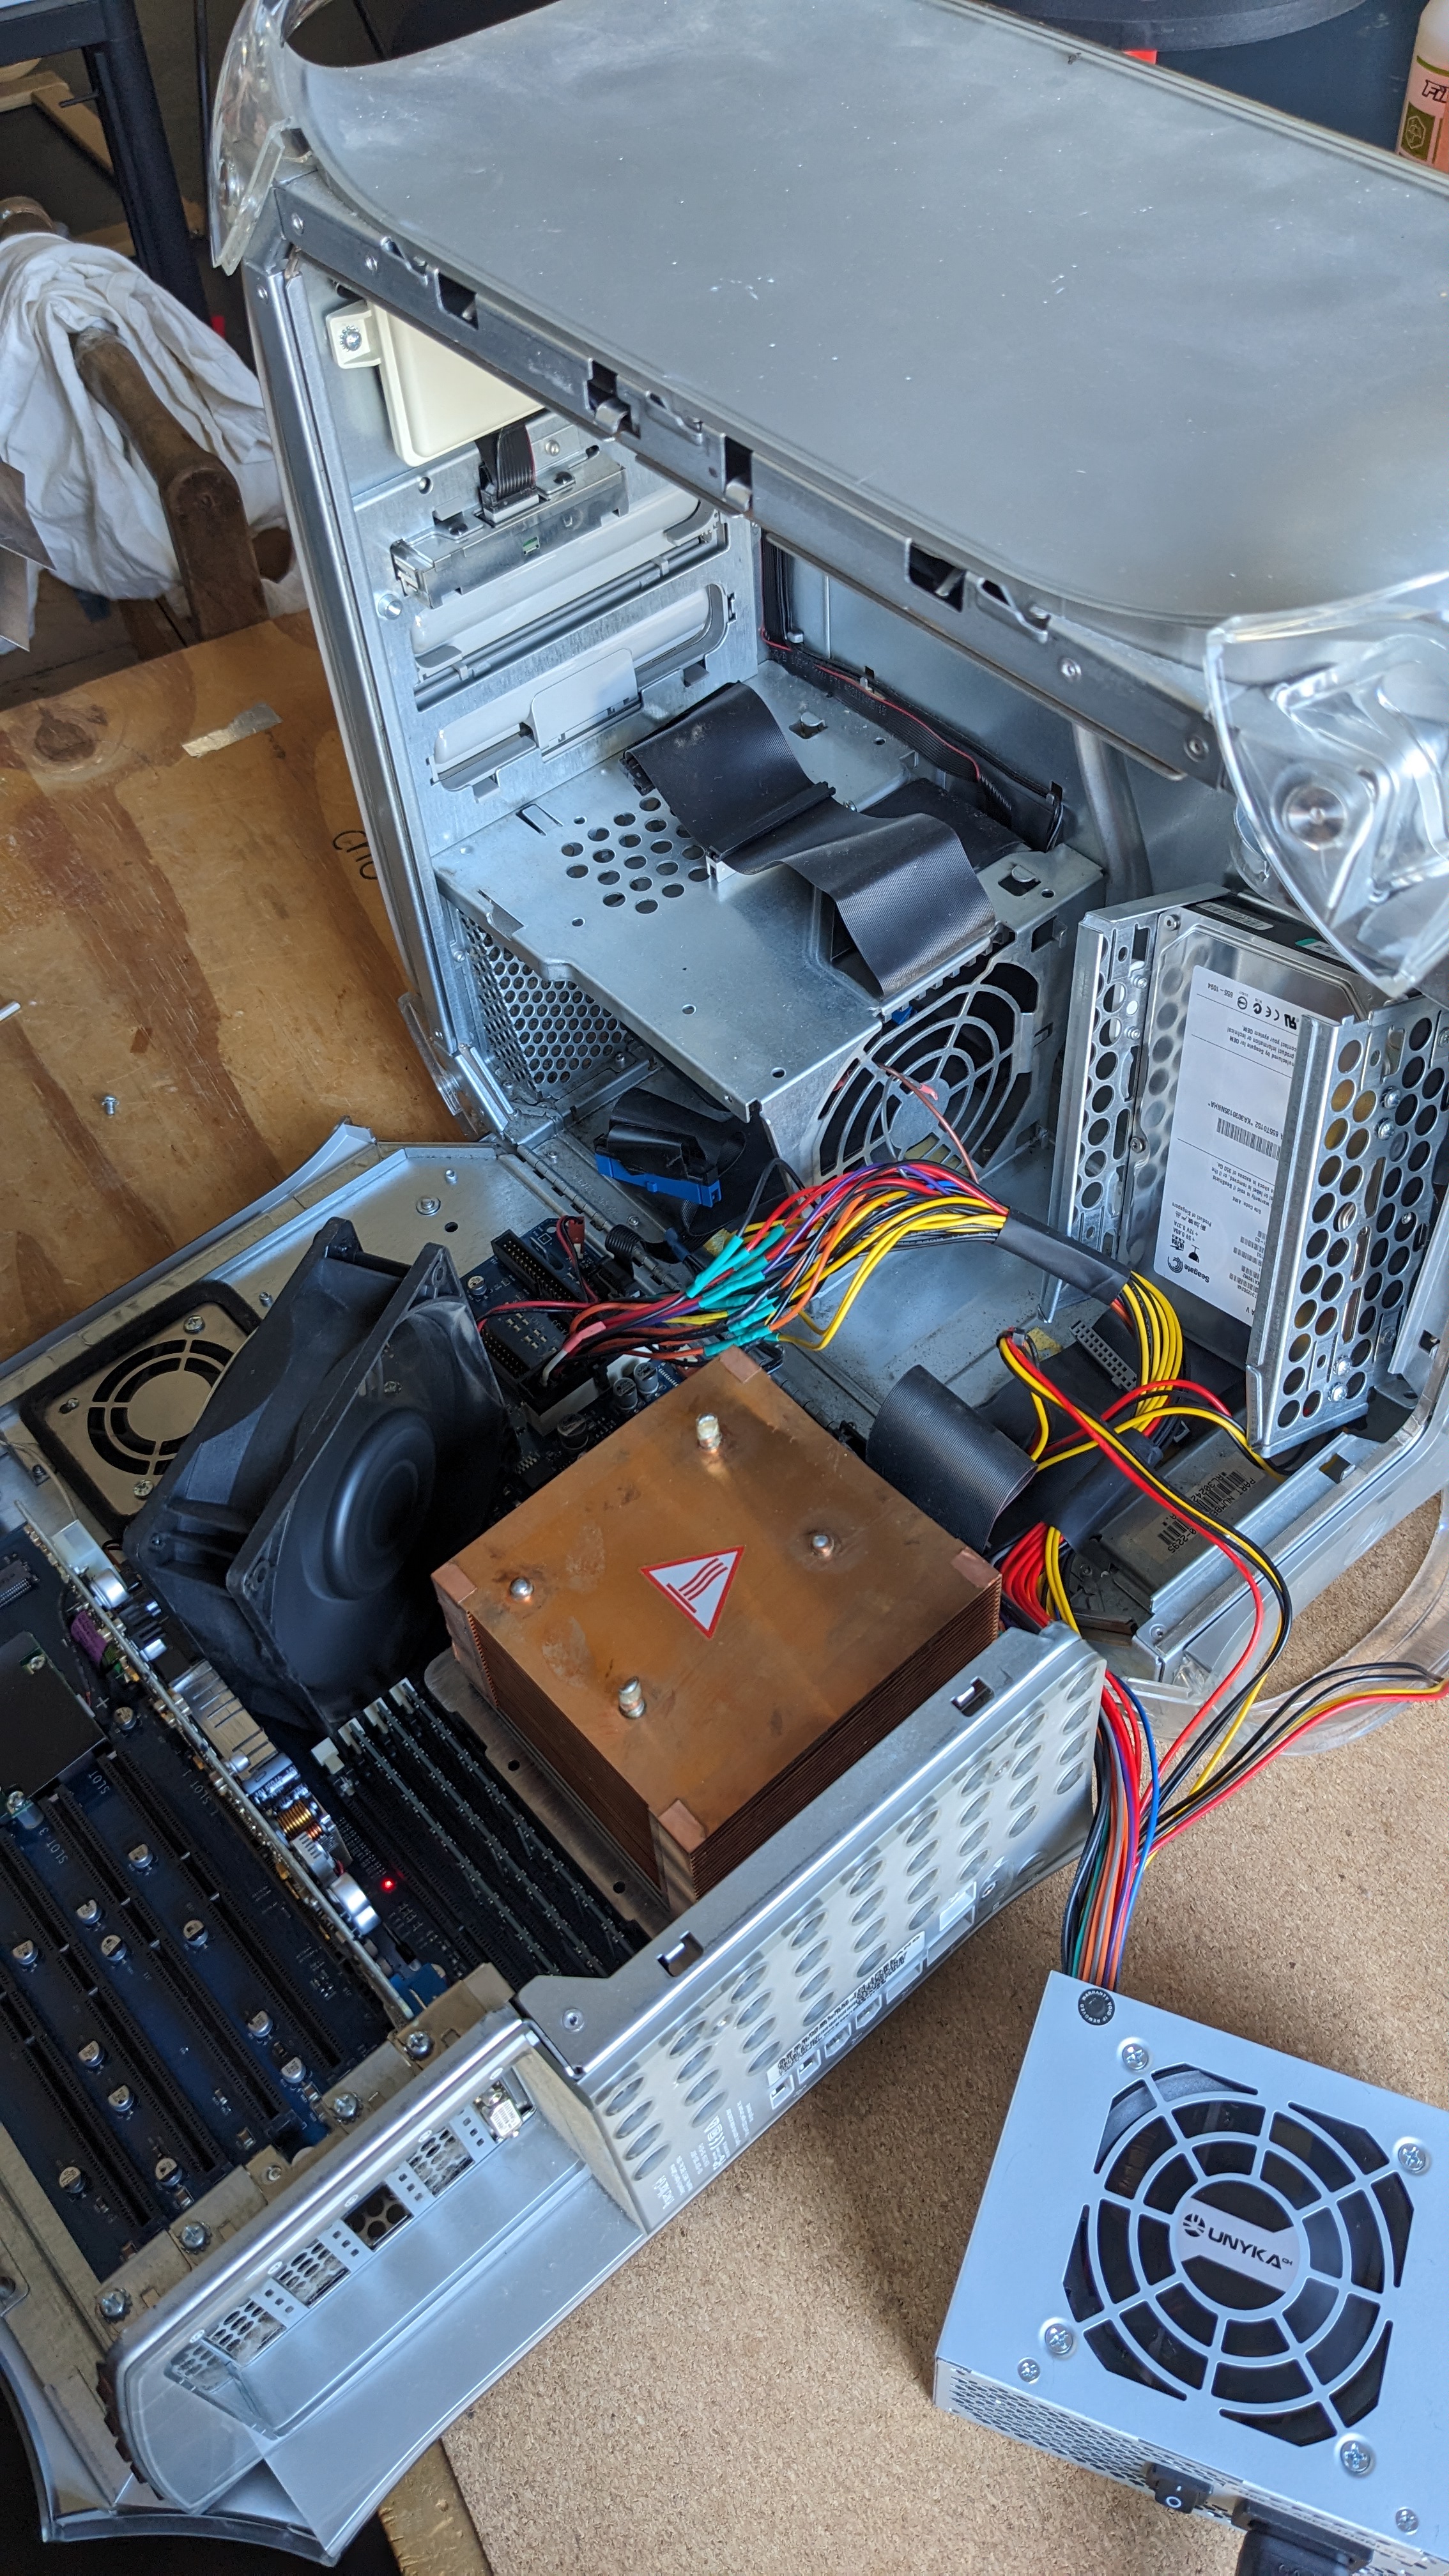
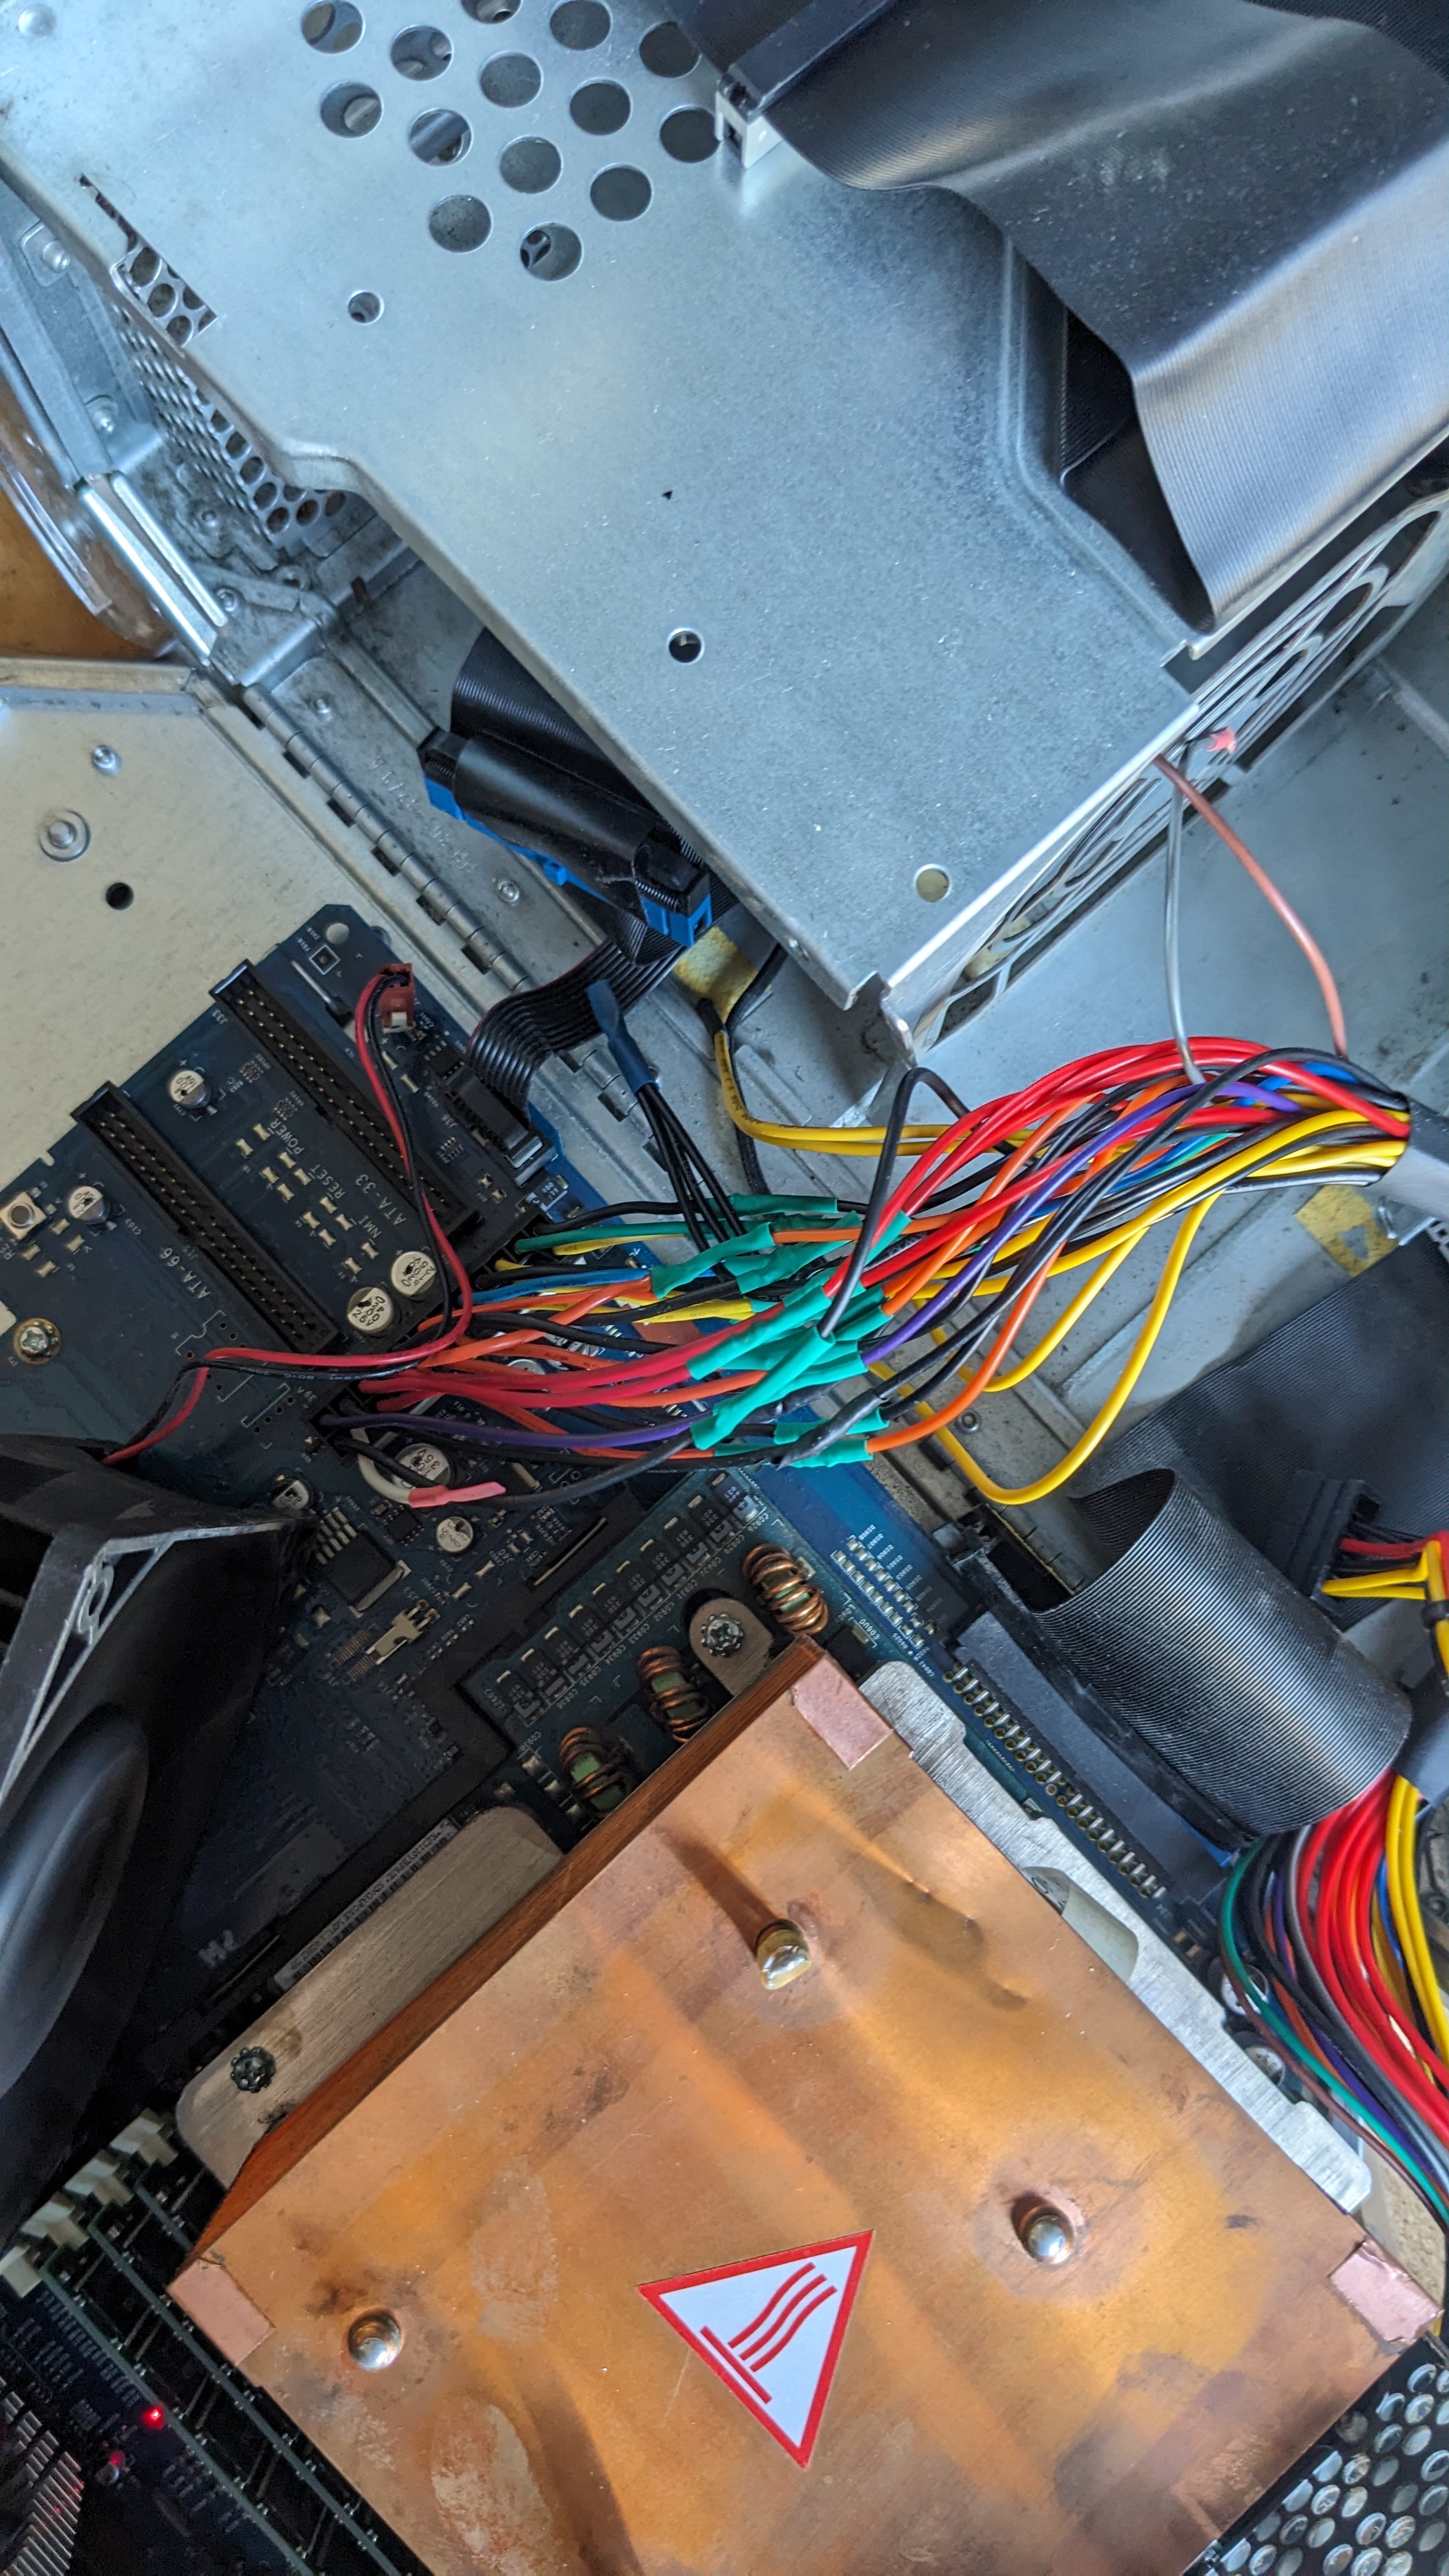
MiB Swap: 1950,0 total, 1945,7 free, 4,2 used. 1484,0 avail MemTogether with Clemens I also found a PowerMac G4 MMD with (almost) max stats.
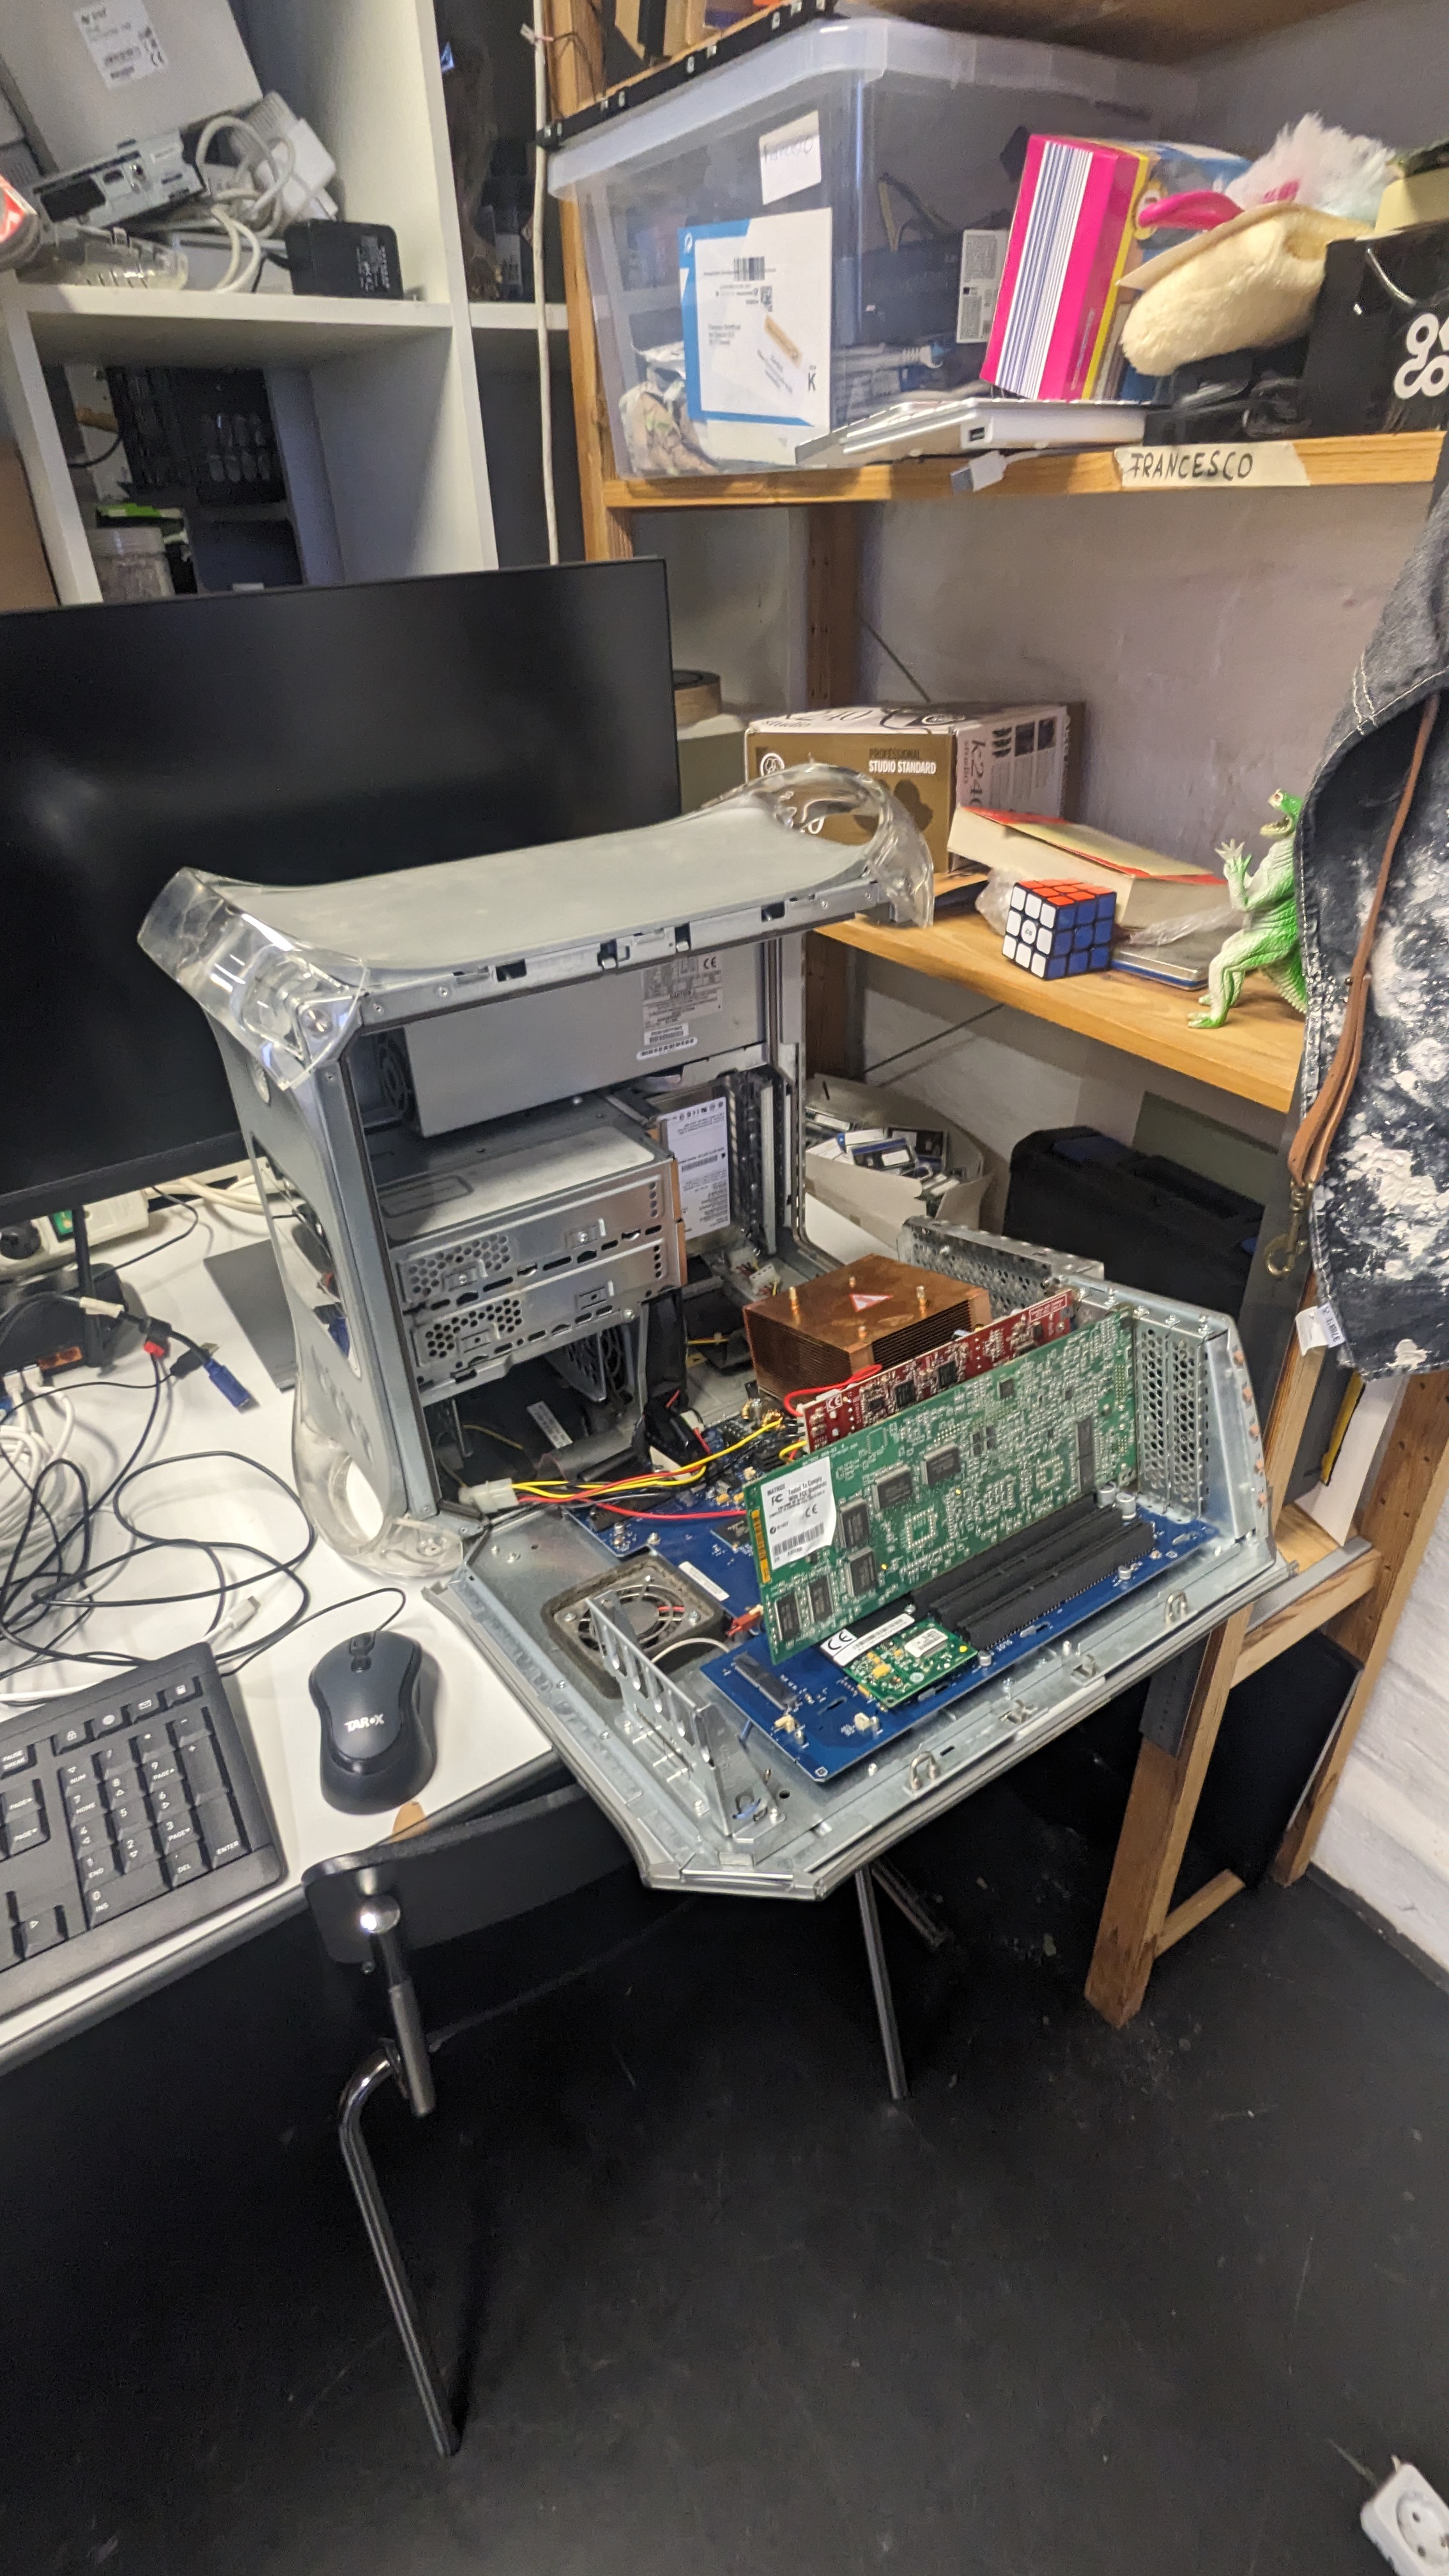
Seems like the power supply is broken though and apparently Apple used a proprietary 24PIN Layout for their power supplies. So let’s see if this can be fixed somehow.
2024-12-09
I ordered some parts from different people to complete the computers I found. The list includes:
- 2x 512MB SODIMM DDR Ram Sticks
- For the HP Pavilion
- 1x 250GB SATA HDD from WD
- For the Dell Optiplex
- 1x 160GB 2.5-Inch PATA Notebook Hard Drive
- For the HP Pavilion
- 1x 80GB 2.5-Inch PATA Notebook Hard Drive
- For the HP Pavillion
The two notebook hard drives were only sold as a package. Included to the two ram sticks was also a CPU chip, which unfortunately has bent socket pins.
2024-12-12
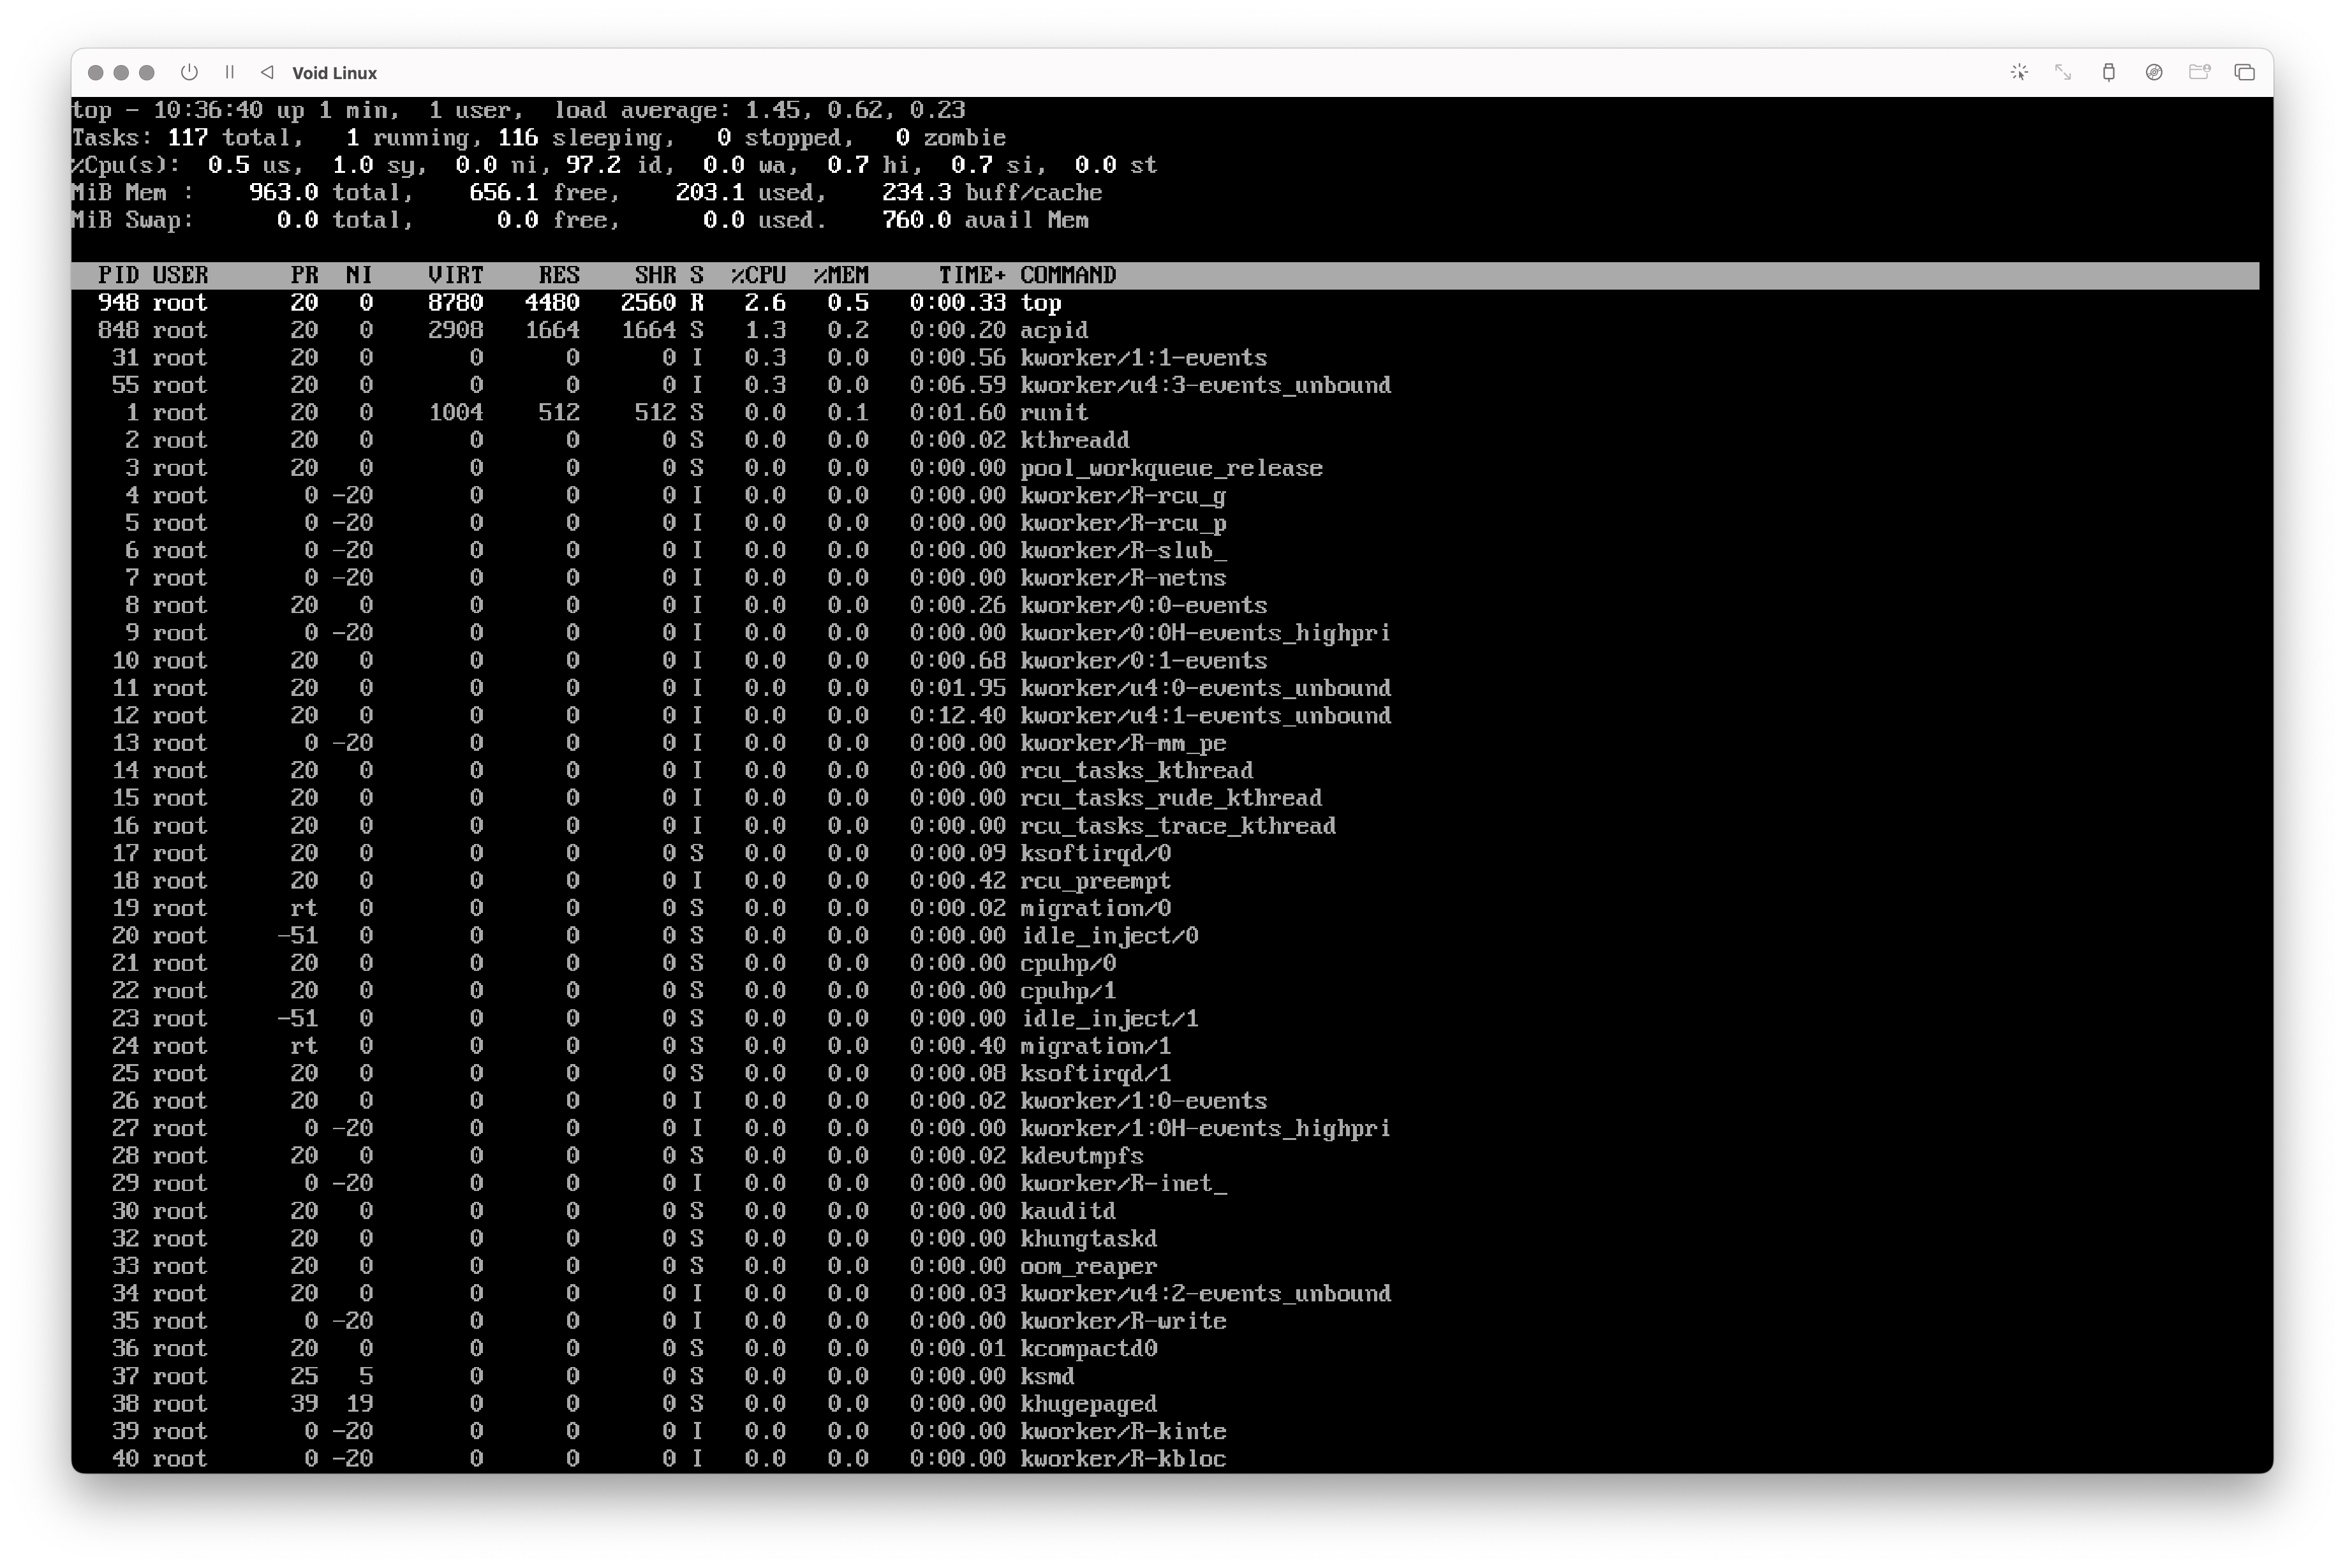
I installed Void Linux inside a UTM VM on my MacBook. Setting up was a bit tedious as I needed to setup everything from file system, boot partitions, etc.
Also when I tried to install lighttpd as a package I could not install it, because the distro/VM could not connect to the network.
The resource usage was around 200MB Ram which is already pretty good.
 I also got an
SSD drive from my father today, which he does not need anymore.
I also got an
SSD drive from my father today, which he does not need anymore.
2024-12-16
With all the hardware I bought I started to fix the laptop first. I installed the two 512MB RAM Sticks which allowed me to boot into BIOS.
After that I wanted to install one of the two IDE/PATA Hard Drives into the laptop. I did not fit immediately and I learned, that an adapter between the hard drive and the laptop. There is an image of it in the manual.
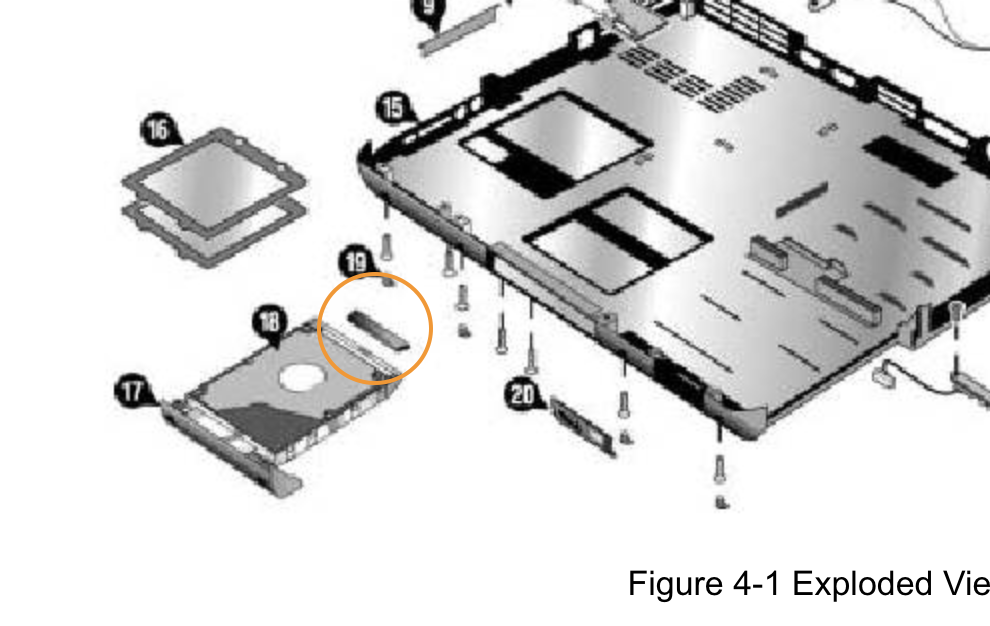 The
adapter that is missing is part of the piece 319417-001 - Hard
Drive Tray for 1F (One Fan), which can be for example be bought
here
and here
but can not be shipped to Germany.
The
adapter that is missing is part of the piece 319417-001 - Hard
Drive Tray for 1F (One Fan), which can be for example be bought
here
and here
but can not be shipped to Germany.
After a discussion with Clemens we came up with the idea to replace the optical drive with an optical drive to hard drive caddy adapter.
Something similar to this:  To do so, I
had to remove the optical drive first from the laptop. I looked into the
manual on how to do that. I first removed the keyboard cover and then
the keyboard itself. After that I could unscrew the optical drive and
push it out.
To do so, I
had to remove the optical drive first from the laptop. I looked into the
manual on how to do that. I first removed the keyboard cover and then
the keyboard itself. After that I could unscrew the optical drive and
push it out.
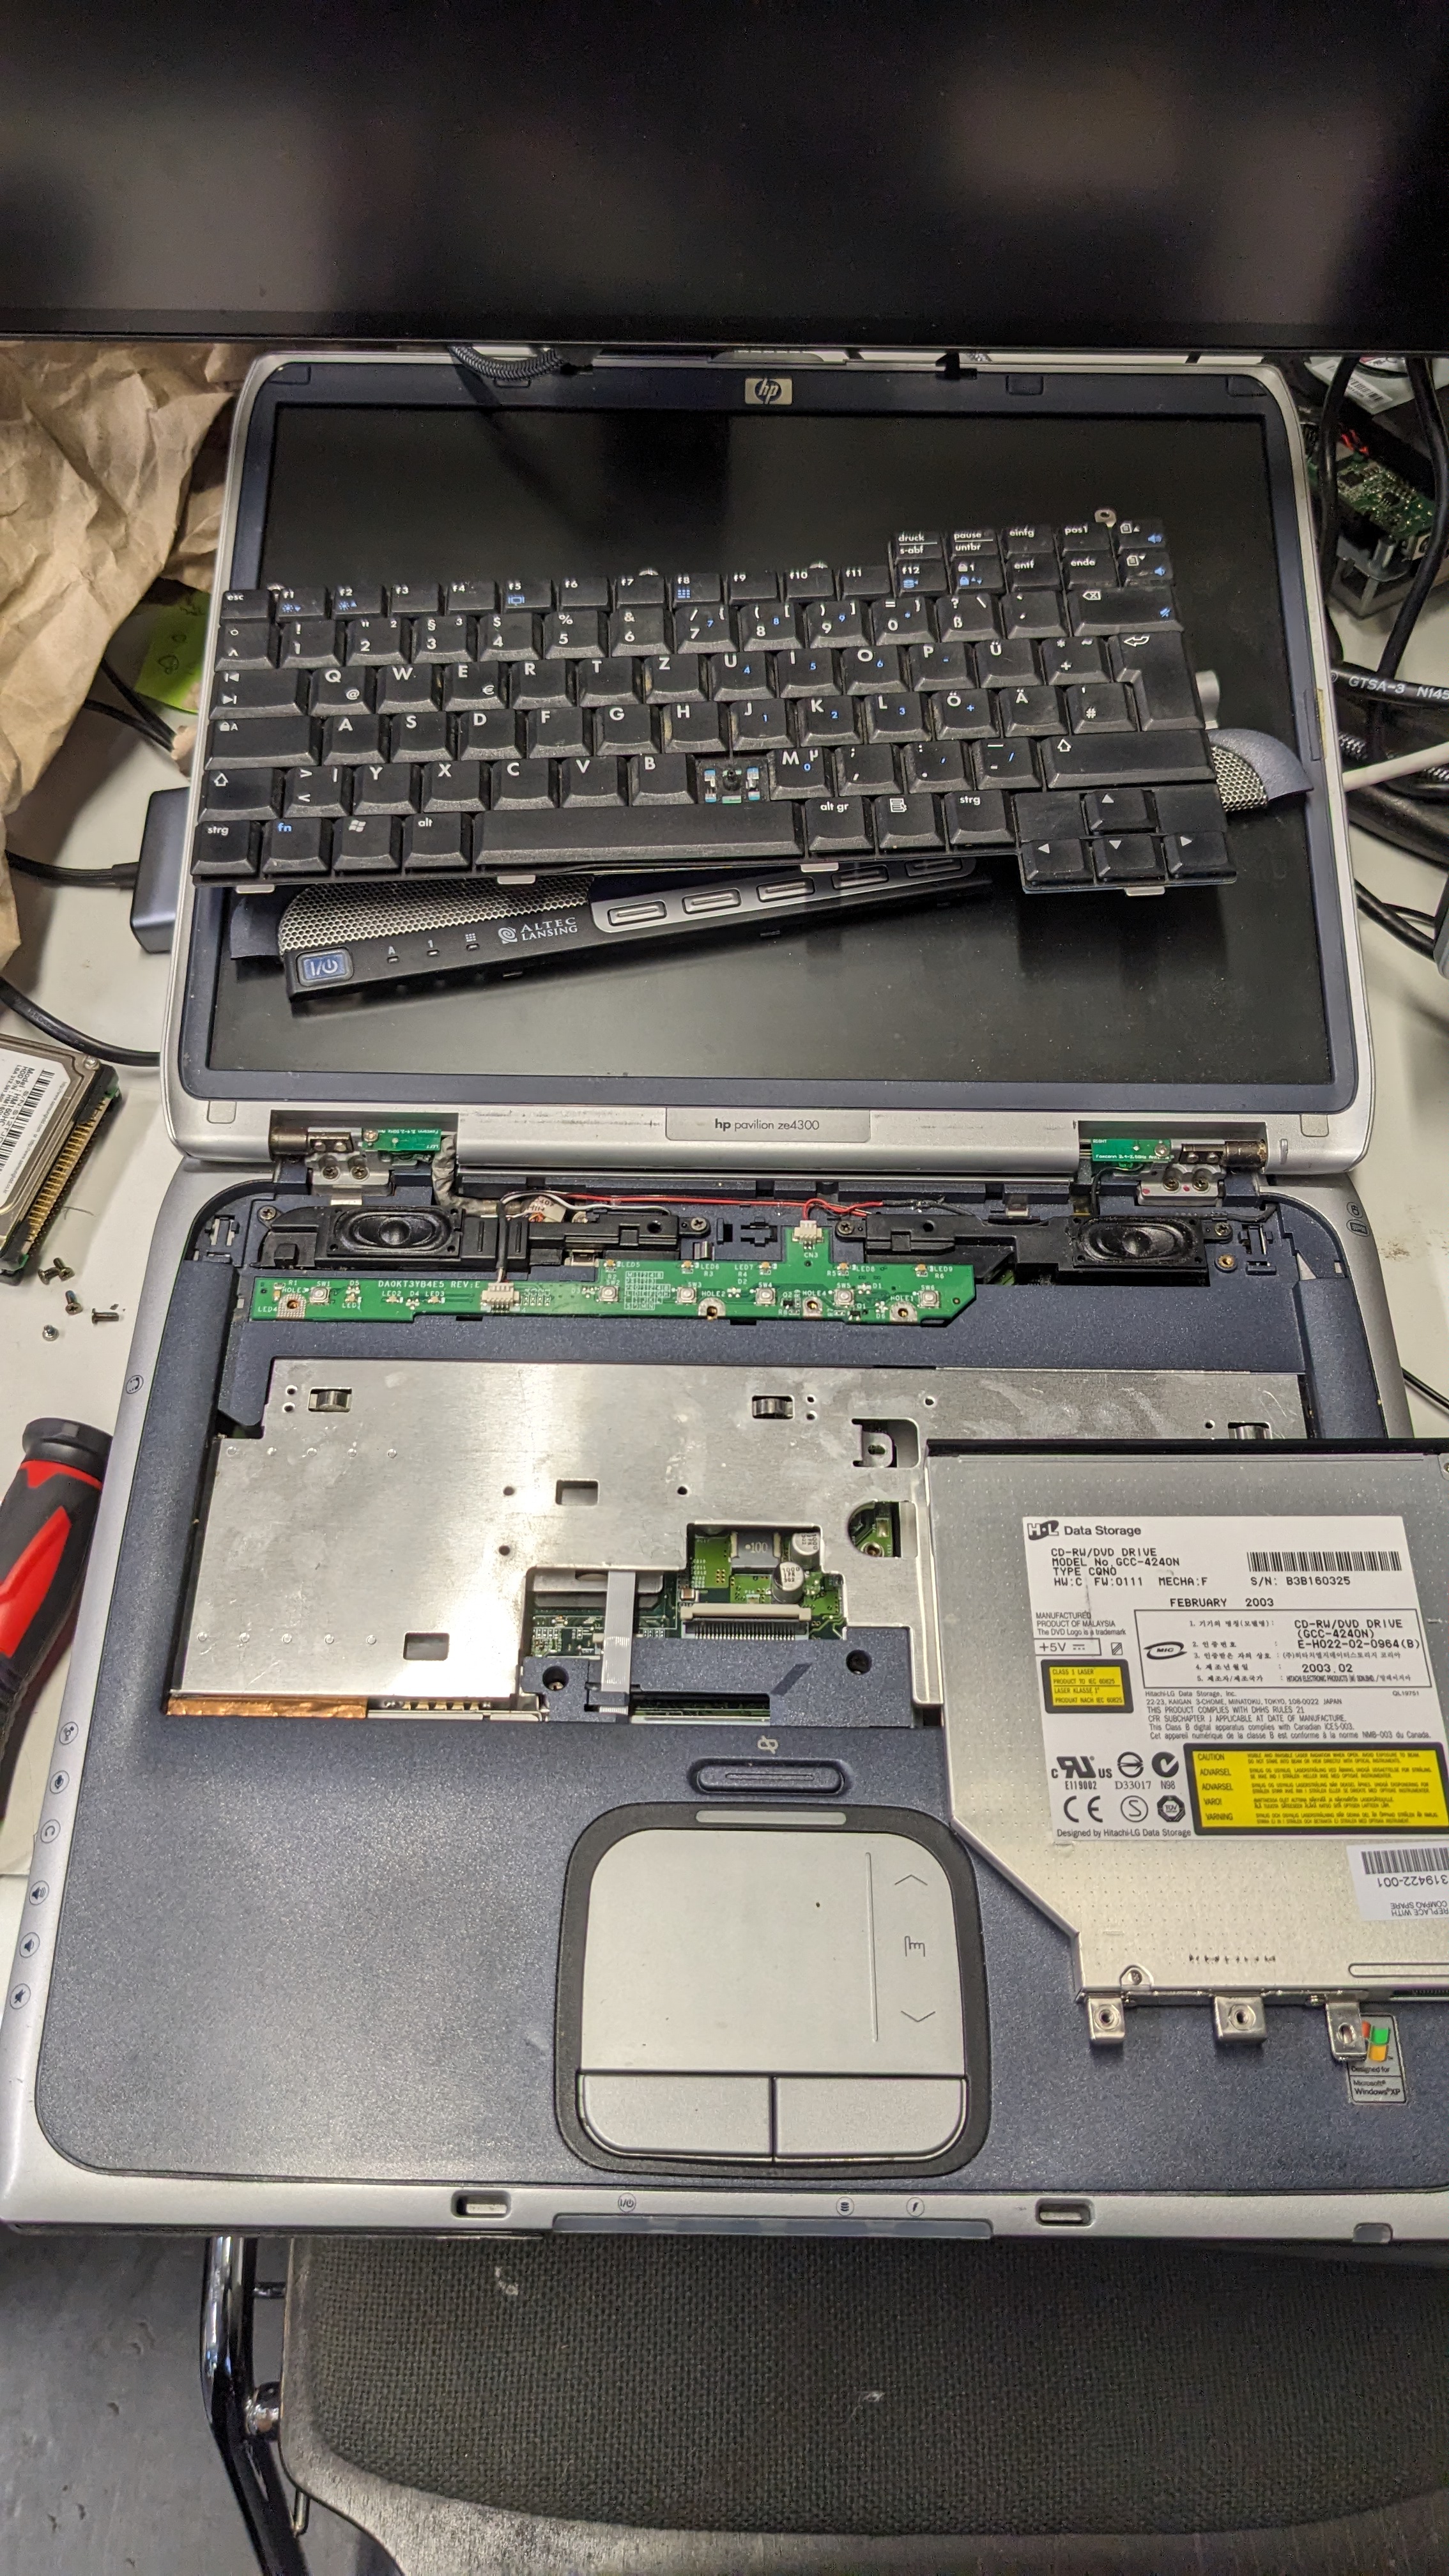
After some research and googling I found out that the optical drive I have here is a 12.7mm one with an IDE/PATA interface. More specifically it is the 319422-001 – CD-RW/DVD Combo Assy.
All the hard drive caddy adapters I could find only had an SATA interface and not the needed IDE/PATA interface, which the optical drive had. Therefore I need to find another solution to add storage to this laptop.
One idea could be to open it up more to see if it has SATA ports or some IDE/PATA Ports I can add an adapter to. Maybe the floppy drive could work?
I could also buy this: https://www.ebay.com/itm/284524589152
2024-12-17
Installed an SSD drive into the Dell Optiplex 745 and now it stays on at least. I am not getting an image signal though.
I had two RAM sticks installed which where had the ECC (Error Correction). The RAM sticks were two of these models: Samsung M391T2863QZ3-CE66. From the [[manual-dell-optiplex-745.pdf|Dell Optiplex 745 manual]] I learned that only Non-ECC ram sticks are allowed (see page 145). Therefore I swapped the two RAM sticks with another one of this type: Samsung M378T5663RZ3-CF7. As 2GB is the maximum the motherboard supports I only installed one.
With the RAM stick swapped, I got a video signal and could enter the boot menu.
Setup nodes
Little documentation on how I can setup my machines:
Moved the documentation from here to the repo.
While writing the Ansible notebook I took inspiration from these three sources:
- How I Install Arch Linux (the hard way)
- arch-from-scratch/README.md
- Installing Arch Linux is EASY ( A Tutorial ) – Linux for Newbs EP 1
In the first video they recommend to use LVM for volume management but I could not get it to work properly within Ansible. That’s why I will try a setup first now with just regular partitions.
2024-12-18
After some thoughts and also chatting with various chat bots (😅) I decided to use Alpine as my distro of choice. Together with Ansible I should be able to create a fairly re-producible workflow for all three machines.
Setting up Alpine directly through Ansible does not really make
sense. Using the setup script ansible-setup ist just way
more convenient and faster.
2025-01-05
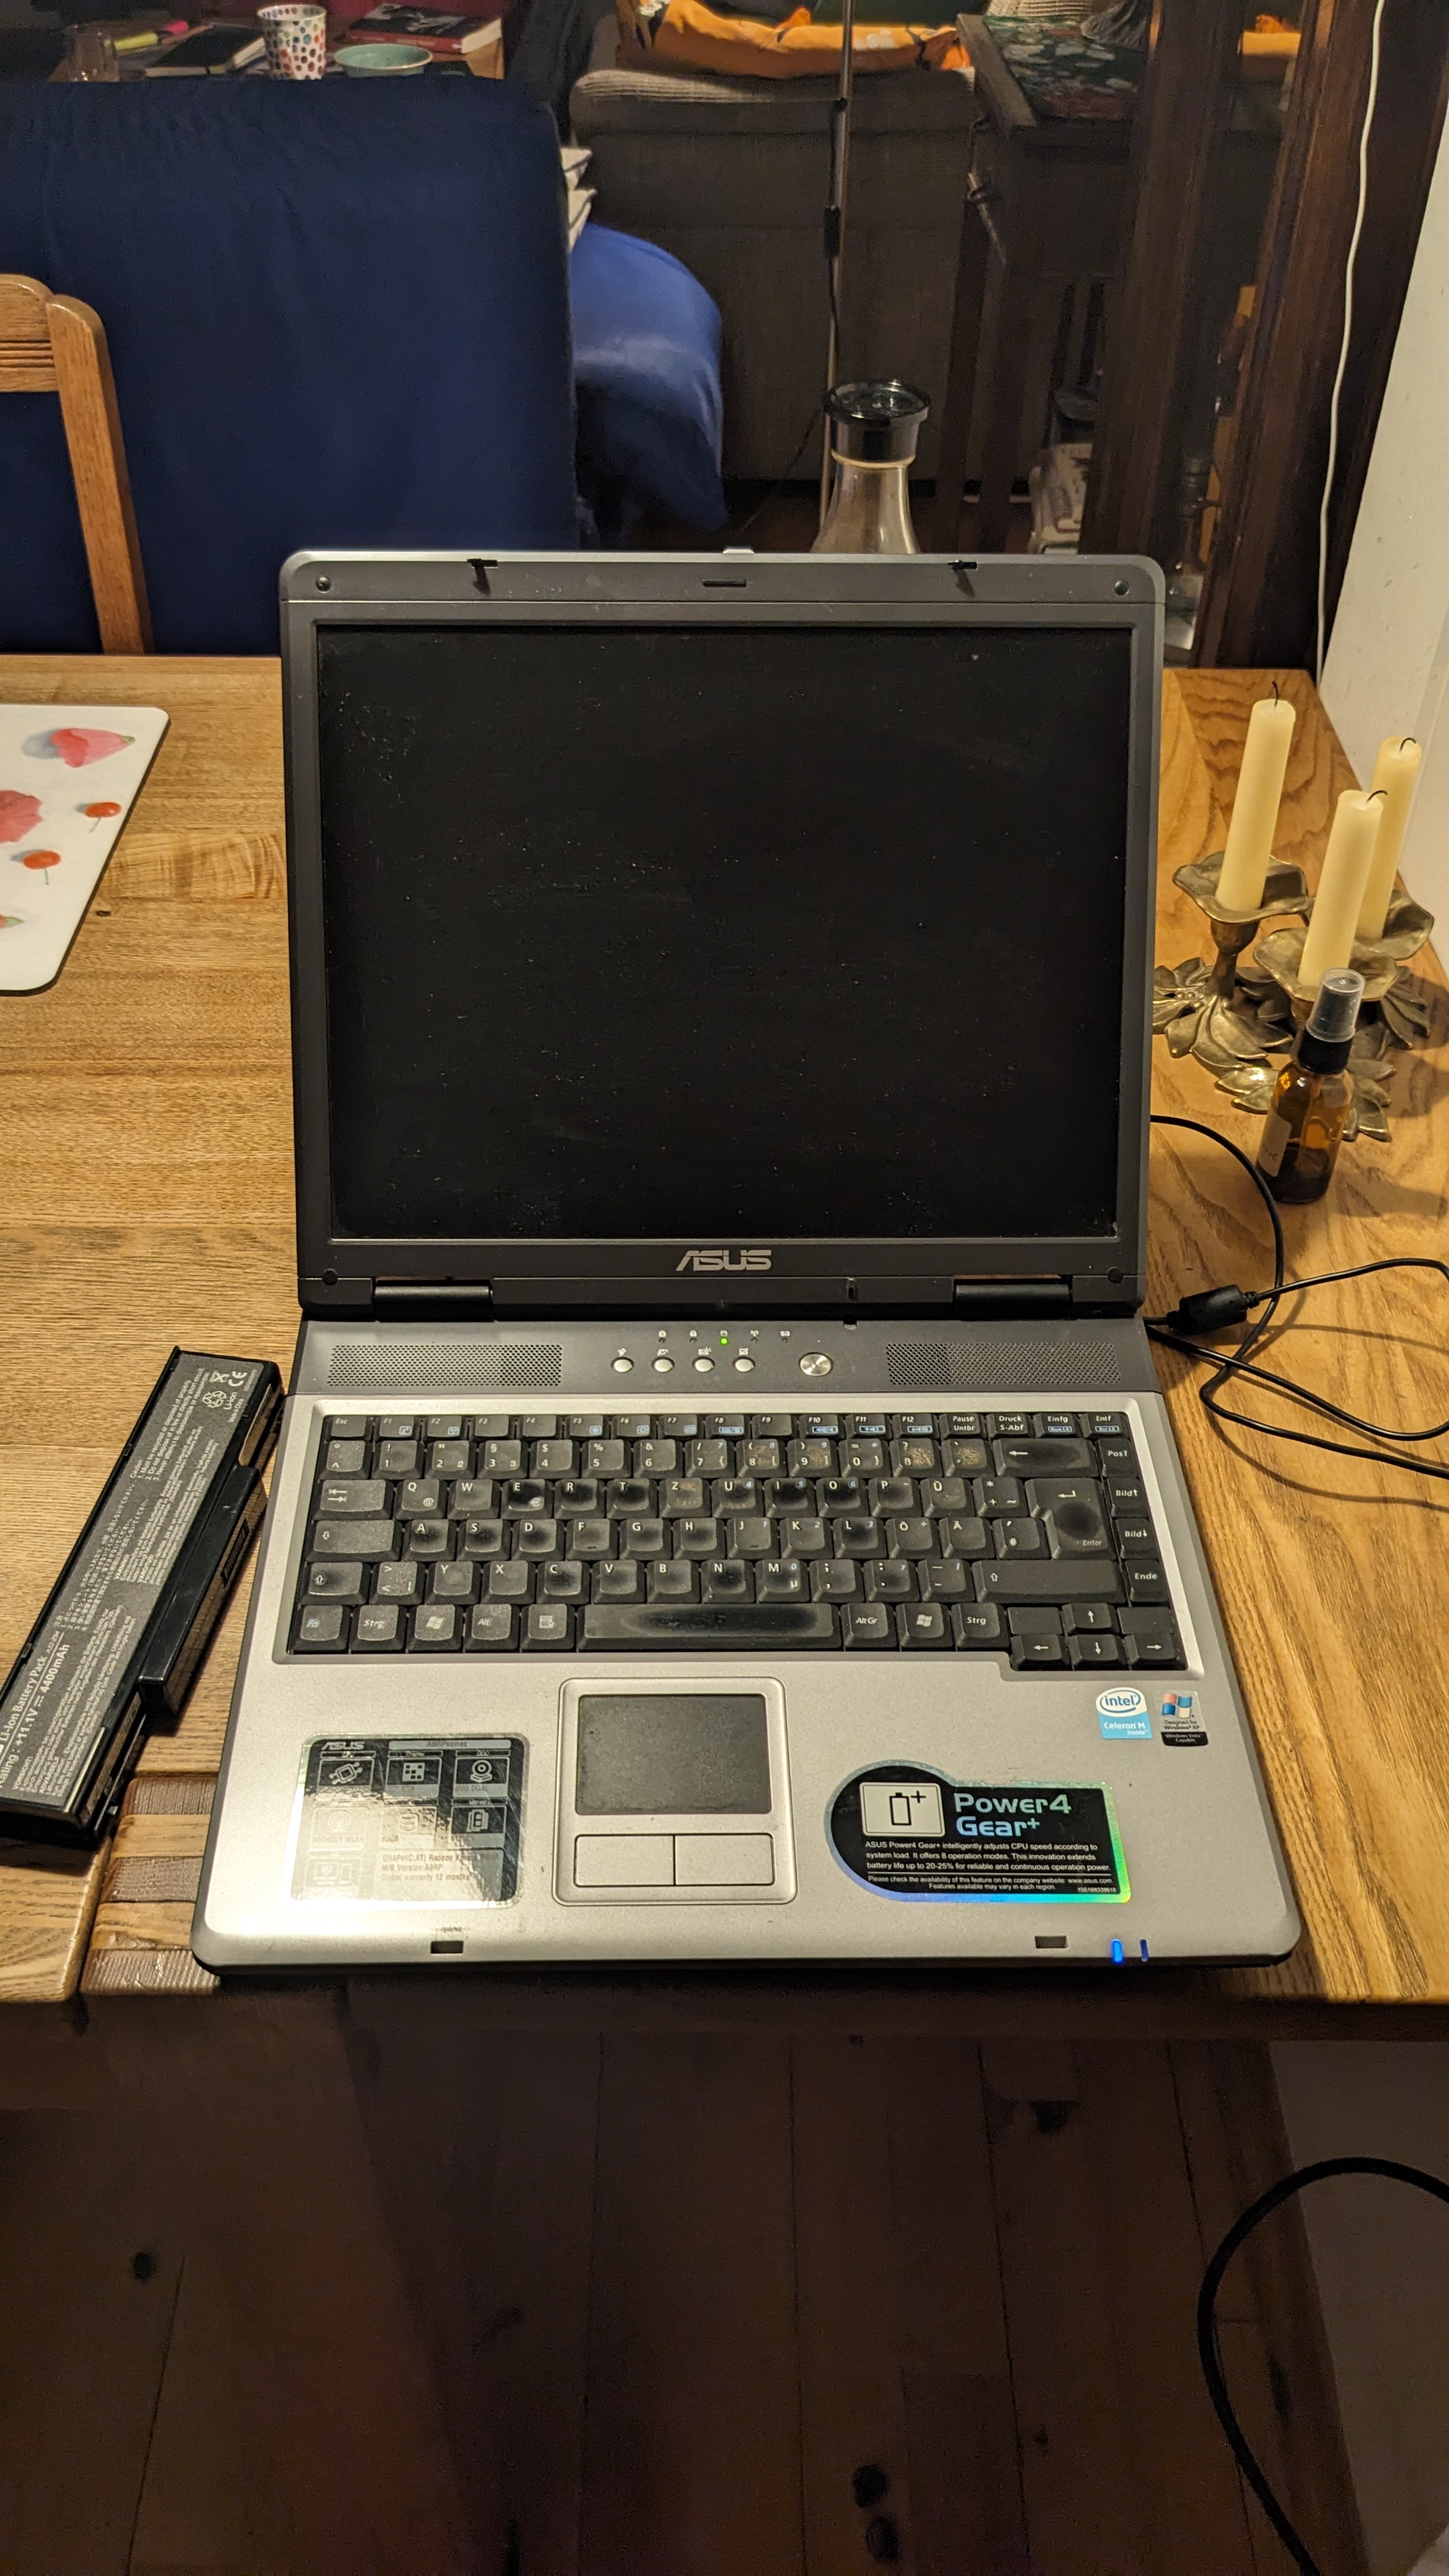
Found two spare notebooks at my parents place, that where supposed to go to the bin. The first one was an ASUS A9RP-5057H. Unfortunately after turning it nothing appeared on the screen. Tested it with the charged battery in it and without.
The second notebook was a Dell Inspiron 6400. That one booted on start slowly but flawlessly into Windows 8. As this notebook was still running out of the box I will move forward with this one for the thesis.
2025-01-07
I tried to install Fedora 42 on the Dell Inspiron 6400. Did not work as the Inspiron 6400 has a 32bit architecture while the Fedora ISO image I had was for 64bit systems.
Then I installed a Debian ISO Image for 32bit systems on the laptop.
2025-01-08
I thought a bit about what I still want to develop/test or do with the servers before starting to develop the website that they should serve.
It basically comes down to these three things:
1. Display system stats and noise of the PC (contact microphone)
This means two things. On one hand I need to test the contact microphone. This contains getting a signal from the microphone as well as developing an API endpoint that streams the audio signal.
This comes down to the following steps: 1. Get a signal from the contact microphone 2. Detect that signal on the server side 3. Create a stream endpoint for the audio signal
On the other hand I need to read system data such as RAM usage or CPU temperature and expose those through a single endpoint or through multiple endpoints.
I can achieve this by doing these steps 1. See which system data I can read 2. Decide which system data could be interesting to expose/could be interesting for the user 3. Decide if the values should be exposed through individual endpoints or through single one 4. Implement them on the server side
What do these things add to my artwork? Well one of the main points I want to achieve with this art piece is to uncover hidden layers of how the internet works. What does it actually mean to get a website served from a machine? I want to achieve this by making the whole experience of the website more tangible. By adding system status and also the noise I hope to create a more tangible experience.
2. File Upload / Download –> Distributed file system
Another thing that could be an interesting addition to the art piece is the ability for the visitors/users of the website to upload, download and maybe even rename and delete files.
This would turn the website into a communal space where the actions of the visitors have a real impact on the experience of the next visitor. This also raises the question on how the visitors react as soon as the disk space of the nodes is full. - Do they start to recklessly delete files? - Are they surprised by the limitation?
By confronting them with the limited disk space the art piece creates another tangible layer, which again should uncover the hidden workings of the web.
Additionally these would give us net artist that will develop the website another material to work with. We could maybe interpret or react to the file uploads. This could happen through processing the files or displaying certain metadata of the files.
One of my ideas would be to just plot the Bit Arrays (?) (you know, ones and zeros as maybe black and white squares) in the background after a file got uploaded.
We could also interpret a system to confront the visitors with the limited disk space while it is getting fuller or as soon as it is completely full.
3. Peer-to-Peer Network, files are served decentralised
- How can we visualize “Hello” requests and “Handshake”/health checks?
- How is this consolidated into one website?
Ideas parking lot:
- Somehow illuminate the inside of the PCs —> better visibility
- LED strips with warm white light (no RGBs!)
2025-01-09
Wrote an Ansible playbook to deploy the hono/deno server for the nodes. Deployed it for now on a VM setup through UTM on my Mac.
2025-02-21
Clemens fixed the PowerPC Mac G4 by re-soldering the old heat of the power supply to a new power supply. Now the Mac works and we could even boot it correctly and open up MacOS.
2025-03-15
As I had problems with setting up audio on alpine, more precisely recording from a microphone, I researched a bit.
Consolidating some articles I should do the following steps:
- Install DBus and start a DBus session
- Add user to audio and video group
- Add pipewire & wireplumber
- Maybe setup ALSA
- Install pipewire-alsa
- https://wiki.alpinelinux.org/wiki/ALSA
- Start the pipewire-launcher
/usr/libexec/pipewire-launcher - Add
export $(dbus-launch) /usr/libexec/pipewire-launcherto the shell configuration
What I actually did
Dbus per session
If first installed dbus:
sudo apk add dbusThen I set it to auto start on system boot and started it manually after that for my session. The system boot is important for the Ansible playbook later, the manual start not.
Start on system boot a system wide dbus session:
sudo rc-update add dbusStart system wide dbus session:
sudo rc-service dbus startALSA
Installation:
sudo apk add alsa-utils alsaconfAdd users to audio group
sudo addgroup $USER audio
sudo addgroup root audio
I checked the soundcard:
alsamixerMake sure everything is turned up:
# Unmute and set Master volume to 80%
sudo amixer -c 0 sset Master unmute
sudo amixer -c 0 sset Master 80%

# Unmute and set Speaker volume to 80%
sudo amixer -c 0 sset Speaker
unmute sudo amixer -c 0 sset Speaker 80%

# Unmute and set Headphone volume to 80%
sudo amixer -c 0 sset Headphone unmute
sudo amixer -c 0 sset Headphone 80%

# Unmute and set microphone (if needed)
sudo amixer -c 0 sset Mic unmute
sudo amixer -c 0 sset Mic 70%
sudo amixer -c 0 sset "Mic Boost" 50%

# Adjust Line if needed
sudo amixer -c 0 sset Line unmute
sudo amixer -c 0 sset Line 80%

# Unmute and set PCM volume to 80% (if it exists)
sudo amixer -c 0 sset PCM unmute 2>/dev/null
sudo amixer -c 0 sset PCM 80% 2>/dev/null

# Store the settings
sudo alsactl store
After that one should change the soundcard in the alsa setting by running this command:
sudo vi /usr/share/alsa/alsa.confand changing these two lines to the sound card you wanna use:
defaults.ctl.card 0
defaults.pcm.card 0
In my case the soundcard I wanted to use, was the 0
soundcard, that’s why I left is as is.
As the last step ALSA nees to be started and added to the default runtime to make it start on boot:
rc-service alsa start
rc-update add alsa
Then we need to make sure that the microphones are always able to record something by turning them on.
#### Ensuring microphones are always enabled for capture

# 1. Enable capture for all available inputs
sudo amixer -c 0 sset "Capture" cap
sudo amixer -c 0 sset "Capture" 100%
sudo amixer -c 0 sset "Mic Boost" 100%

# 2. Make sure Mic is selected as the capture source
sudo amixer -c 0 sset "Mic" cap
sudo amixer -c 0 sset "Line" cap  # Enable Line input as fallback

# 3. Create startup script to ensure mics are always enabled
cat > /etc/local.d/enable-mics.start << 'EOF'
#!/bin/sh

# Wait for sound system to initialize
sleep 2

# Enable all capture devices
amixer -c 0 sset "Capture" cap
amixer -c 0 sset "Capture" 100%
amixer -c 0 sset "Mic Boost" 100%
amixer -c 0 sset "Mic" cap
amixer -c 0 sset "Line" cap

# Create a test recording to verify mic is working
arecord -d 1 -f S16_LE -r 44100 -c 2 /tmp/mic-test.wav 2>/dev/null || true

# Log result
echo "Microphone initialization completed at $(date)" >> /var/log/mic-setup.log

exit 0
EOF

# 4. Make the startup script executable and add to startup
sudo chmod +x /etc/local.d/enable-mics.start
sudo rc-update add local default

# 5. Create an ALSA state file that ensures mics are enabled at boot
sudo alsactl store

# 6. Add custom rules to ALSA configuration to prioritize recording
cat > /etc/asound.conf << 'EOF'
pcm.!default {
    type asym
    playback.pcm "playback"
    capture.pcm "capture"
}

pcm.playback {
    type plug
    slave.pcm "hw:0,0"
}

pcm.capture {
    type plug
    slave.pcm "hw:0,0"
}

# Prioritize capture
defaults.pcm.!card 0
defaults.pcm.!device 0
defaults.ctl.!card 0
EOF

# 7. Reboot to ensure all changes take effect
echo "Configuration complete. Reboot system to apply all changes."
The ALSA implementation is enough to be able to record something. PipeWire and WirePlumber not needed.
PipeWire & WirePlumber
Installation:
sudo apk add pipewire wireplumber pipewire-alsa1. Create the PipeWire Configuration
Create the configuration directory:
sudo mkdir -p /etc/pipewire/Create a comprehensive PipeWire configuration:
sudo tee /etc/pipewire/pipewire.conf <<EOF
context.properties = {
    core.daemon = true
    core.name = pipewire-0
    default.clock.rate = 48000
    default.clock.quantum = 1024
    default.clock.min-quantum = 32
    default.clock.max-quantum = 8192
}

context.spa-libs = {
    audio.convert.* = audioconvert/libspa-audioconvert
    api.alsa.* = alsa/libspa-alsa
    api.v4l2.* = v4l2/libspa-v4l2
    api.libcamera.* = libcamera/libspa-libcamera
}

context.modules = [
    { name = libpipewire-module-rt
        args = {
            nice.level = -11
        }
        flags = [ ifexists nofail ]
    }
    { name = libpipewire-module-protocol-native }
    { name = libpipewire-module-profiler }
    { name = libpipewire-module-metadata }
    { name = libpipewire-module-spa-device-factory }
    { name = libpipewire-module-spa-node-factory }
    { name = libpipewire-module-client-node }
    { name = libpipewire-module-client-device }
    { name = libpipewire-module-access
        args = {
            # Allow access to all users in the "audio" group
            access.allowed = [ "*" ]
            access.rejected = [ ]
            access.allowed-groups = [ "audio" ]
        }
    }
    { name = libpipewire-module-adapter }
    { name = libpipewire-module-link-factory }
    { name = libpipewire-module-session-manager }
    { name = libpipewire-module-portal
        flags = [ ifexists nofail ]
    }
]
EOF
2. Create WirePlumber Configuration
Create the WirePlumber configuration directory:
sudo mkdir -p /etc/wireplumber/main.lua.d/Create ALSA configuration for WirePlumber:
sudo tee /etc/wireplumber/main.lua.d/51-alsa-config.lua <<EOF
alsa_monitor.enabled = true

alsa_monitor.properties = {
  -- Use ALSA device with highest priority
  ["alsa.reserve"] = true,
  ["alsa.reserve.priority"] = -20,
  ["alsa.reserve.application-name"] = "WirePlumber",

  -- ALSA device naming
  ["alsa.midi.node-name"] = "%f",
  ["alsa.midi.node-description"] = "%f",
}

alsa_monitor.rules = {
  {
    matches = {
      {
        -- Match all audio devices
        { "node.name", "matches", "alsa_input.*" },
        { "node.name", "matches", "alsa_output.*" },
      },
    },
    apply_properties = {
      ["node.nick"] = "ALSA Device",
      ["priority.driver"] = 100,
      ["priority.session"] = 100,
    },
  },
}
EOF
Enable all audio devices:
sudo tee /etc/wireplumber/main.lua.d/90-enable-all-audio.lua <<EOF
table.insert(alsa_monitor.rules, {
  matches = {
    {
      { "device.name", "matches", "alsa_card.*" },
    },
  },
  apply_properties = {
    ["api.alsa.use-acp"] = true,
    ["api.acp.auto-profile"] = true,
    ["api.acp.auto-port"] = true,
  },
})
EOF
3. Create Improved OpenRC Service Files
Create an improved PipeWire service with proper socket permissions:
sudo tee /etc/init.d/pipewire <<EOF
#!/sbin/openrc-run
name="PipeWire"
description="PipeWire Media Server"

command="/usr/bin/pipewire"
command_background="yes"
pidfile="/run/pipewire.pid"
supervisor="supervise-daemon"

# Ensure proper environment
export XDG_RUNTIME_DIR="/var/run/pipewire"
export DBUS_SESSION_BUS_ADDRESS="unix:path=/var/run/dbus/system_bus_socket"

# Create necessary directories
start_pre() {
    # Create directory with proper permissions
    checkpath -d -m 0775 -o root:audio /var/run/pipewire

    # Verify dbus is running
    if ! service_started dbus; then
        eerror "D-Bus is not running. PipeWire requires D-Bus."
        return 1
    fi
}

# Set proper permissions after PipeWire starts
start_post() {
    # Wait a moment for sockets to be created
    sleep 2

    # Set permissions on all PipeWire sockets
    chmod 660 /var/run/pipewire/pipewire-0
    chmod 660 /var/run/pipewire/pipewire-0-manager
    chown root:audio /var/run/pipewire/pipewire-0
    chown root:audio /var/run/pipewire/pipewire-0-manager
}

depend() {
    need dbus
    after alsasound
}
EOF
Create a WirePlumber service:
sudo tee /etc/init.d/wireplumber <<EOF
#!/sbin/openrc-run
name="WirePlumber"
description="PipeWire Session Manager"

command="/usr/bin/wireplumber"
command_background="yes"
pidfile="/run/wireplumber.pid"
supervisor="supervise-daemon"

# Set environment
start_pre() {
    export XDG_RUNTIME_DIR=/var/run/pipewire
    export DBUS_SESSION_BUS_ADDRESS="unix:path=/var/run/dbus/system_bus_socket"

    # Verify pipewire is running
    if ! service_started pipewire; then
        eerror "PipeWire is not running. WirePlumber requires PipeWire."
        return 1
    fi
}

depend() {
    need dbus pipewire
    after pipewire
}
EOF
Make service files executable:
sudo chmod 755 /etc/init.d/pipewire
sudo chmod 755 /etc/init.d/wireplumber
4. Set User Environment Configuration
Create client configuration for non-root users:
sudo mkdir -p /etc/pipewire/client.conf.d/
sudo tee /etc/pipewire/client.conf.d/99-system-access.conf <<EOF
client.access = {
    # Make it explicitly use the socket in /var/run/pipewire
    path = "/var/run/pipewire/pipewire-0"
    allowed = [ "audio" ]
}
EOF
Add environment variables to your user profile:
echo 'export XDG_RUNTIME_DIR=/var/run/pipewire' >> ~/.profile
echo 'export PIPEWIRE_RUNTIME_DIR=/var/run/pipewire' >> ~/.profile
Create symbolic link for socket discovery:
mkdir -p ~/.local/share/
ln -sf /var/run/pipewire ~/.local/share/pipewire
Source your profile to apply changes:
source ~/.profile5. Enable and Start Services
Add services to default runlevel:
sudo rc-update add pipewire default
sudo rc-update add wireplumber default
Start the services:
sudo rc-service pipewire start
sleep 2  # Give PipeWire time to initialize
sudo rc-service wireplumber start
6. Verify Setup
Check if services are running:
pgrep -a pipewire
pgrep -a wireplumber
Verify that your user can access PipeWire:
pw-cli help
pw-cli list-objects
Test recording capabilities:
pw-record test.wav # Press Ctrl+C after a few seconds to stopTroubleshooting
If your user still cannot access PipeWire, check:
- That your user is in the audio group:
groups $(whoami)- That socket permissions are correct:
ls -l /var/run/pipewire/- Log out and log back in to refresh group memberships.
Dbus per user
DBus
If first installed dbus:
sudo apk add dbusThen I set it to auto start on system boot and started it manually after that for my session. The system boot is important for the Ansible playbook later, the manual start not.
Start on system boot a system wide dbus session:
rc-update add dbusStart system wide dbus session:
rc-service dbus startThen I created an Open RC service to have a persistent DBus session for the ssw user:
cat <<EOF | sudo tee /etc/init.d/dbus-user
#!/sbin/openrc-run

command="/usr/bin/dbus-daemon"
pidfile="/run/user/$(id -u)/dbus.pid"
DBUS_USER_DIR="/run/user/$(id -u)"

depend() {
    need localmount
}

start_pre() {
    # Ensure the user runtime directory exists
    if [ ! -d "$DBUS_USER_DIR" ]; then
        mkdir -p "$DBUS_USER_DIR"
        chown $(id -u):$(id -g) "$DBUS_USER_DIR"
        chmod 700 "$DBUS_USER_DIR"
    fi
}

start() {
    ebegin "Starting dbus-user"
    start-stop-daemon --start --background --make-pidfile --pidfile "$pidfile" \
        --exec $command -- --session --address=unix:path=$DBUS_USER_DIR/bus --nofork
    eend $?
}

EOF
Then I changed the permissions and enabled it to start on boot
sudo chmod +x /etc/init.d/dbus-user
sudo rc-update add dbus-user default
sudo rc-service dbus-user start
Then I added this line to ~/.profile to persist the
DBUS_SESSION_BUS_ADDRESS:
echo 'export DBUS_SESSION_BUS_ADDRESS="unix:path=/run/user/$(id -u)/bus"' >> ~/.profile2025-03-17
Maybe I can use NFC Tags that are attached to the PCs which then point to the related URL?
2025-03-20
I implemented the ALSA installation in an Ansible Playbook and tested it on a different device. After some debugging it worked and the audio could be listened to on the website.
URL Setup
I decided that the servers will be available at separate sub domains. Specifically these ones:
- n-1.sys-net-visible.scheffczyk.org
- n-2.sys-net-visible.scheffczyk.org
- n-3.sys-net-visible.scheffczyk.org
- n-4.sys-net-visible.scheffczyk.org
- n-5.sys-net-visible.scheffczyk.org
I added a DNS entry for each of the URLs and also changed the Traefik setup on my VPS. Currently if you now reach the parent URL sys-net-visible.sheffczyk.org nothing happens. In the future it might redirect to one of the sub-domains.
2025-04-15
Today I am going to brainstorm some ideas for the installation setup and going to make some decisions. Currently I am looking at these images as a possible direction.


I showed Katja these images and she recommended to me that I should look up the artist Adam Basanta.
On his Instagram I found the installations Crawler (a model of learning, Invisible Labour and The Unknown Future Rolls Towards Us, which I found aesthetically inspiring.
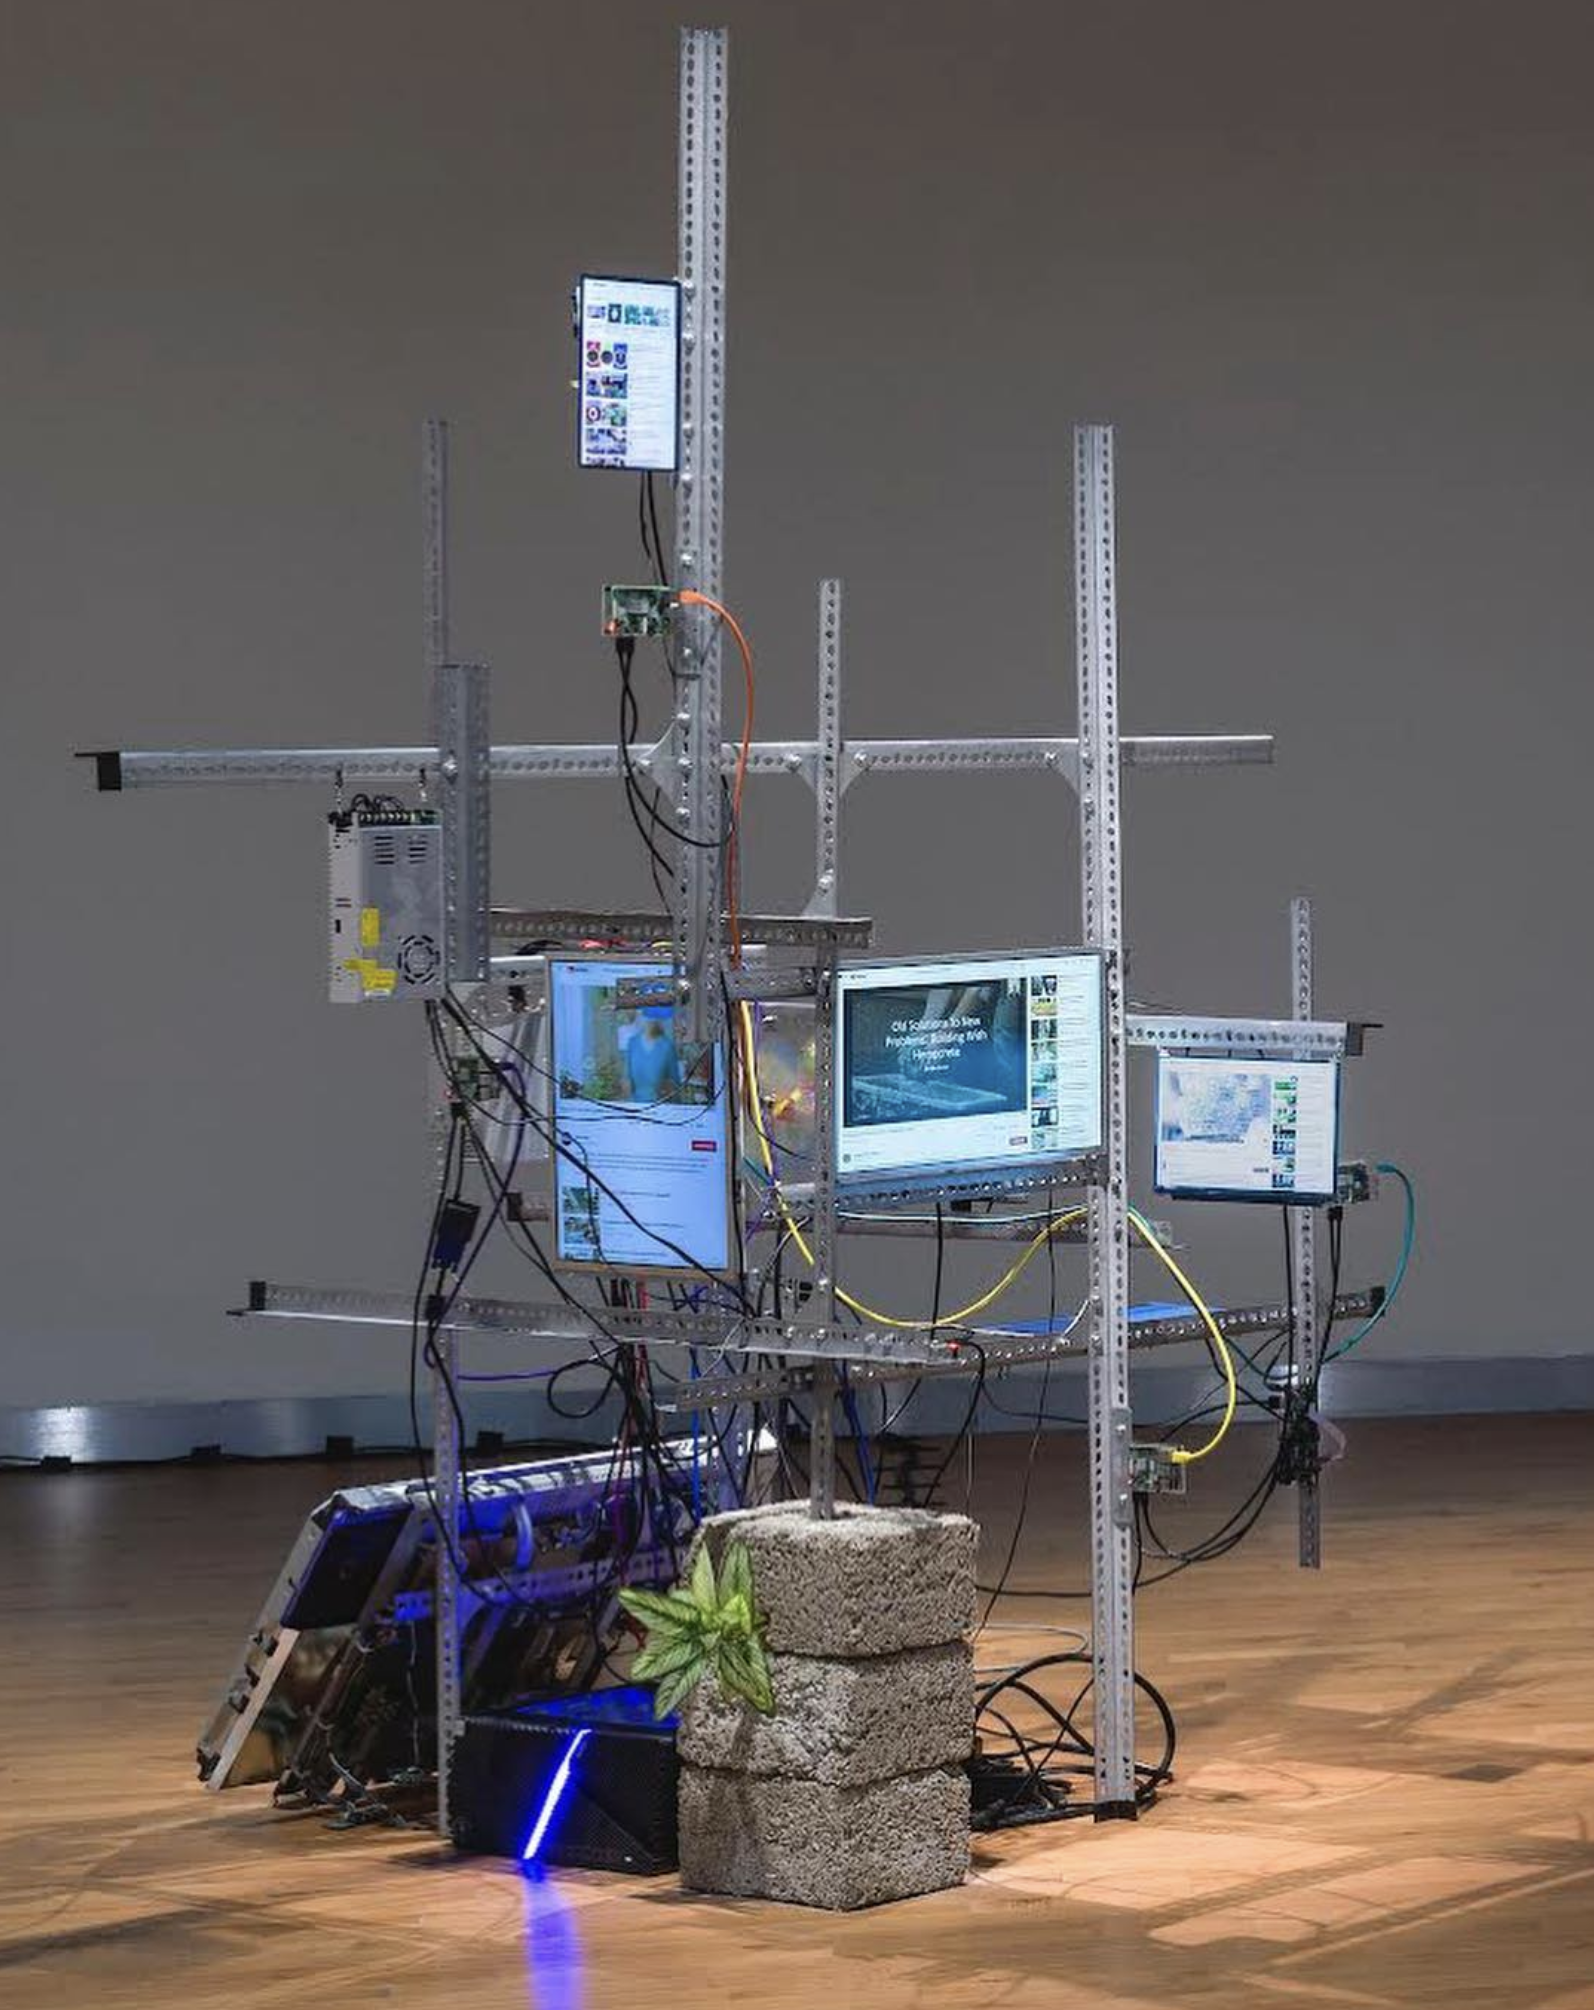


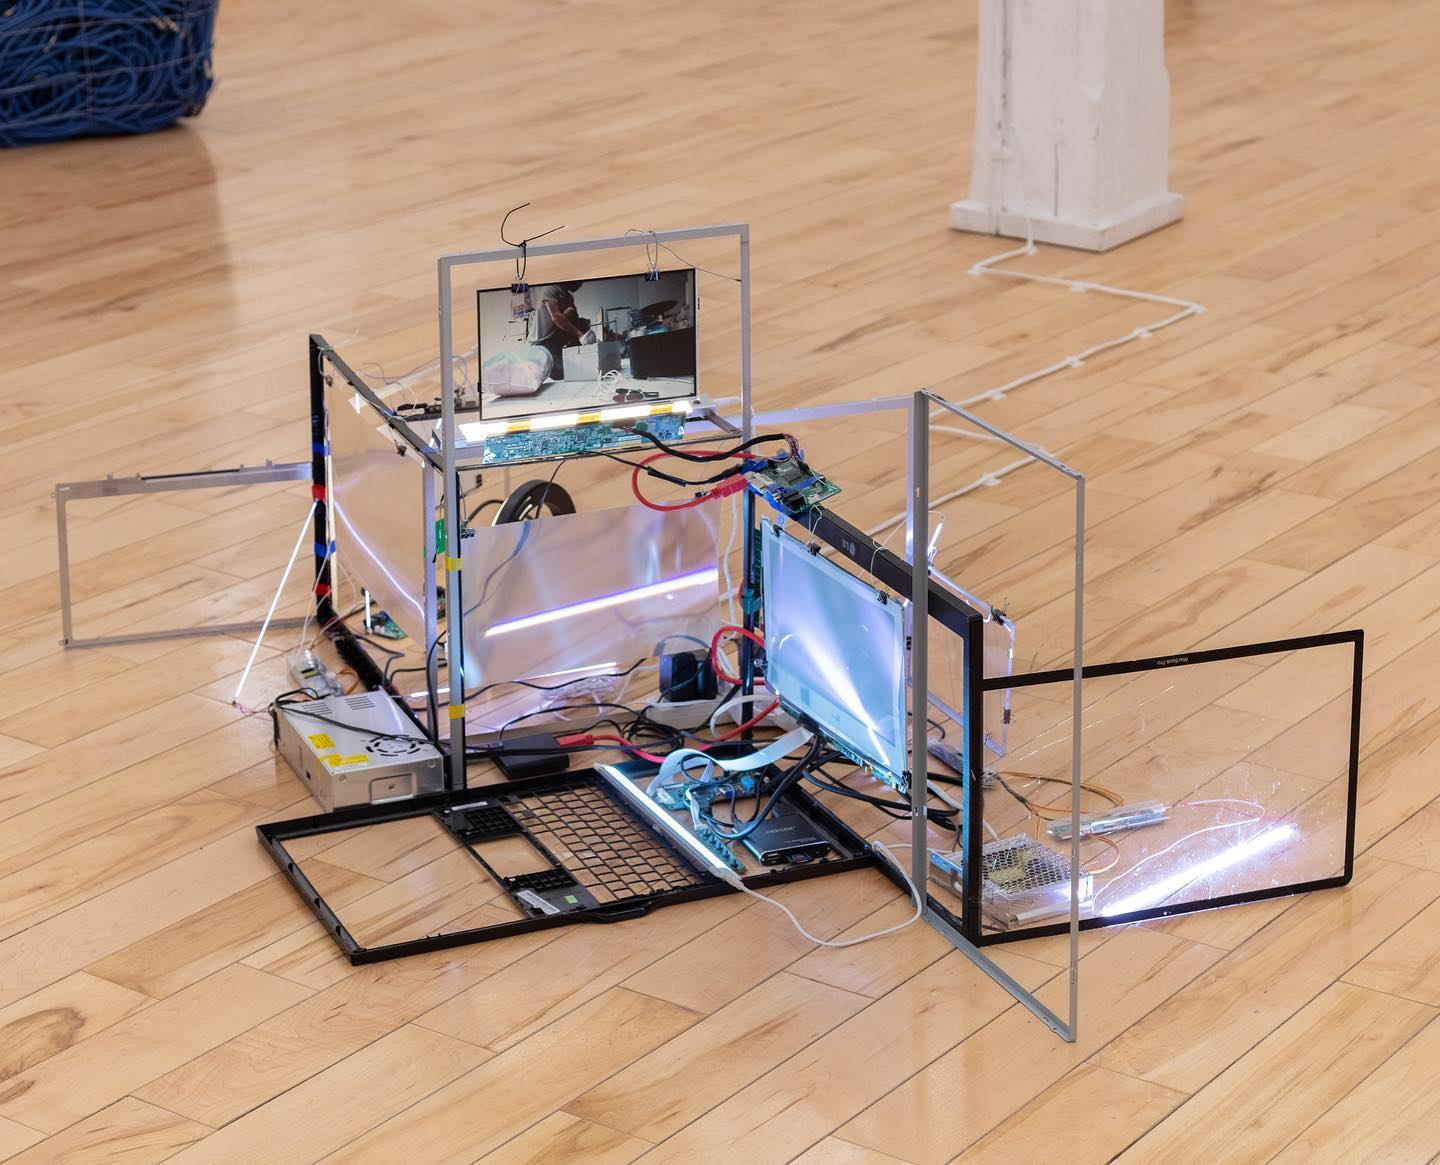
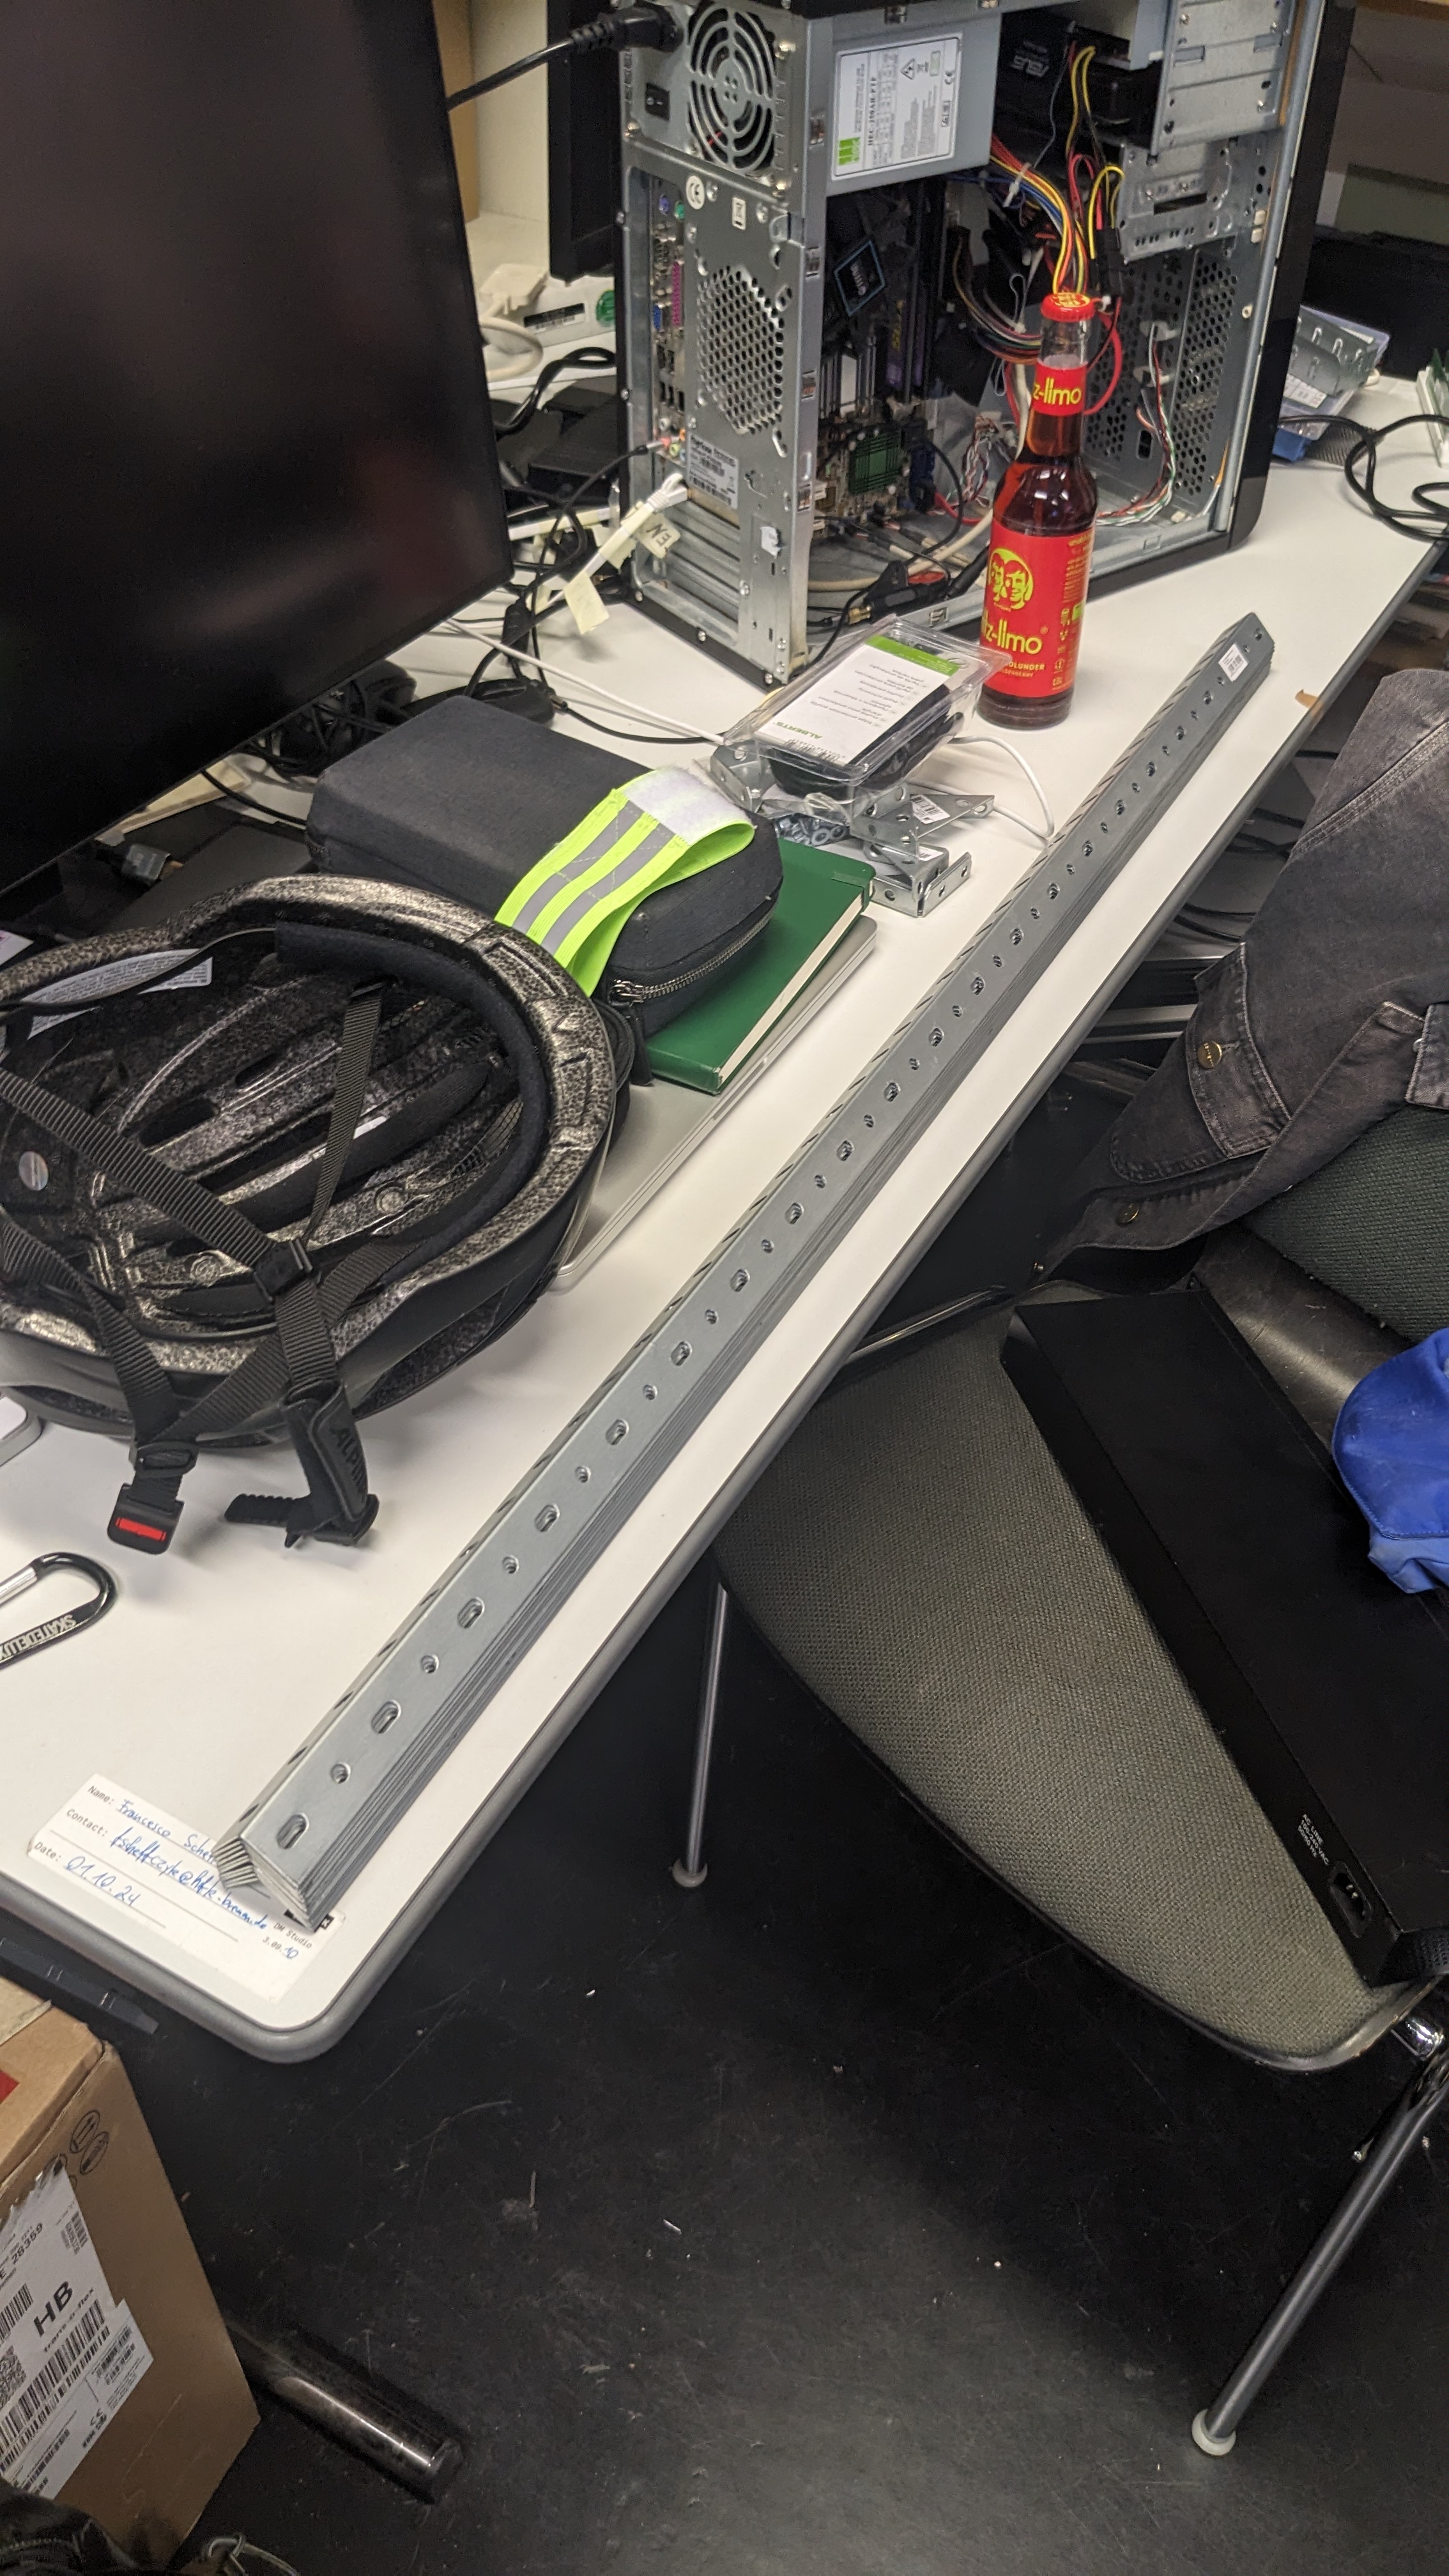
Inspired by these installation I decided to build mine in a similar fashion with angled iron profiles. Ideally they would also be recycled but for a faster prototyping I decided to buy some new ones.
2025-04-16
It is time to get the phone running! Based on this tutorial I am going to try to install Alpine on it inside of Termux.
As the tutorial recommends to use PRoot Distro, I will try this first.
Installing Alpine through PRoot Distro
First I updated all packages:
pkg upgrade -yThen I installed PRoot Distro with the package manager:
pkg install proot-distroThen I installed Alpine Linux with
pd install alpineand logged into the distro with
pd login alpine --fix-low-portsI successfully logged in as root.
Setting up Alpine
Now I need to setup Alpine so it would work with my current Ansible pipeline.
First I need to install openrc to enable
rc-status and rc-service.
apk add openrcThen I need to install openssh
apk add opensshTo be able to run openrc services inside a chroot environment I need to do this
touch /run/openrc/softlevelThen I can check if the sshd service is running
rc-service sshd statusIf it is not running run this
rc-update add sshdrc-service sshd startThis does not work. The service crashes. The problem with
proot environments is that some permissions are not given
inside the environment. For example the sshd service would
need to write a PID file into the /run folder, which is not
possible inside a virtualised proot environment.
Let’s try a different approach
Execute Go binary manually
Following this tutorial I wanna see if I can just copy over the Go binary and HTML Files without using the Ansible playbooks. Also used some part of this wiki for the setup.
First remove the distribution and the PRoot Distro package.
pd remove alpinepkg remove proot-distroThen try to update everything on the root system again
pkg update & pkg upgradeThen install some necessary packages
pkg install wget curl openssh neofetch nmap -yNow enable ssh
sshdCopy SSH key over
To copy the SSH key over we first need to set a new password for the password authentication. Do this by running.
passwdNext copy over your public SSH key. To do this you need to get the IP address of the phone via
ifconfigand you need to figure out who you are with:
whoamiNow you can copy the key with ssh-copy-id. Be aware to
use port 8022 as this is the default SSH port for termux.
ssh-copy-id -p 8022 u0_a47@10.10.51.202When prompted enter the password you defined earlier.
Login via SSH
Now everything should be setup for login in via SSH. Try to login running the following command:
ssh -p 8022 u0_a47@10.10.51.202After that, copy over the Ghostty terminfo to be able to use nano and
vim in the ssh session. To do that you first need to install
tic.
pkg install ncurses-utilsinfocmp -x ghostty | ssh -p 8022 u0_a47@10.10.51.202 -- tic -x -If this was successful it means that the public key work. Therefore
the password authentication can be disabled. For that edit the file
$PREFIX/etc/ssh/sshd_config and set
PasswordAuthentication no
nano $PREFIX/etc/ssh/sshd_configCool, SSH access seems to work! 🥳
Start Go server in Termux
To make sure everything runs as smoothly as possible install update and upgrade the packages.
pkg update && pkg upgradeOn your local machine navigate to the server directory and compile the server for the Fairphone as a target
cd $CODE/sys-net-visible/server && GOOS=android GOARCH=arm64 CGO_ENABLED=0 go build -o fairphone-server cmd/api/main.goThen create a folder for the server on the phone copy over the config, the HTML site and the binary
# Server folder
mkdir opt
mkdir opt/sys-net-visible-server
mkdir opt/sys-net-visible-server/html

chmod 755 opt/sys-net-visible-server
chmod 755 opt/sys-net-visible-server/html
Copy over the files
# Server binary
scp -P 8022 -r $CODE/sys-net-visible/server/fairphone-server u0_a47@10.10.51.202:~/opt/sys-net-visible-server/
# Server config
scp -P 8022 -r $CODE/sys-net-visible/server/fairphone-config.json u0_a47@10.10.51.202:~/opt/sys-net-visible-server/config.json# Server HTML
scp -P 8022 -r $CODE/sys-net-visible/public/node01/* u0_a47@10.10.51.202:~/opt/sys-net-visible-server/htmlStart the server by navigating to the server directory and execute the binary
cd ~/opt/sys-net-visible-server && ./fairphone-serverNice, the server is running! 🥳
Fix /audio endpoint
Let’s try to fix the audio endpoint now. As we are streaming the
audio with arecord the alsa-utils library
needs to be installed.
pkg install alsa-utilsThis did not work as the asla-utils could not detect a
device for recording. I also tried termux-microphone-record
but this does not output to stdout, which makes it unsuitable for
streaming.
Based on this reddit thread it is apparently possible to use Pulseaudio in Termux for audio streaming.
First I needed to install pulseaudio:
pkg update
pkg install pulseaudio
Then I started the Pulseaudio server:
pulseaudio --start --exit-idle-time=-1Then the SLES Module is loaded
pactl load-module module-sles-sourceTo automate this create this file
~/.termux/boot/boot-pulseaudio.sh. First add the
directories
mkdir -p ~/.termux
mkdir -p ~/.termux/boot/
Then add the file
nano $PREFIX/etc/profile.d/boot-pulseaudio.sh#!/data/data/com.termux/files/usr/bin/sh
# Kill any existing pulseaudio processes
pkill -f pulseaudio
# Clean up any leftover files that might prevent pulseaudio from starting
rm -f ~/.config/pulse/pid
rm -rf /data/data/com.termux/files/usr/tmp/pulse-*
# Start PulseAudio with specific socket path in Termux environment
pulseaudio --start --exit-idle-time=-1 --verbose
# Give PulseAudio a moment to initialize
sleep 5
# Load the SLES source module
pactl load-module module-sles-source
# Verify pulseaudio is running properly
if pactl info >/dev/null 2>&1; then
echo "PulseAudio setup completed successfully!"
else
echo "PulseAudio failed to start properly. Please check the logs."
fiMake the file executable
chmod +x $PREFIX/etc/profile.d/boot-pulseaudio.shThen create a boot file to enable the service
nano ~/.termux/boot/enable-pulseaudio#!/data/data/com.termux/files/usr/bin/sh
termux-wake-lock
source /data/data/com.termux/files/usr/etc/profile.d/boot-pulseaudio.shAutostart sshd
Create the file ~/.termux/boot/start-sshd
nano ~/.termux/boot/start-sshd#!/data/data/com.termux/files/usr/bin/sh
termux-wake-lock
sshdAutostart server
#!/data/data/com.termux/files/usr/bin/sh
# Keep Termux awake to ensure the server stays running
termux-wake-lock

# Create logs directory if it doesn't exist
mkdir -p ~/logs

# Change to the server directory
cd ~/opt/sys-net-visible-server/

# Start the server in the background with output logging
./server > ~/logs/sys-net-visible-server.log 2>&1 &

# Optionally, write the PID to a file for easier management
echo $! > ~/logs/sys-net-visible-server.pid

# Print a message indicating server has started
echo "Server started with PID $(cat ~/logs/sy-net-visible-server.pid)"
With this I managed to get Pulseaudio and the server to start automatically when a Termux instance is started. Now I only need to add the autostart for the SSH Tunnel. Will do this tomorrow.
2025-04-17
Today I will try to add an SSH Tunnel to the Phone server.
Requirements
First you need to implement add some environment variables to the
.bashrc.
nano $HOME/.bashrcVPS_USER="USER" # User on the VPS (e.g., root, admin, tunneluser)
VPS_HOSTNAME="IP_ADDRESS" # IP address or hostname of your VPS
REMOTE_PORT="PORT" # The port on the VPS that will forward to the local port
LOCAL_PORT="8080" # The local port on the Termux device to forward (e.g., the Termux SSH port)
TUNNEL_KEY_PATH="$HOME/.ssh/tunnel_key" # Path for the specific key
SSH_CONFIG_PATH="$HOME/.ssh/config"
# Optional: Define a specific alias/host entry for the VPS connection in SSH config
VPS_HOST_ALIAS="vps-tunnel-host"source $HOME/.bashrcThen you need to upgrade and install some necessary packages. To
create and automatic SSH Tunnel we will be using
autossh.
pkg update
pkg upgrade -y # Recommended before installing new packages
pkg install -y openssh autossh termux-services termux-api
Ensure the .ssh directory exists.
Create the SSH key
Now you need to create an SSH key for the connection.
ssh-keygen -t ed25519 -f "$TUNNEL_KEY_PATH" -N ""

# Ensure private key has correct permissions (usually set by ssh-keygen, but doesn't hurt to check)
chmod 600 "$TUNNEL_KEY_PATH"
chmod 644 "${TUNNEL_KEY_PATH}.pub"
Next create an SSH configuration to use a specific key when connecting to the VPS.
# Create or append to the SSH config file
cat << EOF >> "$SSH_CONFIG_PATH"

Host ${VPS_HOST_ALIAS}
    HostName ${VPS_HOSTNAME}
    User ${VPS_USER}
    Port 22 # Or your VPS SSH port if not standard 22
    IdentityFile ${TUNNEL_KEY_PATH}
    # Optional: Add options for robustness if needed
    # ServerAliveInterval 60
    # ServerAliveCountMax 3
EOF

# Set correct permissions for the config file
chmod 600 "$SSH_CONFIG_PATH"
Copy SSH key
Copy the SSH key to the VPS using ssh-copy-id.
ssh-copy-id -i "${TUNNEL_KEY_PATH}.pub" -p 722 "${VPS_USER}@${VPS_HOSTNAME}"Create the service
Create the service directory
mkdir -p "$PREFIX/var/service/reverse-tunnel/log"Next create the run script. This script start
autossh.
# Create the run script
cat << EOF > "$PREFIX/var/service/reverse-tunnel/run"
#!/data/data/com.termux/files/usr/bin/sh
export AUTOSSH_GATETIME=0
export AUTOSSH_POLL=60
# Optional: uncomment the next line to use termux-wake-lock
termux-wake-lock
# Ensure the log directory exists (good practice)
mkdir -p "$PREFIX/var/service/reverse-tunnel/log/main"
# Run autossh, redirecting stderr to stdout for logging
exec autossh -M 0 -N -T -R ${REMOTE_PORT}:localhost:${LOCAL_PORT} ${VPS_HOST_ALIAS} 2>&1
EOF

# Make the run script executable
chmod +x "$PREFIX/var/service/reverse-tunnel/run"
Create a log script to log messages from autossh.
# Create the log run script
cat << EOF > "$PREFIX/var/service/reverse-tunnel/log/run"
#!/data/data/com.termux/files/usr/bin/sh
# Ensure the log directory exists
mkdir -p "$PREFIX/var/service/reverse-tunnel/log/main"
# Run the logger
exec svlogd -tt "$PREFIX/var/service/reverse-tunnel/log/main"
EOF

# Make the log run script executable
chmod +x "$PREFIX/var/service/reverse-tunnel/log/run"
Start the autossh service
# Enable the service (creates symlinks)
sv-enable reverse-tunnel

# Start the service (or use 'sv up')
sv up reverse-tunnel

# Check the status
sv status reverse-tunnel

# Check the logs (wait a few seconds after starting)
tail -f "$PREFIX/var/service/reverse-tunnel/log/main/current"
# Press Ctrl+C to stop viewing logs
Configure Termux:Boot
Create the boot directory if it does not exists
mkdir -p $HOME/.termux/bootCreate the start-services script in
$HOME/.termux/boot.
cat << EOF > "$HOME/.termux/boot/start-daemons"
#!/data/data/com.termux/files/usr/bin/sh
termux-wake-lock

# Start the main service manager daemon in the background
# This daemon will automatically start all enabled services (like your autossh one)
termux-services-daemon &

# You generally don't need to explicitly start individual services here if they are enabled.
# The daemon handles it.
EOF

# Make it executable
chmod +x "$HOME/.termux/boot/start-daemons"
Autostart sshd
Make a directory for the sshd logs:
mkdir -p $PREFIX/var/service/sshd/logThen create the run file for sshd:
nano $PREFIX/var/service/sshd/runAdd the following script
#!/data/data/com.termux/files/usr/bin/sh
# -D: Don't detach and become a daemon
# -e: Log to stderr
# sshd will use the configuration from $PREFIX/etc/ssh/sshd_config (default port 8022)
exec sshd -D -e
Make the script executable
chmod +x $PREFIX/var/service/sshd/runCreate the logger script
nano $PREFIX/var/service/sshd/log/run#!/data/data/com.termux/files/usr/bin/sh
# Create log directory if it doesn't exist
mkdir -p "$PREFIX/var/service/sshd/log/main"
# Execute svlogd
exec svlogd -tt "$PREFIX/var/service/sshd/log/main"Make the script executable
chmod +x $PREFIX/var/service/sshd/log/runEnable sshd
sv enable sshdCheck the status of sshd
sv status sshdIn my case there was still the down file in
$PREFIX/var/service/sshd/, which prevented the services
from starting. After deleting the file everything worked as
expected.
Cleaning up
Now it is time to clean up some things. Ideally I wanna move
pulseaudio as well as the server to a termux-service.
Migrate pulseaudio
First create the termux-services folder for
pulseaudio
mkdir -p $PREFIX/var/service/pulseaudioNow create the script inside that folder
nano $PREFIX/var/service/pulseaudio/run#!/data/data/com.termux/files/usr/bin/sh
LOGFILE="$HOME/pulseaudio_service_native_load.log"
echo "--- Starting PulseAudio Service (Explicit Native Module Load): $(date) ---" > $LOGFILE
# Keep foreground, keep disable-shm, reduce verbosity slightly
exec pulseaudio --disable-shm=yes --daemonize=no -v >> $LOGFILE 2>&1Make the script executable
chmod +x $PREFIX/var/service/pulseaudio/runNow create the logging script
mkdir -p $PREFIX/var/service/pulseaudio/log/nano $PREFIX/var/service/pulseaudio/log/run#!/data/data/com.termux/files/usr/bin/sh
# Set the logging directory for this service
LOG_DIR="$PREFIX/var/log/pulseaudio"
mkdir -p "$LOG_DIR"
# Use svlogd to manage logs, rotating them in the specified directory
exec svlogd "$LOG_DIR"And make it executable
chmod +x $PREFIX/var/service/pulseaudio/log/runNow add this to ~/.config/pulse/default.pa
nano ~/.config/pulse/default.paload-module module-sles-source
load-module module-native-protocol-unixEnable and start the service
sv enable pulseaudiosv start pulseaudioThis is all to migrate pulseaudio. Now you need to
repeat those steps for the web-server as well.
mkdir -p $PREFIX/var/service/web-servernano $PREFIX/var/service/web-server/run#!/data/data/com.termux/files/usr/bin/sh
# Change to the server directory
cd ~/opt/sys-net-visible-server/
# Start server
exec ./serverchmod +x $PREFIX/var/service/web-server/runThe same with the logging script
mkdir -p $PREFIX/var/service/web-server/log/nano $PREFIX/var/service/web-server/log/run#!/data/data/com.termux/files/usr/bin/sh
# Set the logging directory for this service
LOG_DIR="$PREFIX/var/service/web-server/log/main"
mkdir -p "$LOG_DIR"
# Run logger
exec svlogd -tt "$LOG_DIR"chmod +x $PREFIX/var/service/web-server/log/runEnable and start the web-server.
sv enable web-serversv start web-serverThis is everything to get the web-server started automatically.
To see all running services run
sv status $PREFIX/var/service/*To make the phone work without a battery, I needed to be able to reboot the phone every now and then. For that to happen automatically I needed to root the phone so that the app MacroDroid could do the reboot, when the phone goes below a certain percentage in battery.
Another MacroDroid macro would on boot start Termux, which then starts all the necessary services now to host the website.
Rooting Fairphone 3
First you need to unlock the bootloader following this tutorial: https://www.fairphone.com/en/bootloader-unlocking-code-for-fairphone
Then download Magisk and install the app: https://github.com/topjohnwu/Magisk/releases
Download the Android 13 release from Flashing with fastboot for Fairphone 3 from here to a PC: https://support.fairphone.com/hc/en-us/articles/18896094650513-Manually-install-Android-OS-on-your-Fairphone
After that follow the instructions here under Patching images https://topjohnwu.github.io/Magisk/install.html#patching-images
Additional notes
I needed to adjust my sshd_config on the VPS, that is
tunneling the connections. I added
ClientAliveInterval 60
ClientAliveCountMax 2
to automatically close stale SSH Tunnel connection.
2025-04-18
Currently running into the problem that the reverse tunnel to the VPS is not working. I do not know why.
I added the goserver service as a dependency to the
reverse-tunnel service in the OpenRC file. Probably the
tunnel needs pot 80 to run before it can initialise itself.
depend() {
    need net goserver
    after firewall
}
This does not seem to fix the issue… :/
Apparently the negotiation between the DCHP server and the PCs does
take longer in some cases then goserver and
reverse-tunnel need to start up. As a quick fix I added a
sleep to the pre startup section of the reverse-tunnel
service.
start_pre() {
    # Ensure directory exists for pidfile
    checkpath --directory --owner root:root --mode 0755 /run

    sleep 60
}
2025-04-22
Bought the domain visiblesys.net for the work. That will help with writing the URL into your phone while visiting the exhibitions. The subdomains will be accordingly:
- n-1.visiblesys.net
- n-2.visiblesys.net
- n-3.visiblesys.net
- n-4.visiblesys.net
It also thought about creating more specific subdomains that somehow include the title of the website shown on them. I will got with the n-* way for now and the marketing material and maybe implement a redirect if I decide to switch subdomains.
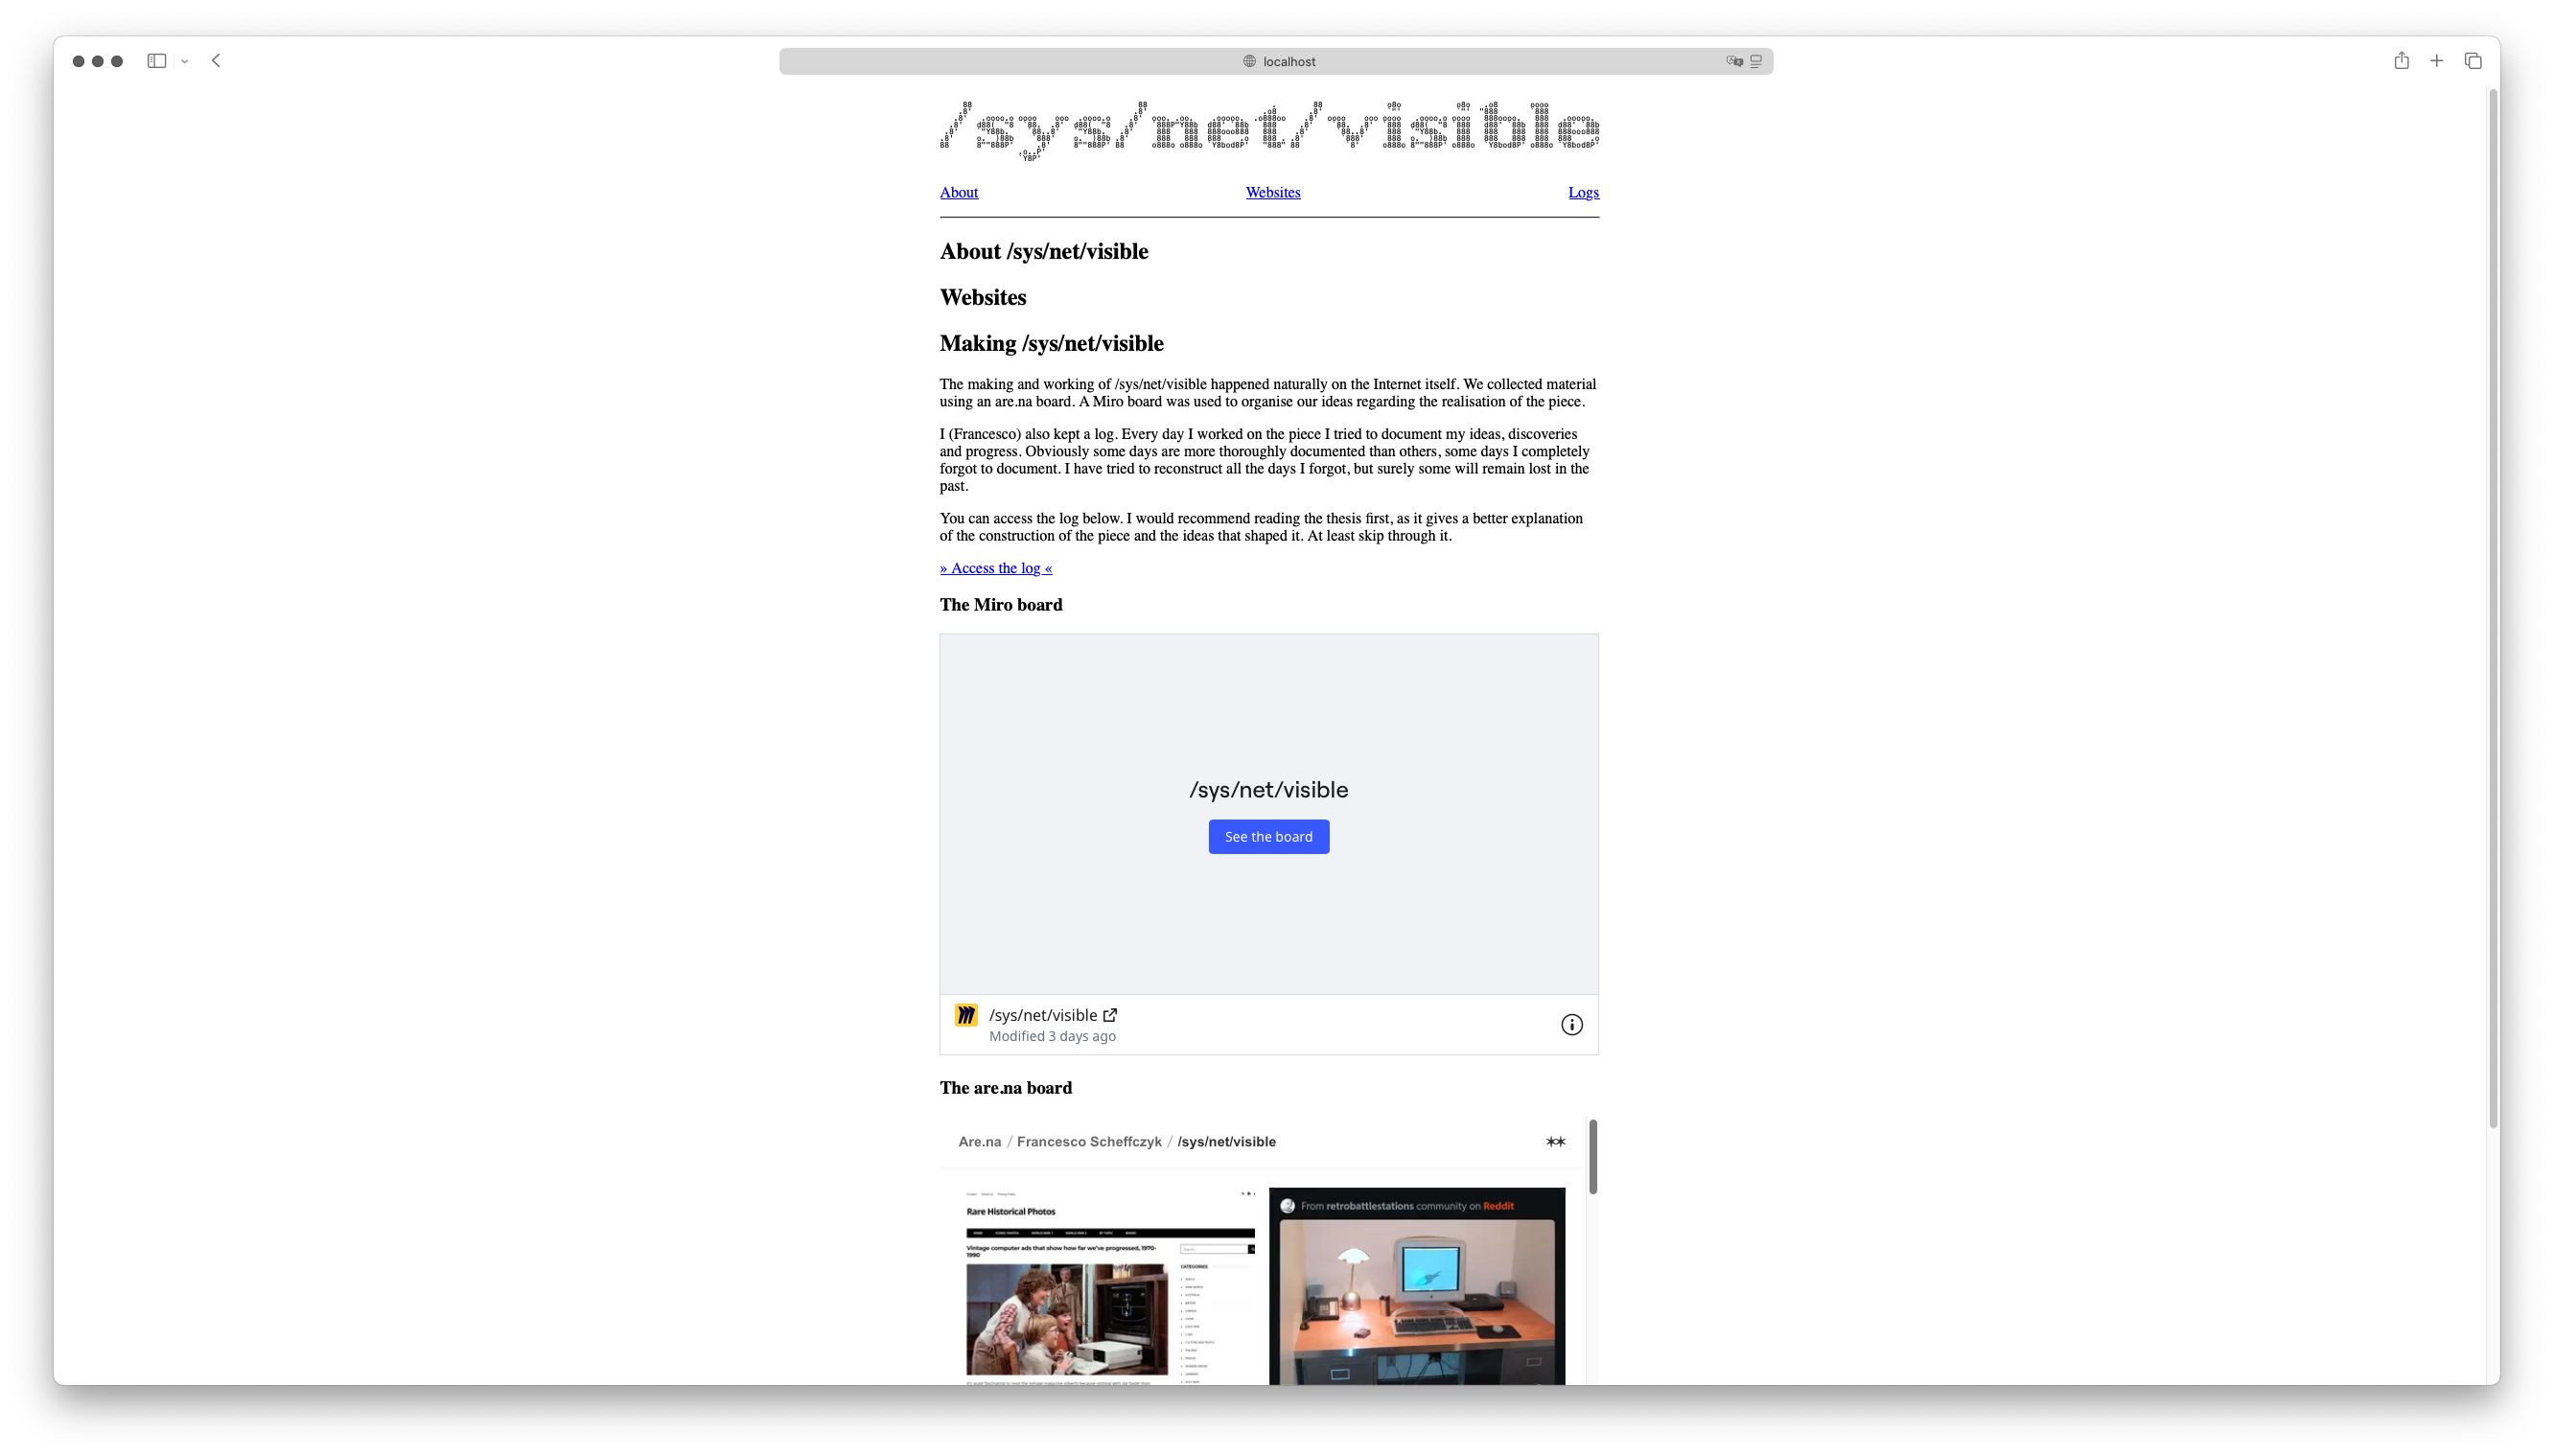
Then I started working on my website for the installation. It will be a documentation of the making of /sys/net/visible, similar to the Request for Comments from the early days of the internet.
For implementing it I want to stay as “web native” as possible, both in terms of style and implementation. Therefore I do not want to use a lot of extra styling or third-party JS libraries. Current sketch looks like this.
 After
having the first draft done I implemented a pandoc command with custom
Lua scripts to convert the logs files from Markdown to a HTML page.
After
having the first draft done I implemented a pandoc command with custom
Lua scripts to convert the logs files from Markdown to a HTML page.
2025-04-25
An idea for a text on the poster:
The installation repurposes three old PCs and an old smartphone as web servers. The physical hardware of the internet - the servers - is staged in the installation. Accordingly, four websites - the digital software of the internet - are presented on the web. The four websites are a text, a game, a sound and a map, each dealing in its own way with the implications and effects of the infrastructure of the internet.
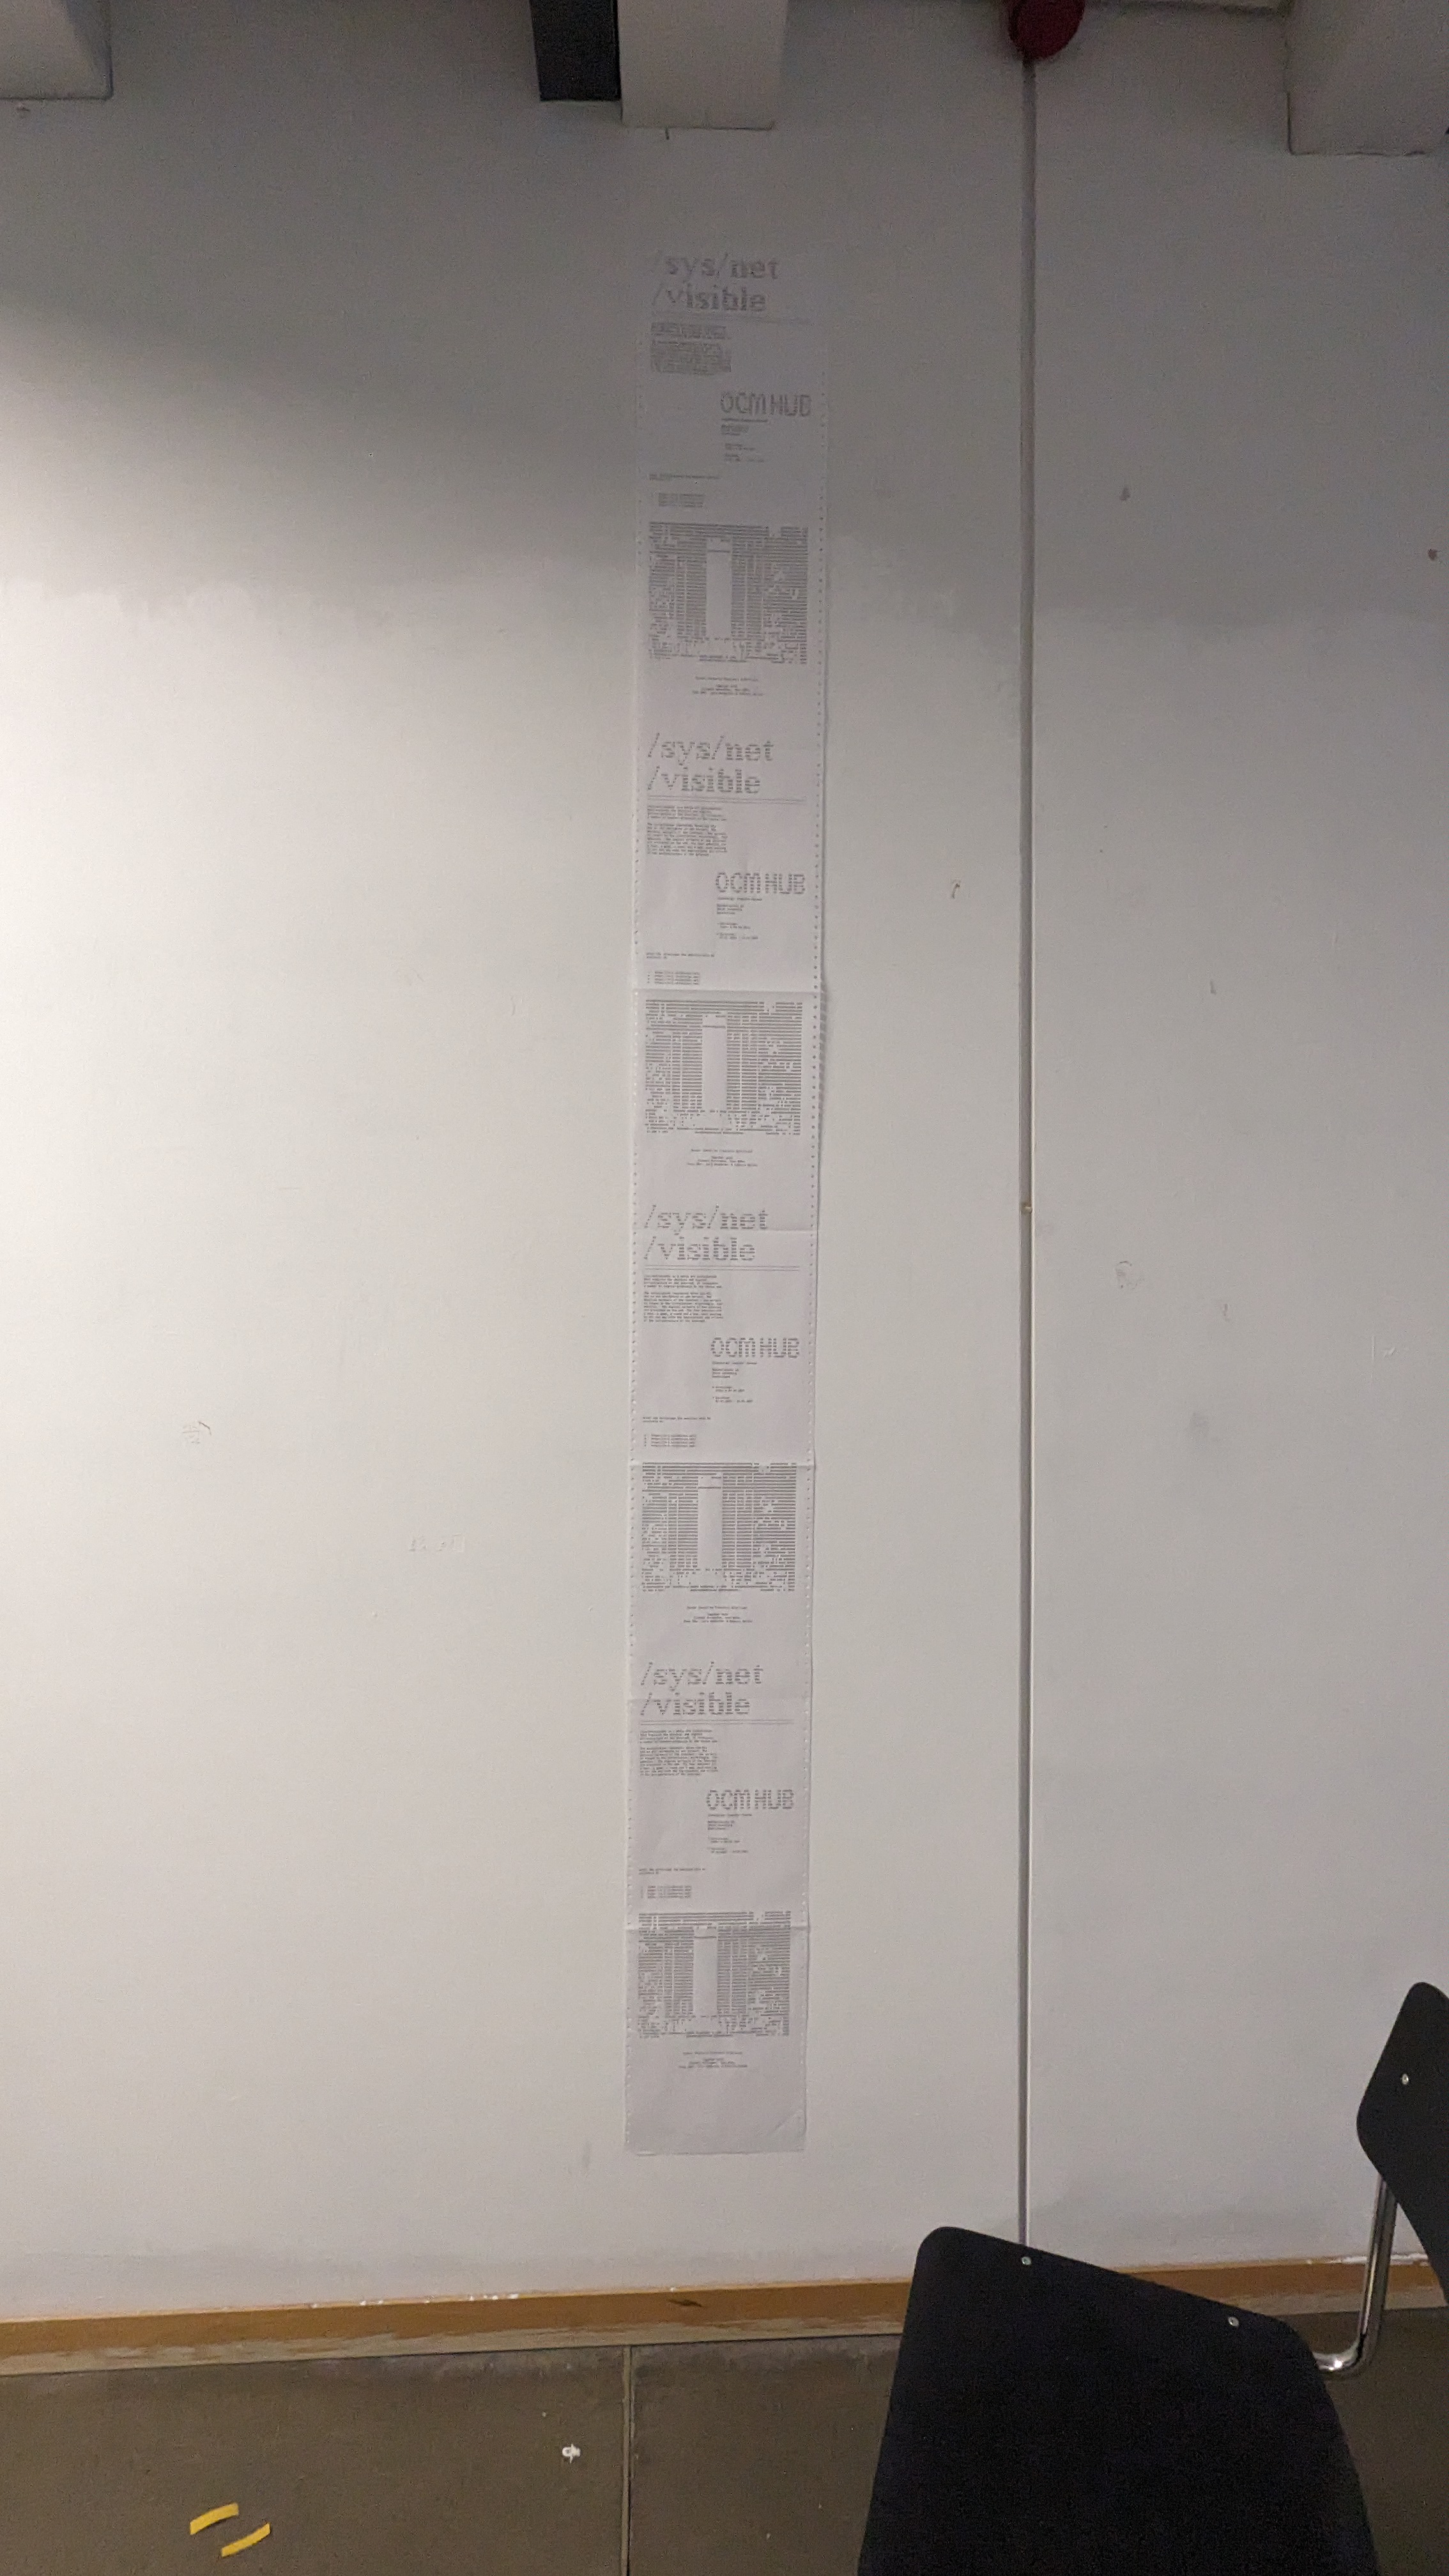
2025-04-27
Finished with layouting, printing and setting up the posters for the exhibition. Also the promotional e-mail is sent and social media posts are posted.
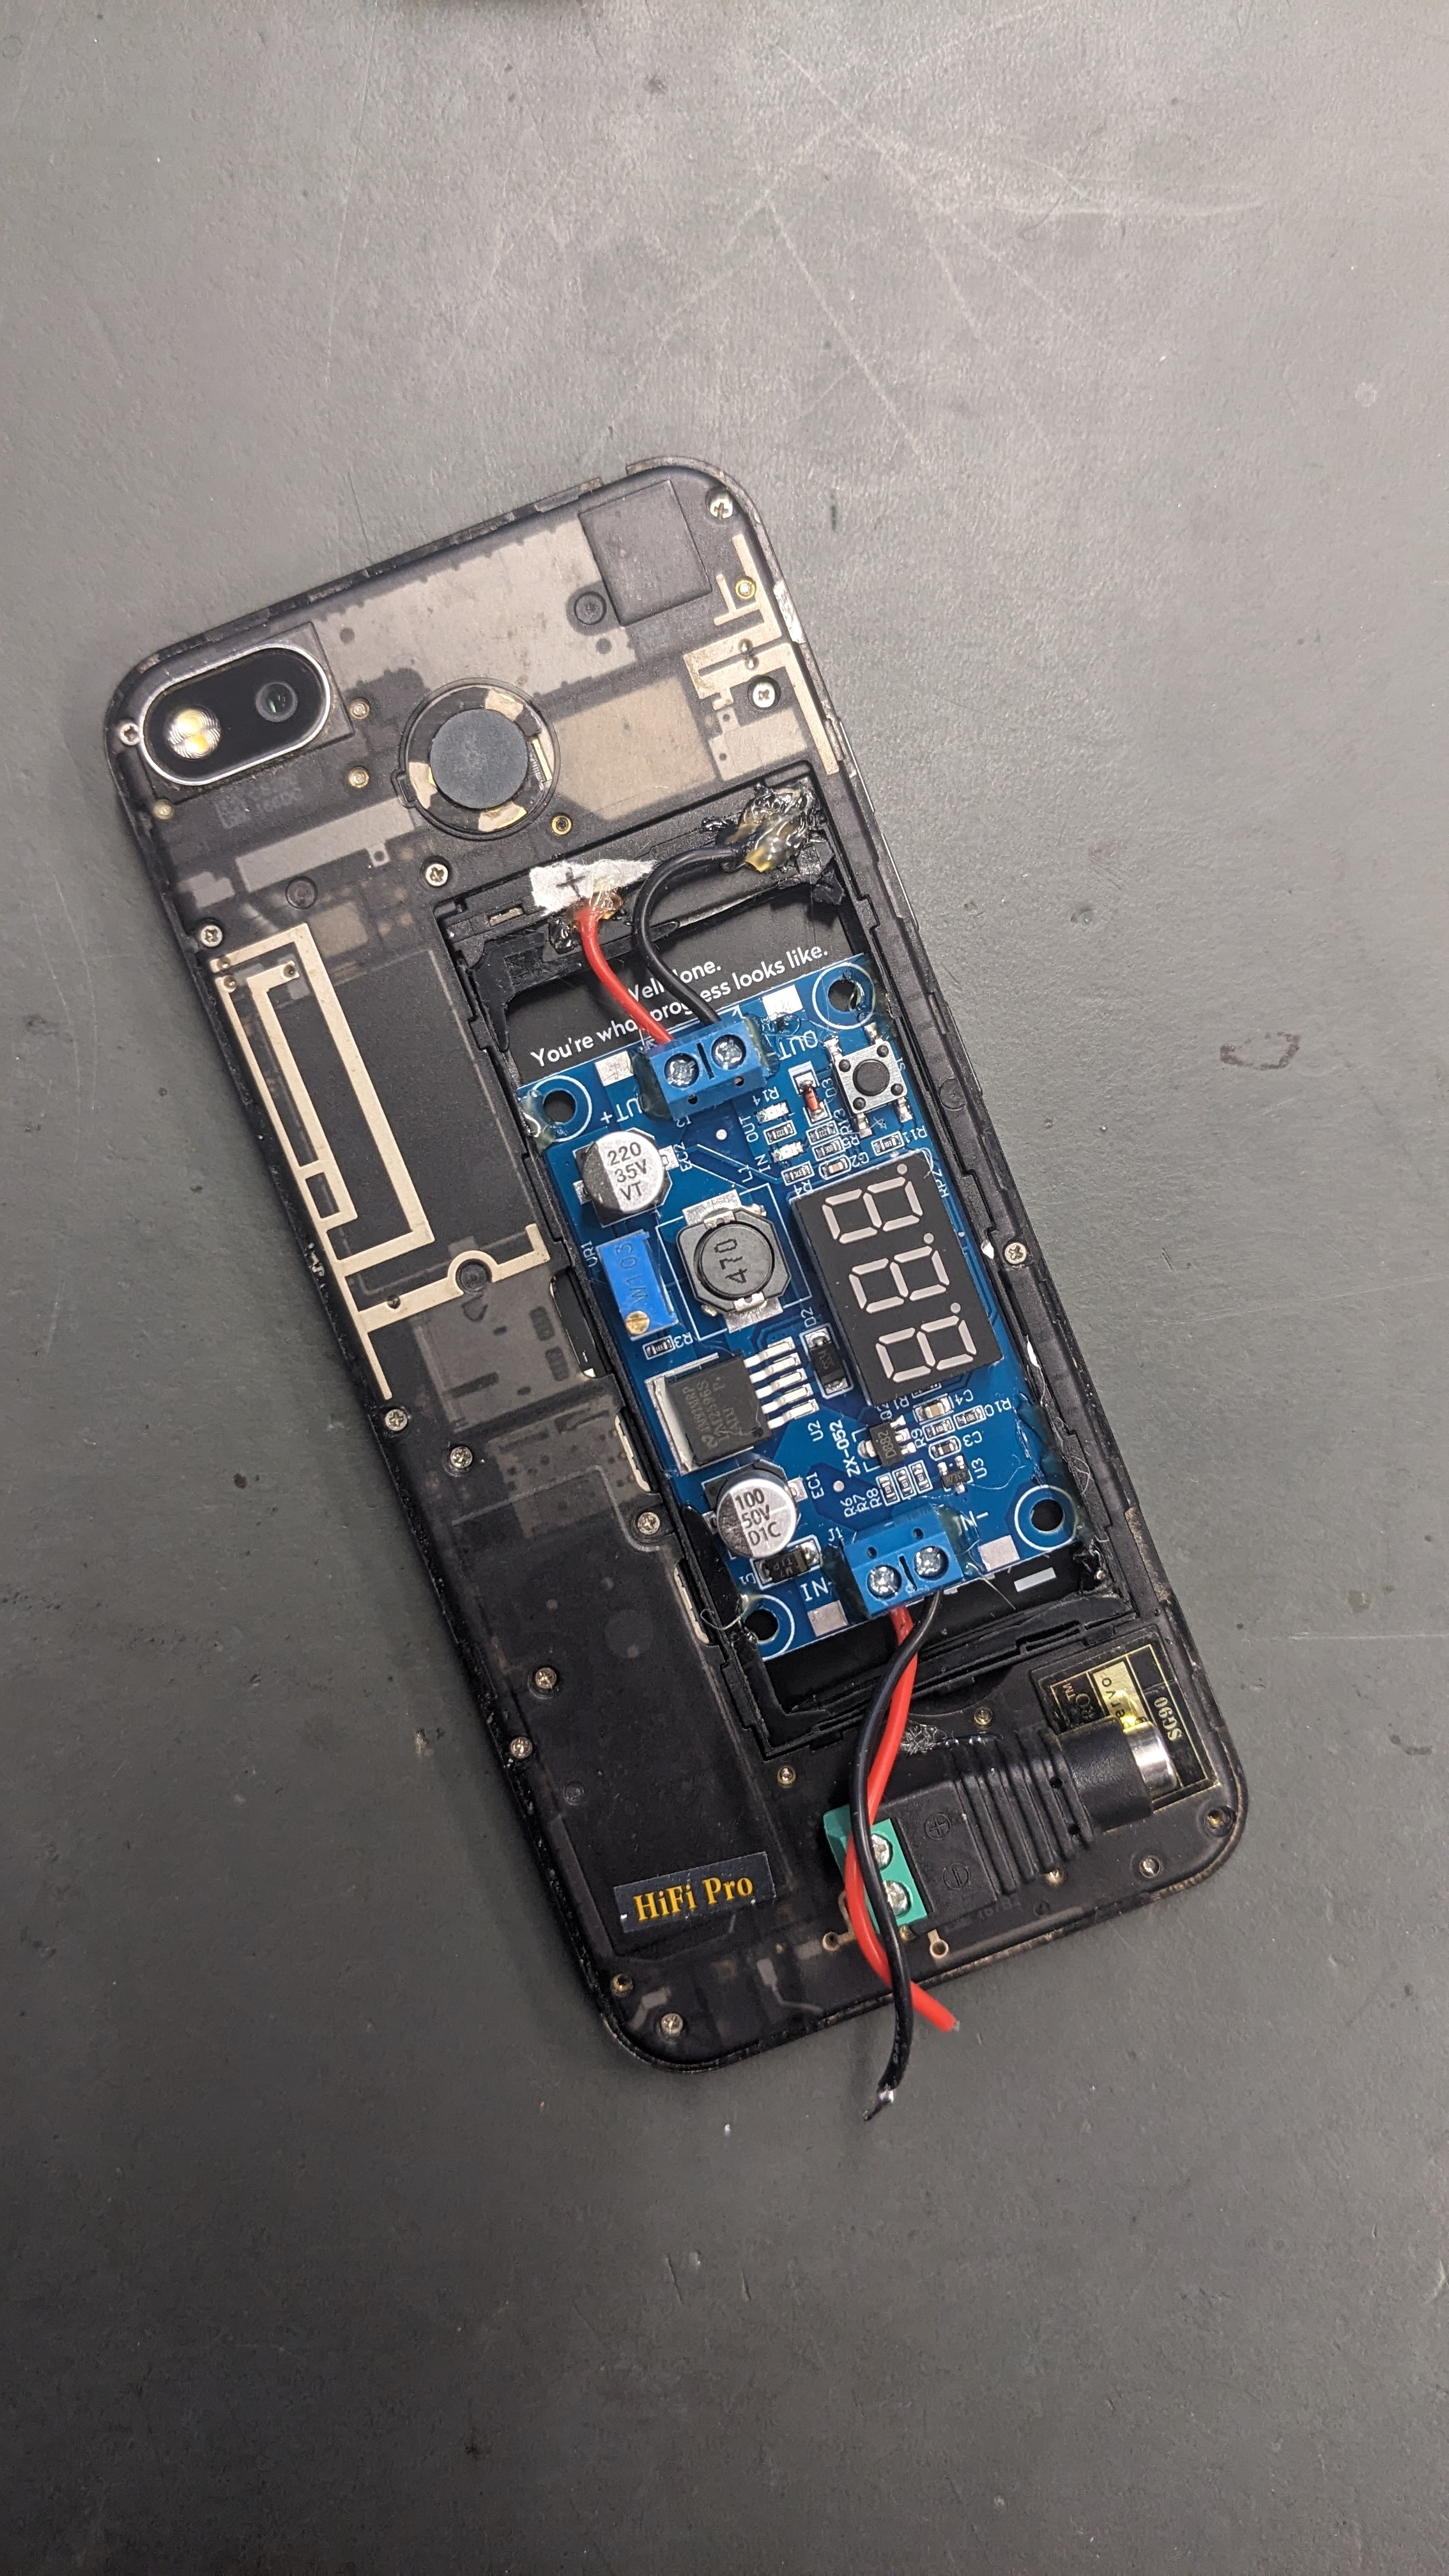
Now back to the phone server. Clemens modified the phones battery with a buck converter so that we can power it continuously. That way the USB-C port can be used for the ethernet connection.
Now I need to redo the setup of the terminal with the new rooted phone.
I updated the android version from the settings of the phone. This disabled the root access of Magisk… -.- So I had to flash the phone again.
Then I followed my earlier logs to setup the phone again.
2025-05-03
Testing the setup for the exhibition at the Oldenburger Computer-Museum.
2025-05-06
Vernissage & Kolloquium for /sys/net/visible @ Oldenburger Computermuseum.
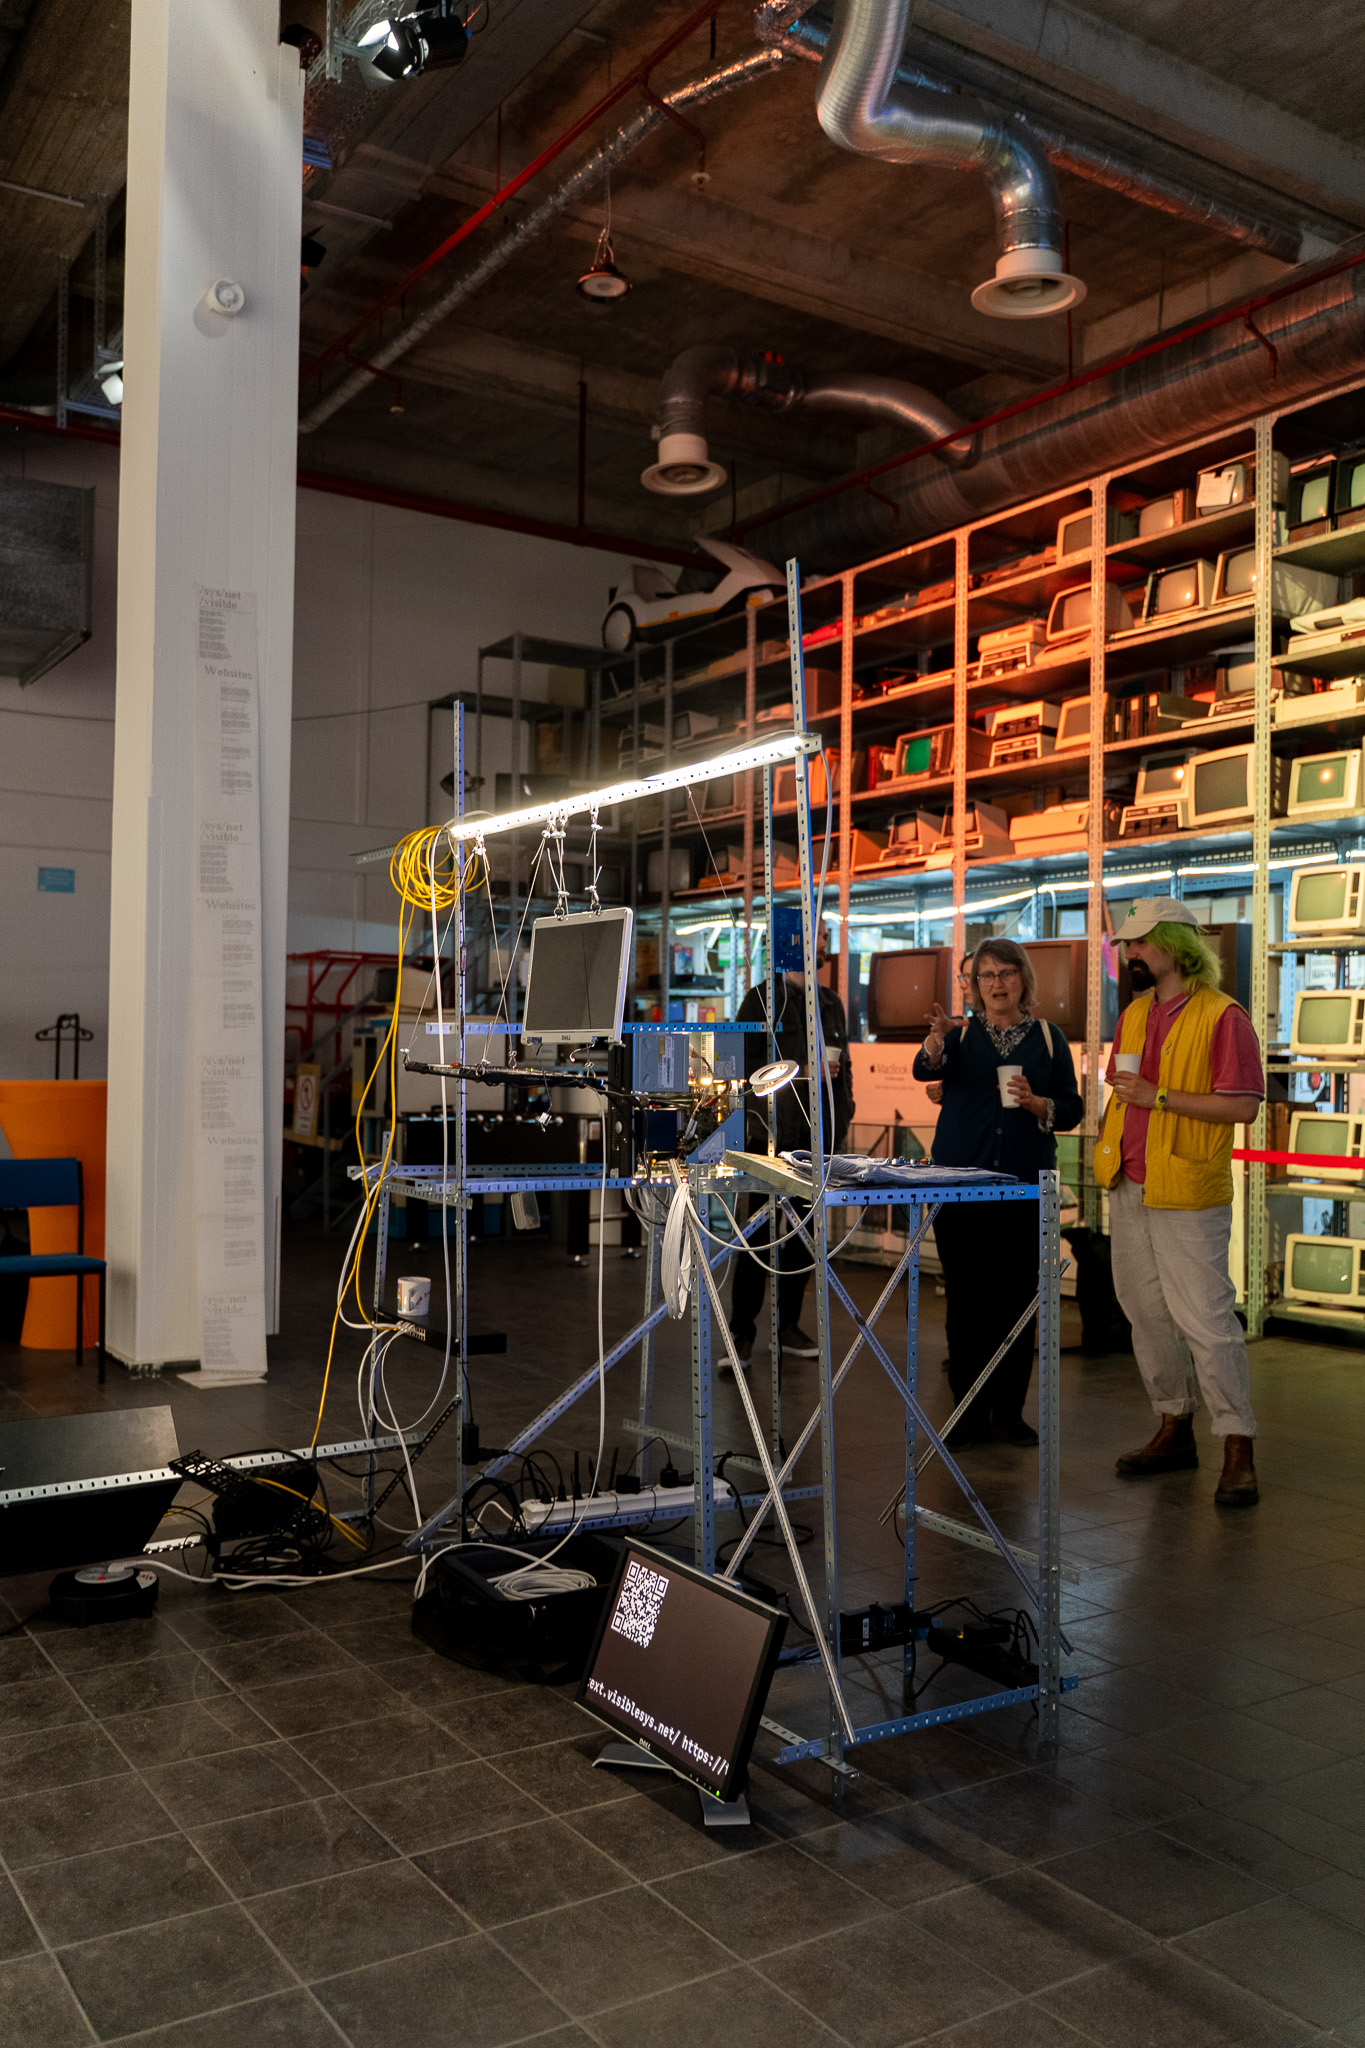
2025-09-24
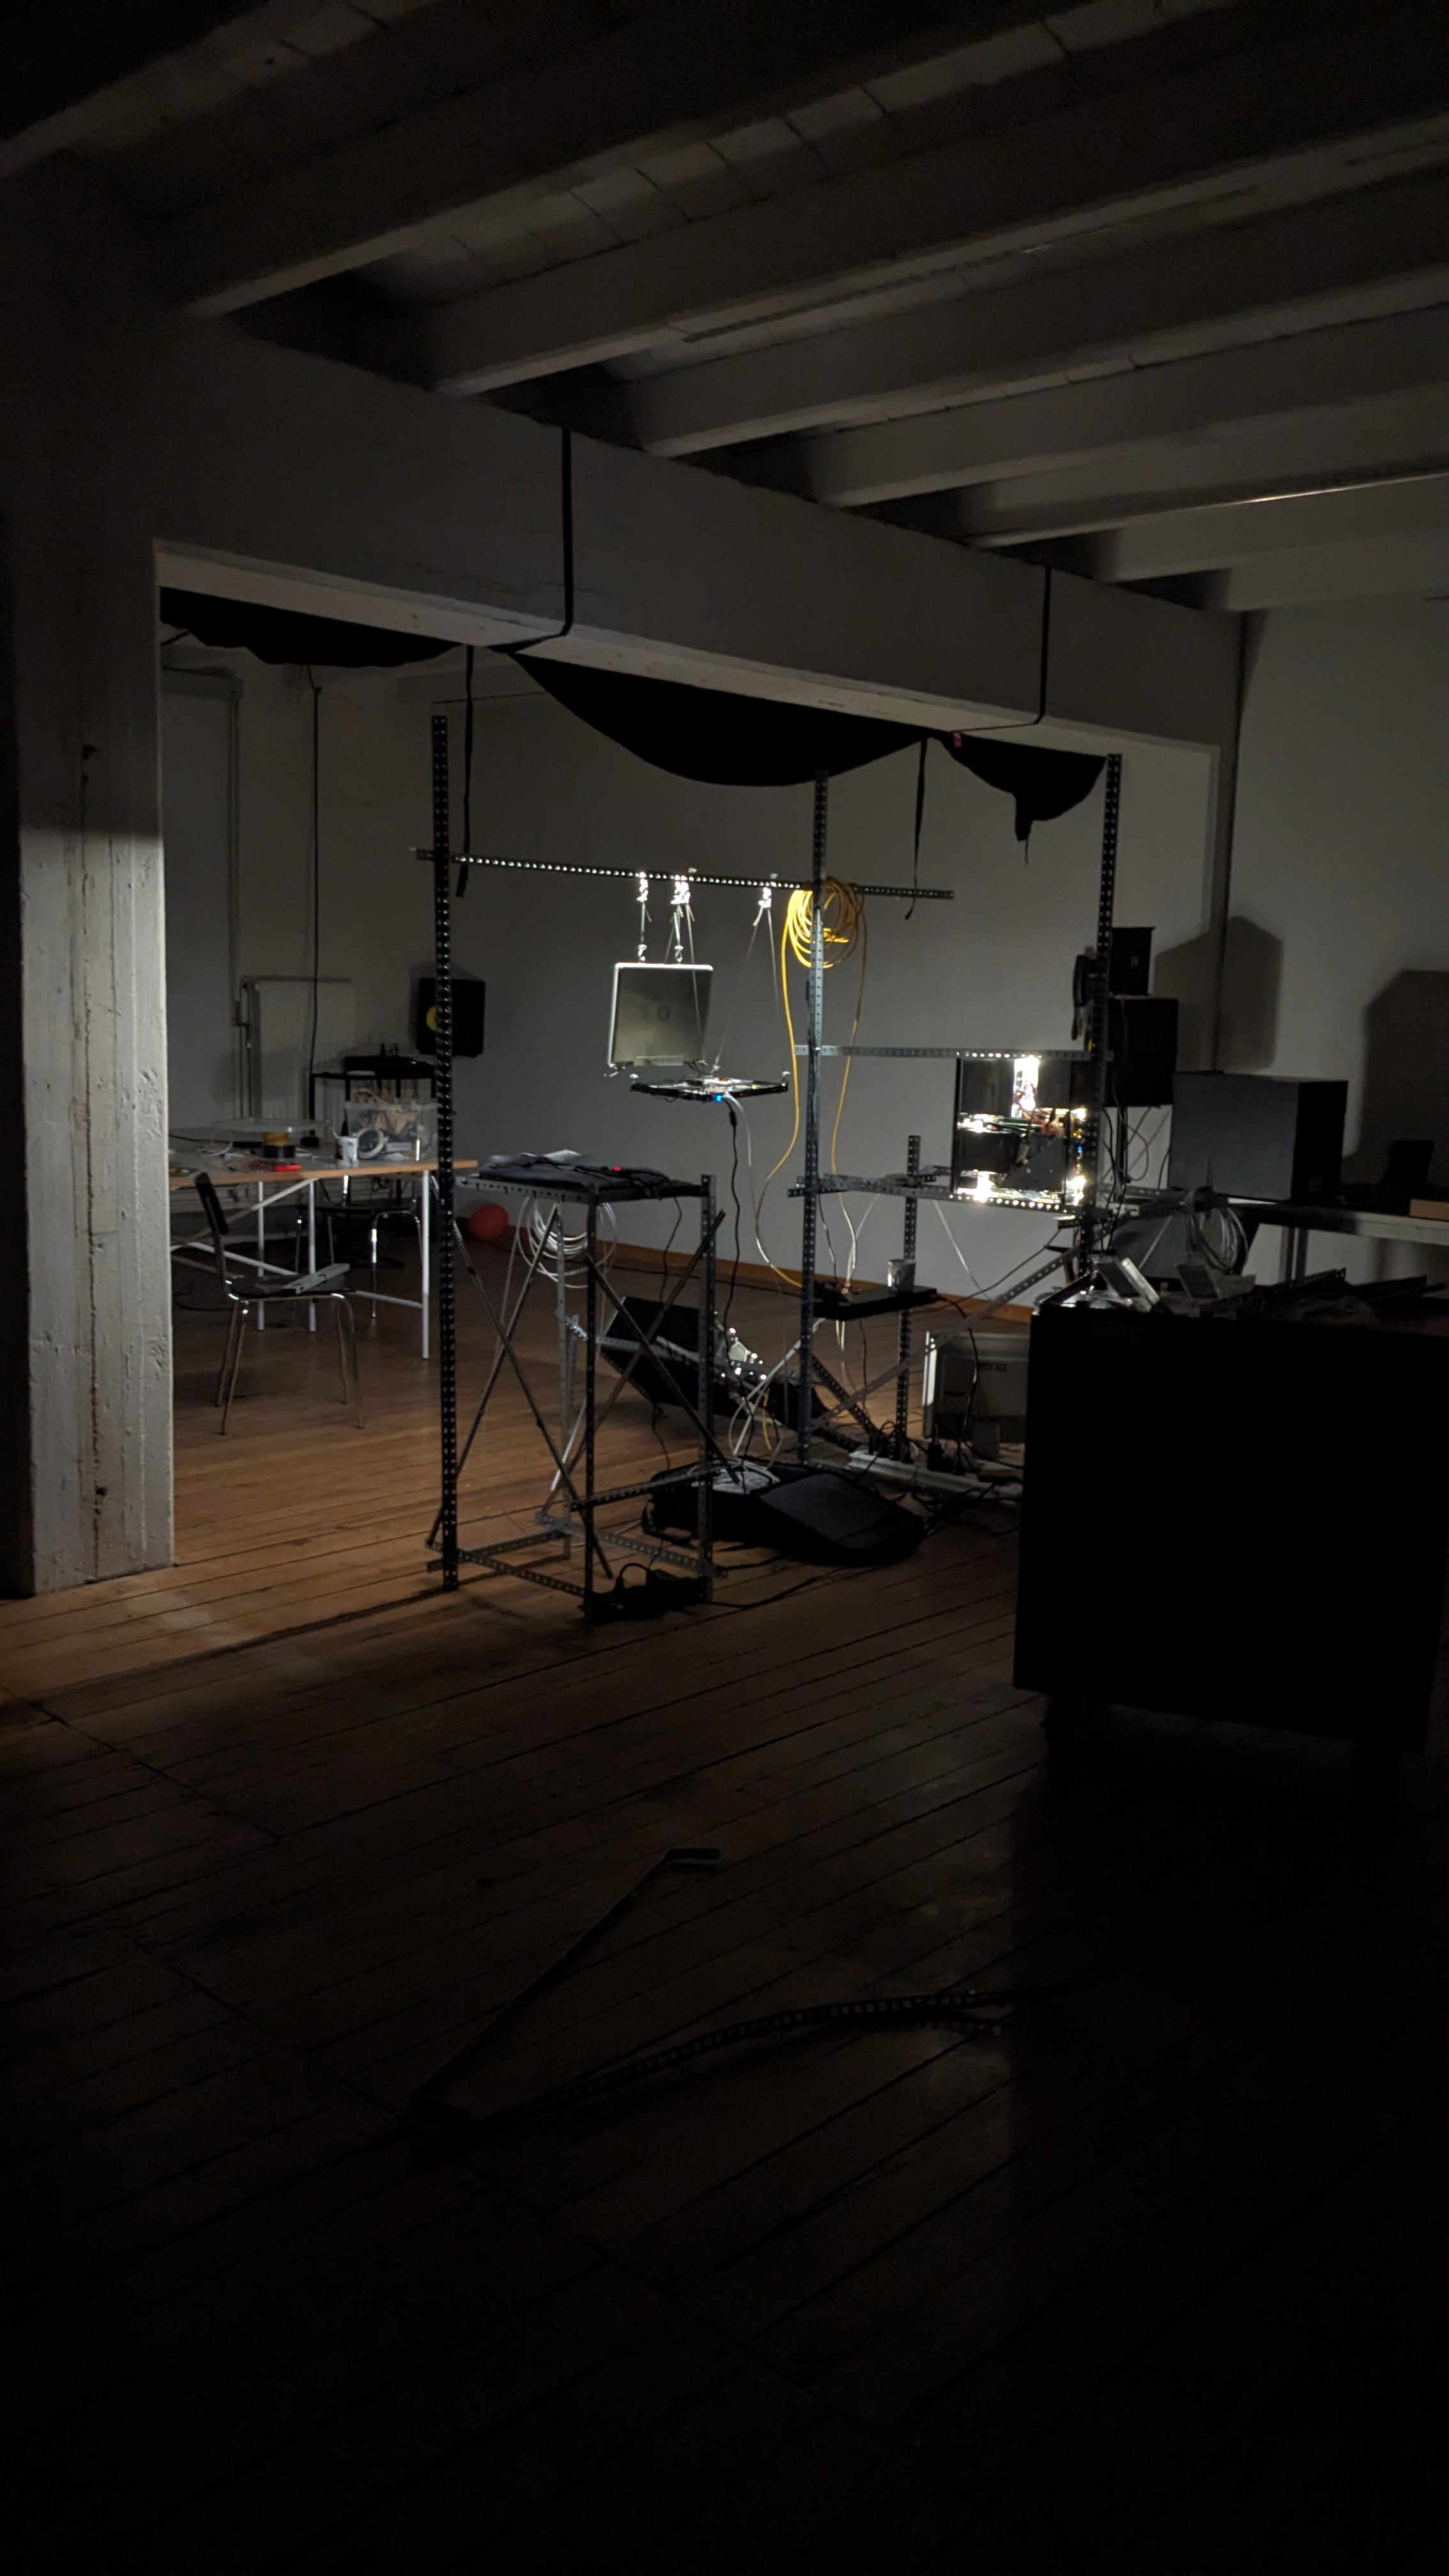
Got the chance to exhibit /sys/net/visible again during the Transform 2025 – Conference on AI, Art, Design and Society. For this transport I packed everything up into Euroboxes to be a bit faster while unpacking and installing. Installation went pretty seamless and everything was working as expected.
The installation was positioned above the speaker stage on a scaffolding. That was kinda cool. :D
![]()